Sunday, January 31, 2010
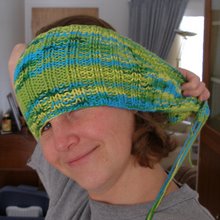
Wendy and Tommy
The most precious gift you can give to the one you love is your true presence.
-Thich Nhat Hanh
-------------------------
Related Post-
Funny Story About My Brother
Labels:
Sunday Happiness
Wednesday, January 27, 2010
Weeds
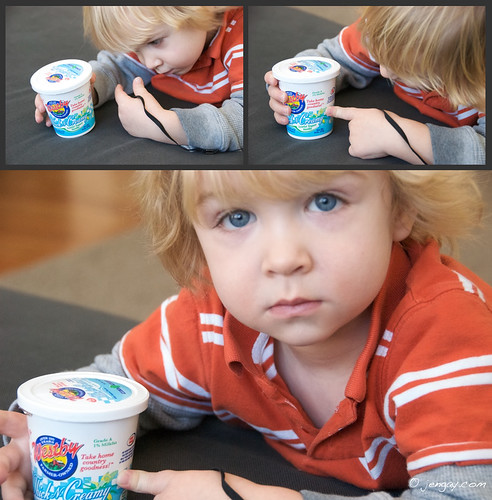
Observations by my nephew, Kam.
Mom, this is made out of ...(long pause as he scans the yogurt container, focusing on the vanilla pods)... WEEDS!
Labels:
Weird Kid Wednesday
Tuesday, January 26, 2010
Recipes- Cilantro Pesto and Jalapeno Wraps
One day at the farmer's market, I bought a batch of cilantro pesto, which I loved. I loved it so much, in fact, that I've kept it in the freezer and used it by the spoonful in all kinds of things from rice to scrambled eggs to mashed potatoes. And it's really fantastic on roasted vegetables and to add extra flavor to soups. The most recent use that I've found for it though, is to spicy up cream cheese for jalapeno and prosciutto wraps.
The problem was that the pesto was really expensive to buy and I had a sneaking suspicion that it would be fairly cheap to make. I had looked and looked, but could never find a recipe to make it for myself. This really irked me, especially considering how often I have left over cilantro to make it with.
So pesto making was at a standstill. And bunches of leftover cilantro often died sad deaths in my fridge. Until, that is, I ran across Pestos, Tapenades, and Spreads by Stacey Printz. I have combined two of her recipes and then done a bit of my own tweaking to come up with the following nut-free recipe. If you like cilantro, you'll love this. If you hate cilantro (as most of my family does), it's so good that you may still like it. Joey proclaimed this ringing endorsement... "I don't hate it." Which is amazing coming from the kid who gags when she walks into the kitchen after I've been cutting cilantro.
I'm just sayin.
Cilantro Pesto
Ingredients
2 cups packed cilantro and basil leaves (you can use a cup of each or go full cilantro and no basil if you want more cilantro flavor)
1/4 cup grated Parmesan
1 clove of garlic, cut in a few pieces
3 T. lime juice
1 jalapeno pepper, stem removed and roughly chopped (remove seeds and ribs if you don't want it too spicy)
1/8 t. salt
1/4 t. ground pepper
1/3 to 1/2 cup panko bread crumbs (can be found in the Asian section of your grocery store)
6 T. olive oil
How To
-Mix everything but the panko and oil in a food processor or blender. Blend until it's a coarse mixture, scraping down the bowl as necessary.
-Add 1/3 cup of the panko and blend well.
-With machine running, pour oil in through hole in top of machine. Keep mixing until it's well combined.
-Let sit for 5 minutes or so to allow the panko to absorb some of the liquid.
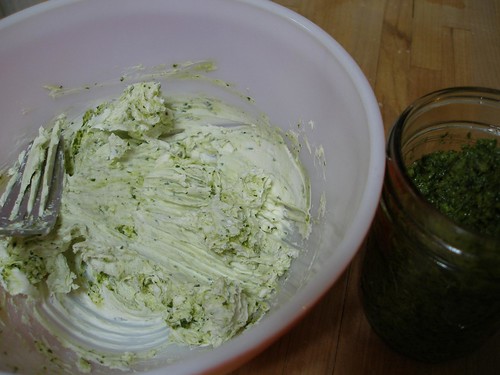
-If the mixture looks a little loose, add more of the panko to thicken it up to a decent pesto consistency. If it's too thick, add a bit more oil. (look at the pictures below to see what the consistency should look like.)
-I suggest that you freeze leftover pesto in an ice cube tray and then store the little cubes in a mason jar in the freezer, just like I do with leftover chipotles. Then you can pull them out, one at a time to use as you see fit.
So yah, there are a ton of things that you can do with this. What follows is the recipe for jalapeno wraps that I made up for New Year's. They would be great for a Super Bowl Party. I'll probably only bother making these when I'm going to a party because Jeff likes neither jalapenos nor cilantro. Poor guy.
Jalapeno Wraps (makes 20)
Ingredients
10 Jalapenos
1 block of cream cheese (at room temperature)
2 (or more) tablespoons cilantro pesto
1 avocado
1 package of prosciutto
How To
-For each jalapeno, cut off the stem, cut in half length wise and scrape out the seeds and ribs. Avoid touching your eyes or any other sensitive bits for many hours. Trust me.
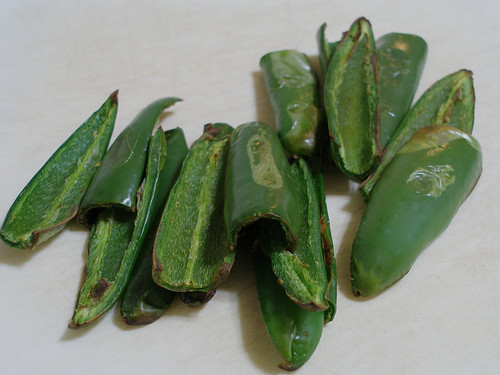
-Place on a broiler pan, skin side up and put about 5 inches from broiler, until flesh is softened somewhat and skin is slightly charred. (I do this to get rid of that raw jalapeno taste and crunch, but this step is optional if you don't mind it.) They'll look a bit like this.
-In a bowl, mix together the cream cheese, cilantro pesto and avocado till it's fairly smooth. Sorry, you'll just have to imagine what it looks like when it's fairly smooth. I didn't get a picture of that.
-Spread this mixture in each of the jalapenos. (If you're doing a whole bunch of these, I'd suggest putting the mixture in a Ziploc bag, cutting a smallish hole in the corner and using that to pipe it on the jalapenos. For this batch, I just spooned it on.)
-Cut each sheet of prosciutto in half lengthwise and roll it up around the jalapeno. If you want to make more of these, but don't want to buy another pack of prosciutto, you can cut it in thirds the other direction and use that size to roll around them. Personally, I really like prosciutto, so I used bigger pieces. You'll have to follow your heart on that one. I am not here to tell you how much prosciutto to use. In fact, I made a second batch of these completely devoid of prosciutto for the vegetarians in the group. They were pretty awesome as well.
So there you go.
The problem was that the pesto was really expensive to buy and I had a sneaking suspicion that it would be fairly cheap to make. I had looked and looked, but could never find a recipe to make it for myself. This really irked me, especially considering how often I have left over cilantro to make it with.
So pesto making was at a standstill. And bunches of leftover cilantro often died sad deaths in my fridge. Until, that is, I ran across Pestos, Tapenades, and Spreads by Stacey Printz. I have combined two of her recipes and then done a bit of my own tweaking to come up with the following nut-free recipe. If you like cilantro, you'll love this. If you hate cilantro (as most of my family does), it's so good that you may still like it. Joey proclaimed this ringing endorsement... "I don't hate it." Which is amazing coming from the kid who gags when she walks into the kitchen after I've been cutting cilantro.
I'm just sayin.
Cilantro Pesto
Ingredients
2 cups packed cilantro and basil leaves (you can use a cup of each or go full cilantro and no basil if you want more cilantro flavor)
1/4 cup grated Parmesan
1 clove of garlic, cut in a few pieces
3 T. lime juice
1 jalapeno pepper, stem removed and roughly chopped (remove seeds and ribs if you don't want it too spicy)
1/8 t. salt
1/4 t. ground pepper
1/3 to 1/2 cup panko bread crumbs (can be found in the Asian section of your grocery store)
6 T. olive oil
How To
-Mix everything but the panko and oil in a food processor or blender. Blend until it's a coarse mixture, scraping down the bowl as necessary.
-Add 1/3 cup of the panko and blend well.
-With machine running, pour oil in through hole in top of machine. Keep mixing until it's well combined.
-Let sit for 5 minutes or so to allow the panko to absorb some of the liquid.
-If the mixture looks a little loose, add more of the panko to thicken it up to a decent pesto consistency. If it's too thick, add a bit more oil. (look at the pictures below to see what the consistency should look like.)
-I suggest that you freeze leftover pesto in an ice cube tray and then store the little cubes in a mason jar in the freezer, just like I do with leftover chipotles. Then you can pull them out, one at a time to use as you see fit.
So yah, there are a ton of things that you can do with this. What follows is the recipe for jalapeno wraps that I made up for New Year's. They would be great for a Super Bowl Party. I'll probably only bother making these when I'm going to a party because Jeff likes neither jalapenos nor cilantro. Poor guy.
Jalapeno Wraps (makes 20)
Ingredients
10 Jalapenos
1 block of cream cheese (at room temperature)
2 (or more) tablespoons cilantro pesto
1 avocado
1 package of prosciutto
How To
-For each jalapeno, cut off the stem, cut in half length wise and scrape out the seeds and ribs. Avoid touching your eyes or any other sensitive bits for many hours. Trust me.
-Place on a broiler pan, skin side up and put about 5 inches from broiler, until flesh is softened somewhat and skin is slightly charred. (I do this to get rid of that raw jalapeno taste and crunch, but this step is optional if you don't mind it.) They'll look a bit like this.
-In a bowl, mix together the cream cheese, cilantro pesto and avocado till it's fairly smooth. Sorry, you'll just have to imagine what it looks like when it's fairly smooth. I didn't get a picture of that.
-Spread this mixture in each of the jalapenos. (If you're doing a whole bunch of these, I'd suggest putting the mixture in a Ziploc bag, cutting a smallish hole in the corner and using that to pipe it on the jalapenos. For this batch, I just spooned it on.)
-Cut each sheet of prosciutto in half lengthwise and roll it up around the jalapeno. If you want to make more of these, but don't want to buy another pack of prosciutto, you can cut it in thirds the other direction and use that size to roll around them. Personally, I really like prosciutto, so I used bigger pieces. You'll have to follow your heart on that one. I am not here to tell you how much prosciutto to use. In fact, I made a second batch of these completely devoid of prosciutto for the vegetarians in the group. They were pretty awesome as well.
So there you go.
Labels:
Recipes and Other Cooking Stuff
Sunday, January 24, 2010
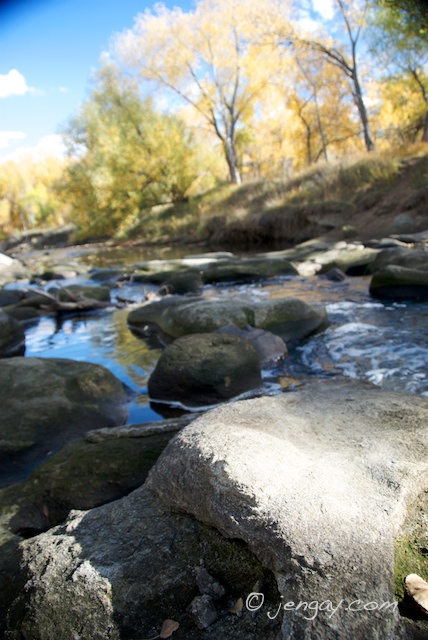
The Park Near Where We Grew Up
Find tongues in trees, books in the running brooks, sermons in stone and good in everything.
-Shakespeare
Labels:
Sunday Happiness
Tuesday, January 19, 2010
Wild Kingdom in our Backyard
Here's a couple of video clips that Joey took last week.
Crazyness.
I especially like the part where Joey chastises them for fighting.
Crazyness.
I especially like the part where Joey chastises them for fighting.
Labels:
Homeschool
Sunday, January 17, 2010
St. Baldrick's
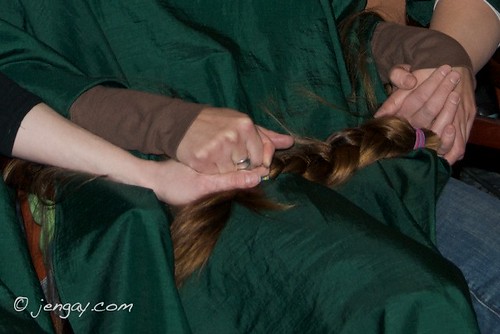
We are here to awaken from our illusion of separateness.
-Thich Nhat Hanh
-----------------------------
Related Posts-
St. Baldrick's- We Really Did It
Here They Are- More Pictures
Labels:
Sunday Happiness
Saturday, January 16, 2010
(Part 4) Because We Find Ourselves Amusing...
even if no one else does.
Since we were all dressed up for Joey's party, Tommy, Aurora, Jenny and I all decided that we absolutely had to run to the store for a few last minute items.
Aurora was in character, squawking and strutting across the parking lot. And, surprisingly, sober. Not that it's surprising that she's sober in general, but it's surprising that she's acting like this and also sober.
Unless, of course, you know her. Then you kind of expect it.
(I love how Aurora's holding up that pipe in every single picture, even when she doesn't know she's having her picture taken. Also, this is what I look like when I come to the store without a list and can't remember what it is that we came for.)
(I'm not sure Jenny approves of all this silliness.)
(The best eyebrows ever.)
And clearly, Joey is just as ridiculous as the rest of us.
We really are our own entertainment.
(And thanks Aurora, for all the pics and videos. Except the close up of my chest. We have Jenny to thank for that one.)
-------------------------------
Related Posts
Alice In Wonderland Tea Party- (Part 1) The Costumes
(Part 2) Painting the Roses Red
(Part 3) The Birthday Cake
Labels:
Out of the Ordinary,
This One Time
Thursday, January 14, 2010
(Part 3) The Birthday Cake
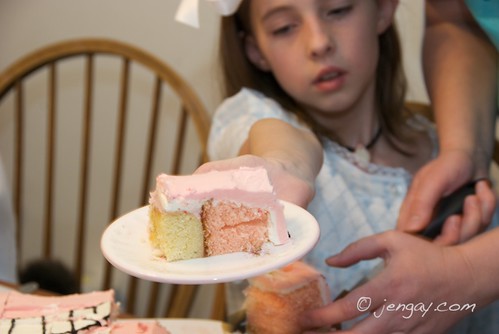
Even though I decorate most birthday cakes, Jeff is usually in charge of making their actual insides because he loves to do it. And I love that all of our kids have had a bunch of fun, weird cakes made by the two of us.
This one was particularly fun.
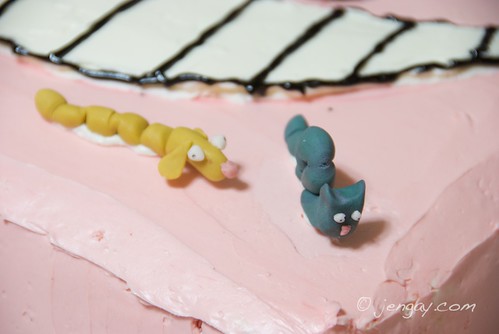
As for the design, I decided to make a giant Cheshire Cat buttercream smile. Then I just used a little grocery store tube of black gel frosting to outline it.
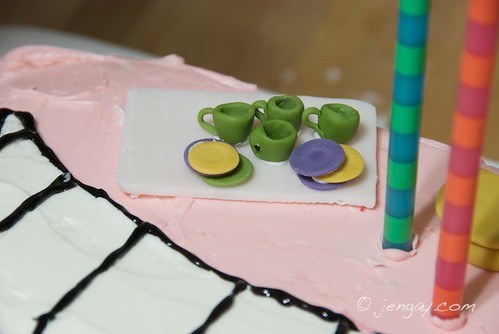
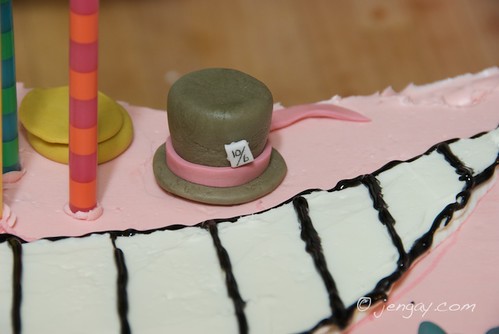
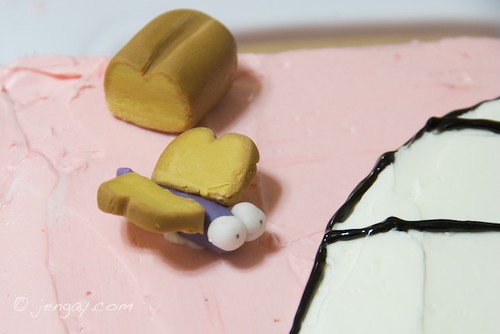
I made the characters out of gumpaste the week before so they had time to dry. Well, I made about half of them the week before. I made the other half the night before and had to use the dehydrator so they'd be ready in time for the party.
Here are the dog and caterpillar...
the itty-bitty tea set...
the Mad Hatter's hat and a giant pocket watch...
and my personal favorite, the bread and butterfly.
I think that the little loaf of bread with its darker colored crust was my favorite thing about the entire party.
-------------------------------
Related Posts
Alice In Wonderland Tea Party- (Part 1) The Costumes
(Part 2) Painting the Roses Red
(Part 4) Because We Find Ourselves Amusing
Wednesday, January 13, 2010
(Part 2) Painting the Roses Red
and other decorations for an Alice in Wonderland party.
Originally, I conceived a lot of these decorations almost 15 years ago for a Halloween party that I threw when I was in college.
(I just felt the need to confess that, yes, I've done this sort of thing long before I had kids.)
Instead of roses that were already red, it's much better to paint them yourself. I think that Joey did a fantastic job.
Then we used a roll of black and white checkered plastic that I'd bought for that original party.
We put the plastic down as a tablecloth, using a few small pieces of tape to keep it in place (It was sort of slickery). Then we covered it with every tea set we could find. Luckily both Jenny and I each have miniature tea sets that our Grandma made for us when we were little. And I inherited the teapot with the little bee on it from my MeMaw.
And to round it out, we taped a bunch of cards to fishing line and hung them from the ceiling. I think these were the easiest and cheapest decorations that I've ever done.
Another idea, if you're doing this yourself and have the time... you might want to consider drawing the outlines of various characters and scenery on big pieces of butcher paper to tape up to the walls. Then let the kids loose with crayons for a fun activity.
That was the original plan, but, alas, I completely forgot about it at the time. (Our parties always manage to get away from me somehow.)
An even better idea would be to encourage all the kids to read the book before the party and then have them draw their favorite scene on the paper.
-------------------------------
Related Posts
Alice In Wonderland Tea Party- (Part 1) The Costumes
(Part 3) The Birthday Cake
(Part 4) Because We Find Ourselves Amusing
Labels:
Parties and Presents
Tuesday, January 12, 2010
Alice in Wonderland Tea Party- (Part 1) The Costumes
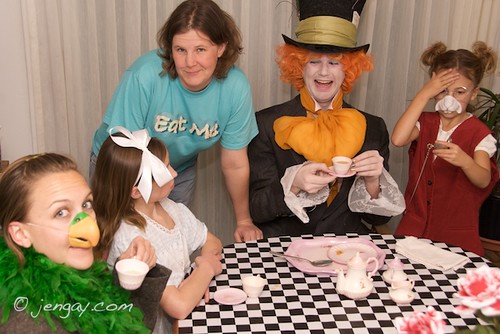
One of my favorite things about having a costume party is that it sometimes turns into a bit of a play, with the actors slipping in and out of character. That, in itself, becomes the evening's entertainment.
Joey decided on the theme for her birthday when she read Alice in Wonderland and Through the Looking Glass. For Halloween, she was the Cheshire cat. But when it came time for her own party, she wanted to be Alice. And Aurora suggested this super clever idea.
In order to be Giant Alice, Joey painted a Build-A-Bear box and simply left the back flap open.
Done and done.
Joey's friend Nico, came as the Queen of Hearts, which cracked me up because she is the sweetest, most mild-mannered kid you'll ever meet.
Jenny was also the Queen of Hearts because we didn't really coordinate.
(Thanks to Aurora for this picture. Thanks to Jenny for all the rest.)
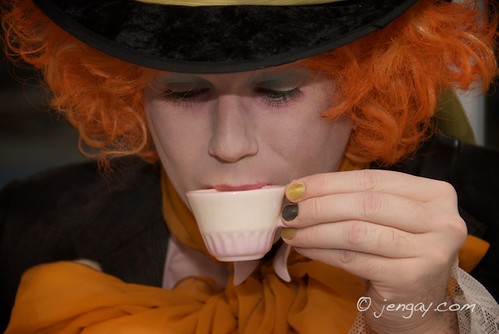
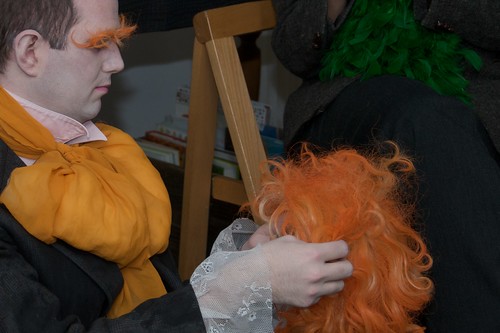
Part of Tommy's decision to be the Mad Hatter for Halloween came from the fact that he could also use the costume to officiate at Joey's tea party.
And how awesome are those eyebrows? Jenny originally attempted to glue them on with a glue stick, but eventually ended up using Museum Wax.
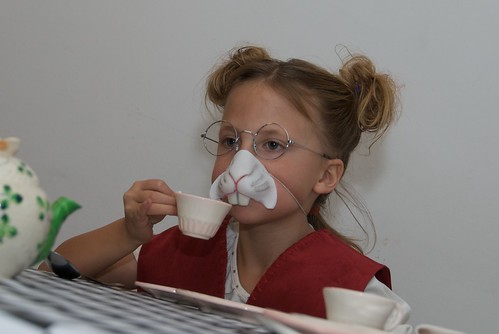
Aurora came as the Dodo, while her daughter, Jaden, was the White Rabbit. I spent the entire night laughing at their antics.
I, myself, was a piece of cake.
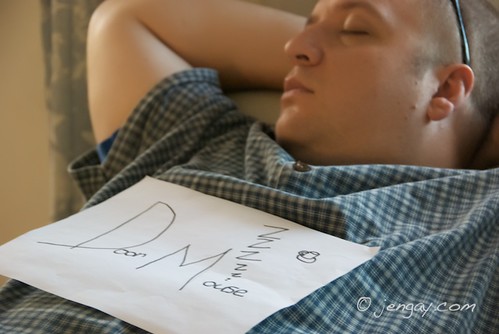
And Brad, Jenny's man, unwittingly became the Dormouse when he fell asleep in the living room.
You can tell we've matured because we didn't attempt to draw whiskers on his face with marker.
If you're interested, stay tuned all this week for more of the party.
---------------------------------
Related Posts-
(Part 2) Painting the Roses Red
(Part 3) The Birthday Cake
(Part 4) Because We Find Ourselves Amusing
Labels:
Out of the Ordinary,
Parties and Presents
Sunday, January 10, 2010
Sara
History has remembered the kings and warriors, because they destroyed; Art has remembered the people, because they created.
-William Morris
Labels:
Sunday Happiness
Monday, January 4, 2010
Homemade Firestarters
Firestarters are a super simple project. They really come in handy when you're trying to make a fire at home, but they're almost invaluable when you're out camping in the woods. (So says the girl who was taught, as a kid, how to make fires using a flint. Trust me, a firestarter and a match is better.) This project also makes use of nothing new as it's made from 100% unwanted, unused and recycled materials. Which also means that it costs nothing at all.
I love things that are so cheap that they're free.
This is a good way to use some of the branches from your Christmas tree, should you still have one hanging around your living room (like we do).
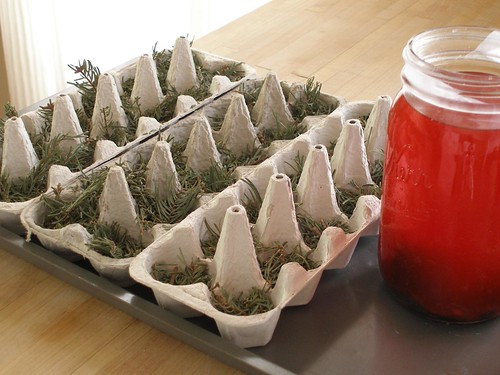
Also, it used up 3 of the dozens of old egg cartons that we have stacked in the garage, the cardboard ones, not the plastic kind.
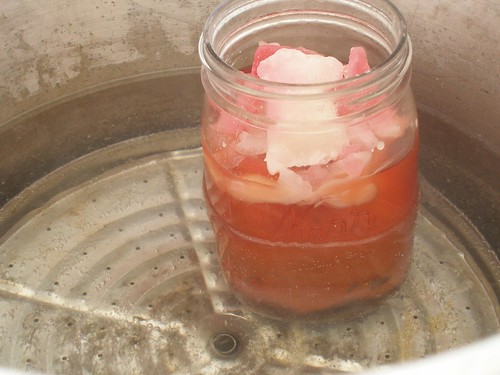
And the final ingredient in the firestarter recipe is old saved wax. I have a Mason jar (no way) in which I save all the butt ends of burned out candles.
How To
Basically, you strip the needles off the branches and fill up the egg cartons with them. The girls thoughtfully left little sprigs on the top of each cup for prettiness and for ease of lighting.
(I offered gardening gloves to the girls and, after a few minutes of stubbornness, they accepted.)
While this is going on, you can put the Mason jar into a slowly simmering pan of hot water. The water, as you can see, only needs to come up the sides of the jar a few inches.
(These days I have a specific pan that I use for melting wax, complete with a strainer that holds the jar up off the bottom, but I have successfully done this in a regular pan. Just make sure to keep the water at a bare simmer.)
Lay out the egg cartons full of pine needles on an old pan. (I used the one I destroyed doing this.)
And, using the kind of pot holders that slip on over your hand, CAREFULLY pour the wax into the egg cartons. (They will weep a bit, which is why you've got them on the sheet.)
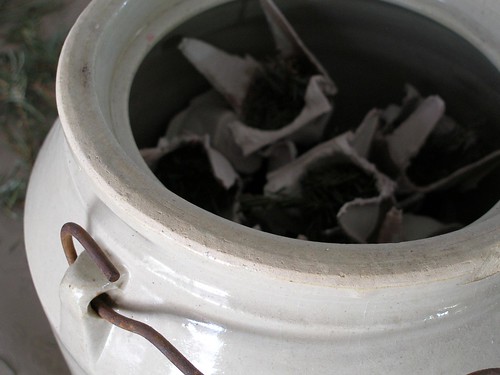
Once they are completely cooled, you can cut them apart and store them. We keep some of them in a lidded crock near the kindling and the rest with our camping gear.
To use, you just light one of the bits of cardboard or pine needle and build your fire on top of it.
--------------------------------
Enjoy this tutorial?
Get more like it by subscribing to my RSS feed
Labels:
Crafts and Art,
How To,
Our Green Life
Sunday, January 3, 2010
Beautiful Aurora
I am the only unique me that will ever be. I have the power to make a difference in this world. I look forward to taking on the grand adventure of life, living and always remembering to be myself… I Love Being Me!
-Catrinka
-----------------------------
Related Posts-
St. Baldrick's
Labels:
St. Baldricks,
Sunday Happiness
Saturday, January 2, 2010
Yesterday's Visitor
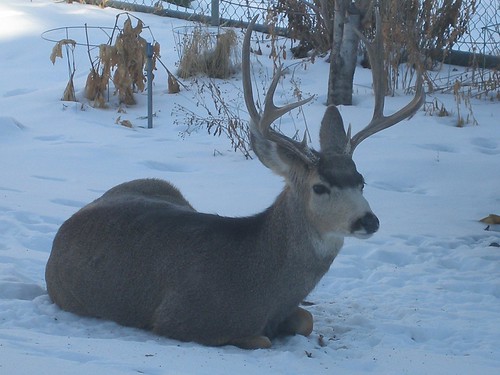
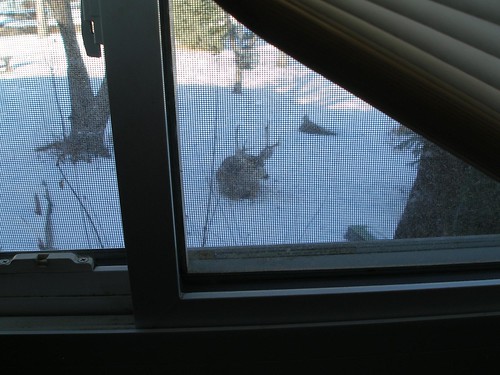
We woke up to this guy sitting underneath our bird feeder yesterday morning.
And here's another view of him, just outside our bedroom window.
I'm guessing that's probably a good omen for the year to come.
Hope you all had an equally good start to the new year.
And here's another view of him, just outside our bedroom window.
I'm guessing that's probably a good omen for the year to come.
Hope you all had an equally good start to the new year.
Subscribe to:
Posts (Atom)