Back in May, we went out to breakfast for my birthday. As we were waiting for the food, Jeff told me that I wouldn't be getting my present until the next day.
Jeff: So, do you wanna know what it is?
Me: Kind of.
Jeff: (without waiting for me to make up my mind) It's a sewing machine.
Me: ?! :)
Jeff: Well?
Me: I don't know. Do you even know a good sewing machine from a bad one? 'Cause I don't.
Apparently, after reading this post, my incredibly thoughtful man decided that it was time for me to have a new sewing machine, instead of a hand me down with a broken belt.
He explained that he'd searched on Craftzine for advice. Eventually, he ended up using the customer ratings on Amazon to choose a Brother CS6000I because it's supposed to be a really good model for beginners (not too complicated), but at the same time has lots of great features for more advanced sewing (if I ever get to that point). And it was a really good price, which, frankly, was my biggest concern. I spent the rest of the day getting more and more excited at the prospect of a working sewing machine.
Here's the phone conversation we had after it arrived the next day.
Me: Umm, the machine's here.
Jeff: How do you like it?
Me: I'm sort of freaked out by it.
Jeff: I'm sure you'll figure it out.
Me: But, it has like 60 different stitches and all these feet and I don't know what they're for.
Jeff: Does it have a manual?
Me: Yah, it's freaking me out even more than the machine is.
So, of course, once I got over my techno-fear concerning a computer in a sewing machine (!), I fell in love with it. If you've been to visit my house anytime in the last several months, I've probably shown it to you.
It's super easy to use and even though it's huge, the manual is totally understandable. Though, it wasn't until this weekend that I read far enough into it to discover it does an overcasting stitch, which is the awesomest thing I've ever done. For all I know, all sewing machines have this feature. I've never done anything other than straight and an occasional zigzag.
Maybe one of these days I may even attempt a buttonhole.
I know. Wow.
Wednesday, July 30, 2008
Tuesday, July 29, 2008
At Least Someone's Finishing Projects Around Here
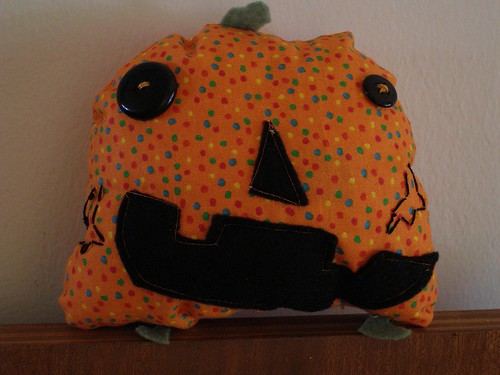
Joey spent most of yesterday making this little guy. His name is Charles Pipsqueak.
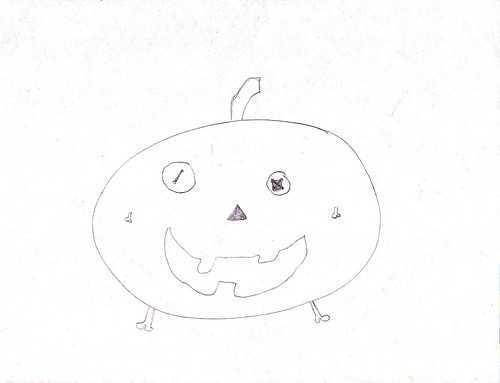
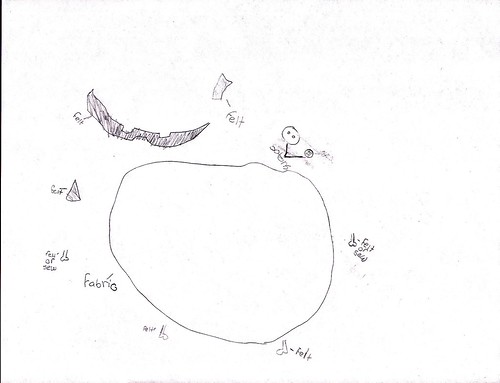
She started with a detailed plan and everything. The feet crack me up. I'm impressed that she even picked out the eyes and actually planned for them to be different sizes with different stitching.
I especially love the expanded view labeled with the materials.
Except for sewing him closed at the very end, she did every bit of this herself.
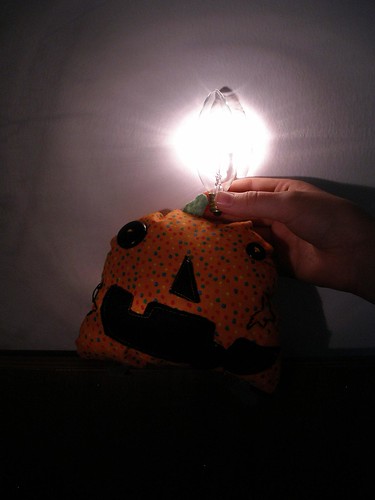
And, apparently, this is how you bring stuffies to life (with a burnt out lightbulb and a flashlight), which, I suppose, is much better than a kite and a thunderstorm.
I guess it's never too early to start thinking about Halloween.
Labels:
Crafts and Art,
Homeschool
Monday, July 28, 2008
Thursday, July 24, 2008
How to Resize Flickr Pictures
When I copied in the Flickr code from the meme on Monday, I adjusted the size of the picture. Since there was a comment about how to do just that, I thought I'd share what we learned as both Joey and I explored the concept of ratios.
Joey did her own meme for us to practice on and to share with you all.
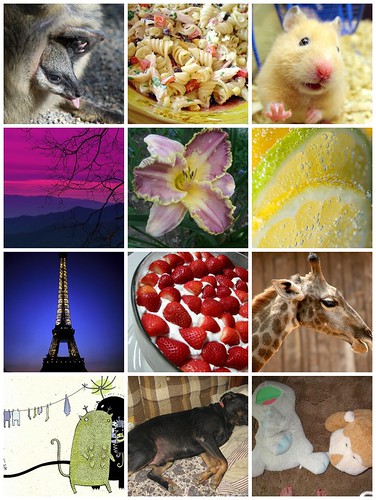
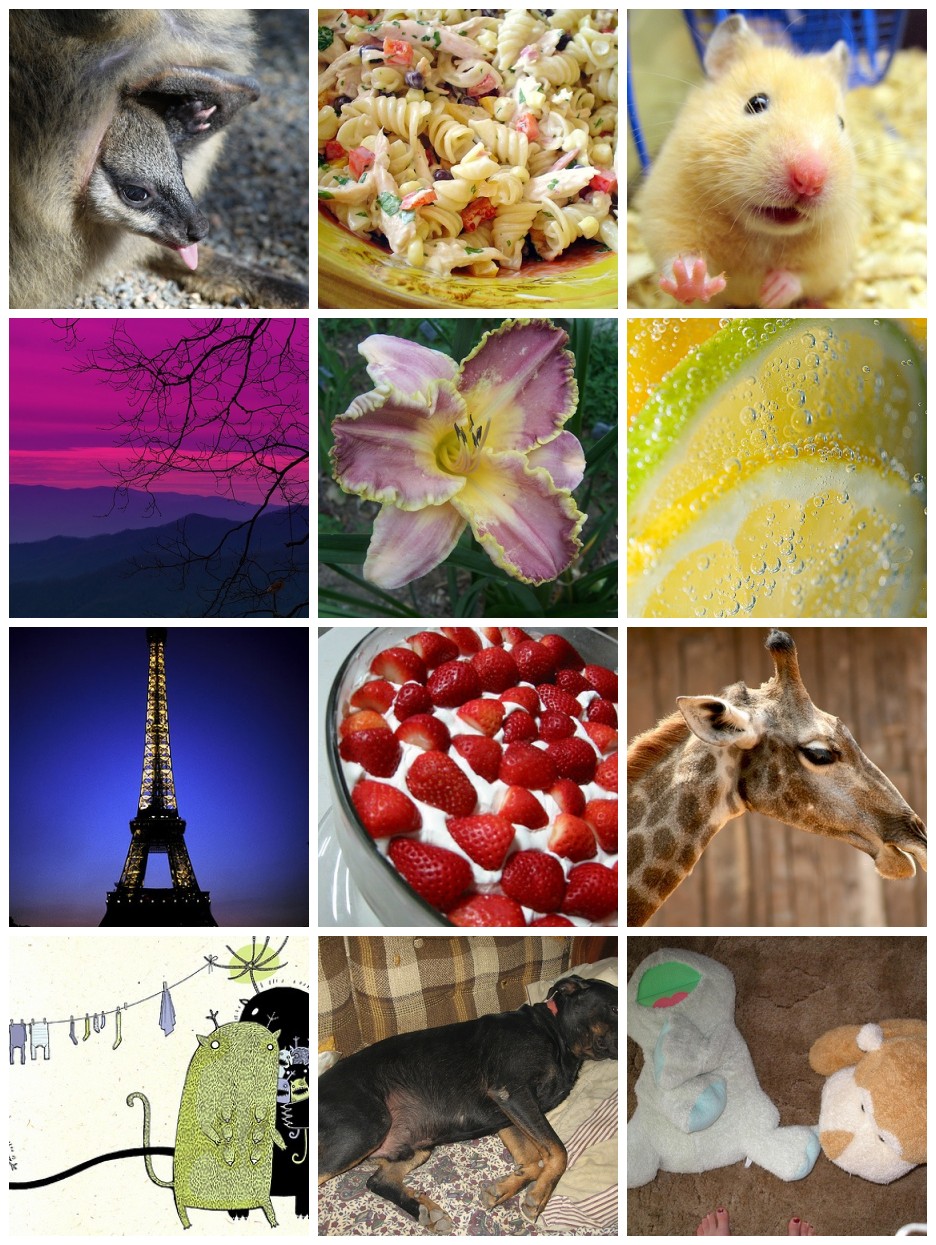
1. Joey sticks his tongue out..., 2. SouthWest Chicken Pasta Salad, 3. This Little Girl Wanted To Come Home With Me, 4. PURPLE HAZE, 5. Awesome Edger, 6. Miss Lemon + Miss Lime + Miss Sprite = Bubbletastic shoot!!!, 7. France: Eiffel Tower, 8. strawberry short cake, 9. The Zookeeper's Girl, 10. Animal Family, 11. "Goofey", 12. P8010038
First of all,
How to add pictures from Flickr
-Click 'All Sizes' above the picture of yours that you want to add.
-Click the size you want.
-Highlight and copy the HTML code that's under option 1.
-Paste it into your blog where you want the picture to go.
Normally I use the medium size for pictures, but it was a bit too small for the mosaic, considering how tiny the individual pictures were to begin with. And the large size was way too big.
The good thing is that even though they don't give you the option on Flickr, you can easily choose something in between. But, it involves a teensy bit of math.
Basically, when you're looking at "All Sizes", the numbers along the top are a consistent ratio of width to height. And when you look at the coding underneath, toward the end you'll see something that looks like this width="936" height="1245" with numbers that correspond to those at the top (depending on which of them you have clicked).
All you have to do is change the numbers in the code so they fit your page while keeping the ratios the same.
If you don't keep the ratios the same, you end up with something like this
or this
So here is the math. It's not hard, so don't panic.
The important thing to realize is that all the ratios that Flickr has made available on easily clickable links are essentially the same number (like 1/2 equals 2/4 equals 50/100 equals 0.5) if you divide one by the other. (Um yah, I know that's pretty much the definition of a ratio, but I'm working on the assumption that many of us have been out of school for awhile and are as freaked out by math as Joey is. If you already knew all of this, you've probably also figured out how to resize a picture and aren't reading anyway.)
Adjusting the Size
-First I decided what I wanted the width to be. For my blog, this width = 500.
-Then I found the ratio of the picture by taking the height of the original (1245) and dividing it by the width of the original (936), which came out to be about 1.33.
-I multiplied this by my desired width of 500 and came up with 665 for the right number for the height.
Homeschool Note
This is totally not how we covered it when Joey and I talked about it (because although it gives a simple process for solving this problem, it doesn't explain why, which is the most important bit).
We covered fractions and cross multiplication and even some algebra, though she didn't realize it at the time. She fought me most of the way because she has this irritating block with math. When she hears the m-word, she just shuts down mentally. But, she really wanted to post her meme, so there was some motivation to figure this out.
Eventually, we got the math down to this...
622,500 = 936 x ?
(622,500 equals 936 times something)
she said, "wait, wait, wait, shhhh, hold on", opened the calculator on the computer and did 622,500 divided by 936.
Let me tell you, I did the happy dance. Literally.
Labels:
Homeschool,
Random
Wednesday, July 23, 2008
Tuesday, July 22, 2008
Especially Tasty Iced Tea
I'm not normally a huge fan of iced tea, but lately Jeff's been making up massive quantities of different kinds and I've sort of jumped on board. He uses the coffee maker, which I've never actually operated before now, so there's another skill I've added to my repertoire. Though I only know how to make tea in it, not coffee. 'Cause I'm lame that way.
His method is super quick, too. So I'm all over it.
Ingredients
2 tea bags of regular iced tea
4 tea bags of flavored tea
Sugar or whatever sweetener you use- I use Agave Nectar. (anywhere from 3 T to 1/2 cup)
Ice (enough to fill a Gallon sized pitcher)
Water (enough to fill a coffee pot)
How To
Put the tea bags where the coffee normally goes in the coffee maker, making sure that they're laying flat.
Fill with water as you normally do.
Turn on coffee maker (which has now become a tea maker).
When it's done brewing, turn off the machine and stir in the sweetener.
Let it cool a bit.
Fill a gallon pitcher with ice.
Pour the tea over the ice.
You're Done.
My Favorite Flavored Tea
Chai Tea
Orange Zinger
Good Hope Vanilla (from The Republic of Tea)
The Republic of Tea has a lot of fun and tasty Superfruit Teas too.
I just did a bit of math to figure out how much this costs per 16 oz glass. And even with the more expensive teas, it's still less than 15 cents a glass (unsweetened) and less than 20 cents a glass (sweetened with Agave Nectar).
Labels:
Recipes and Other Cooking Stuff
Monday, July 21, 2008
Flickr Mosaic Meme
I found this at Riot 4 Austerity and thought it looked like a fun way to waste an hour... and learn about making mosaics.
Which I guess means that it wasn't a total waste of time.
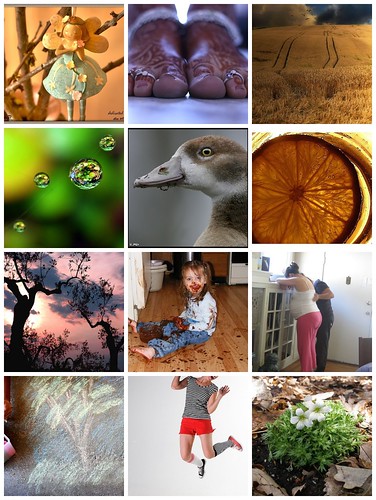
1. Happy Easter Wendy ......, 2. my sister, the blue-eyed Indian bride, 3. Wheat Field with Crows 2008, 4. Let's Get Green! Please take a moment to read..., 5. Portrait of an Egyptian Gosling, 6. Gin & Tonic, 7. Olive Grove. Pescara, Italy, 8. Put Chocolate Pudding on the Top Shelf !!, 9. Doula helps, 10. Product Of Our Parents, 11. :: dork in mid-air, 12. P5110028
The instructions to create the mosaic are:
Type your answers to each of the questions below into Flickr Search .
Using only the first page, pick an image.
Copy and paste each of the URLs into the mosaic maker.
Questions:
What is your first name?
What is your favorite food?
What high school did you go to?
What is your favorite color?
Who is your celebrity crush?
Favorite drink?
Dream vacation?
Favorite dessert?
What do you want to be when you grow up?
What do you love most in life?
One word to describe you.
Your Flickr name.
Labels:
Random
Saturday, July 19, 2008
Nut Allergy Henna Warning
I wanted to mention that those of you with nut allergies shouldn't use the Earth Henna kits. It does contain Black Walnut which would obviously be bad for those who are sensitive to nuts.
Just thought I would give a heads up in its own post in case you don't check back on the original one that's been updated with this info.
Hope you're all having a good weekend!
Peace out.
Just thought I would give a heads up in its own post in case you don't check back on the original one that's been updated with this info.
Hope you're all having a good weekend!
Peace out.
Labels:
Feeling Good- inside and out
Friday, July 18, 2008
Etsy Love
I'm not much for shopping, especially for clothes. But I am totally coveting this from Larime Loom's Etsy shop.
Here's the back, which I love so much I'm almost giddy looking at it.
It's not cheap, but wow.
I also love this from the Cloth Pony
Hmmm, maybe the reason I don't like shopping for clothes is that I haven't been doing it on Etsy.
Everything really is better when it's handmade.
Here's the back, which I love so much I'm almost giddy looking at it.
It's not cheap, but wow.
I also love this from the Cloth Pony
Hmmm, maybe the reason I don't like shopping for clothes is that I haven't been doing it on Etsy.
Everything really is better when it's handmade.
Labels:
Random
Thursday, July 17, 2008
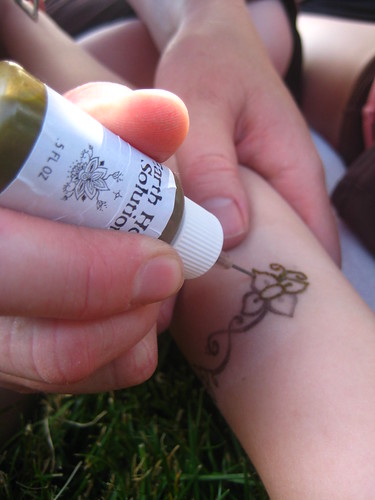
How We Do Henna
I received quite a few questions about the henna pictures, so I thought I'd answer them all here.
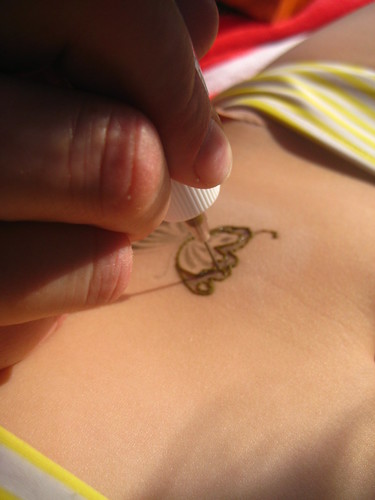
The first time we tried this (on my pregnant belly), we mixed our own batch using a traditional Indian recipe and bulk henna from the health food store. After we applied it, I had to keep it wet for hours by continually dabbing it with a sugar and lemon solution. And after all that work, it hardly stained at all.
Sad.
We have since found Earth Henna kits. I think they're so much easier and a lot more fool proof. We buy ours locally (just about all the health food stores around here carry them), but if you can't find them in your area, you can always get them online. The kits come with everything you need to create a lot of tattoos, including the transfer sheets if you don't want to do it freehand. And you don't have to keep them wet, which is a total pain.
Added Note- As mentioned in the comments, this product does contain black walnut, which would obviously cause a problem for those people with nut allergies. I'm very grateful to the commenter for bringing it up because it is something that didn't even cross my mind (having a family without any allergy problems what so ever).
For those of you who don't have allergic issues...
I am copying in pictures of each of these and adding little descriptions because every time I go to buy them, I forget which one is which (some kits make more designs than others and one is just a refill) and the descriptions all sound the same. I have the same problem with buying these that I used to have with Ranch dressing at the grocery store; I somehow always ended up with bacon flavored when I only wanted plain. ... Not that any of these are bacon flavored.
Humm, kinda got off track there.
Anyway, here are all the different kits that I, personally, recommend. There are plenty of other ones out there that I haven't tried. And many people (like the millions in India) are perfectly capable of mixing up their own batches themselves. If you're more competent than me, you should give that a try.
Earth Henna® Body Painting Kit
This is a mini kit has enough for 15 to 20 designs.
Original Earth Henna® Body Painting Kit
This has enough to do 30 to 40 designs.
Earth Henna® Body Painting Kit and Mehndi Book
This contains the Mini Kit (15 to 20 designs) plus a book of designs.
Lakaye Studio - Refill - Earth Henna Body Painting Kit
This is a refill kit that has enough for 30 to 40 designs (and the one I always intend to get, but sometimes I end up with something different).
The Process We Use
-Heat the skin where the design will go. (optional- see below*)
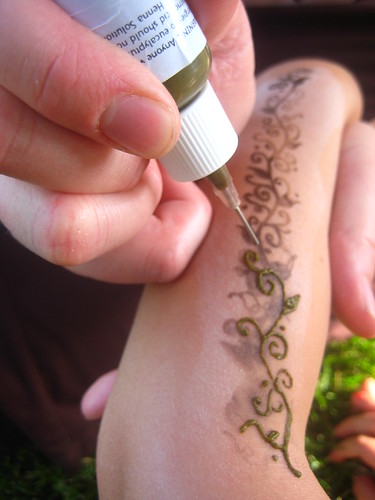
-Transfer design (if using) by placing ink side down on skin and rubbing eucalyptus oil over the top, holding the paper perfectly still while you do it. Do this step as quickly as possible because it tends to smear. (It's much easier to do on a flat part of the body.)
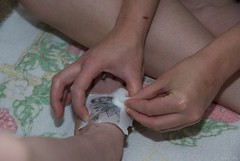
-Apply henna to skin, using nice thick lines.
-Don't move much until it is dry to the touch.
-Leave it on the skin at least 2 hours and up to 6.
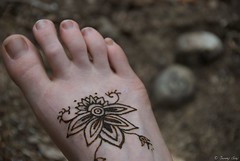
-Soak a cotton ball with cooking oil and dab it all over the henna design.
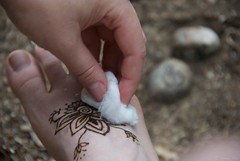
-Let sit for a minute or two and then rub the skin with the cotton ball, loosening and removing the henna.
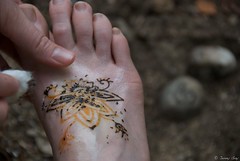
-The color starts out as orange, but darkens to brown within a day.
-Avoid water for 24 hours if you can.
(Thanks, Jenny, for the photos and the use of your foot.)
Tips
*We've had really good luck with using a microwaved heating bag (you know, filled with corn or rice or lentils) to heat the area just before applying the henna. This helps the henna to stain darker and last longer, but is certainly not necessary.
-The skin should be clean and free of lotions before starting. It also helps if you rub the area vigorously with a towel to buff away any dead skin.
-Henna stains darkest (and lasts longest) on the feet and hands (unless you hand wash a lot of dishes), but it will work anywhere on the body.
-If you're squeezing out a line of henna and it stops, DON'T squeeze harder, unless you want a big glob on your design. On a piece of paper, attempt to squeeze it out. If it doesn't come out easily, use a straight pin to clear the tip.
-The longer you let the dried henna sit on your skin before removing it, the longer it lasts.
-Don't go to sleep with the dried henna still on your skin, even if you wrap it with tissue paper like some books recommend. It will crumble off and fill your bed with little henna crumbs... which stain.
-Whenever you need to get the area wet, you can rub oil into the area first to protect it a bit. This will help it last longer.
-If you would like to make up your own designs to draw from directly, just print them up on a laser printer and use just like the included transfer designs.
-If you do want to make your own designs, my favorite books for inspiration are
Mehndi: The Art of Henna Body Painting
(This is actually the book that comes with the kit above)
Mehndi : The Timeless Art of Henna Painting
(This one has some gorgeous designs.)
Important Note
Beware of Black Henna. It is sometimes made with a really toxic chemical (PPD) which can burn the skin.
The first time we tried this (on my pregnant belly), we mixed our own batch using a traditional Indian recipe and bulk henna from the health food store. After we applied it, I had to keep it wet for hours by continually dabbing it with a sugar and lemon solution. And after all that work, it hardly stained at all.
Sad.
We have since found Earth Henna kits. I think they're so much easier and a lot more fool proof. We buy ours locally (just about all the health food stores around here carry them), but if you can't find them in your area, you can always get them online. The kits come with everything you need to create a lot of tattoos, including the transfer sheets if you don't want to do it freehand. And you don't have to keep them wet, which is a total pain.
Added Note- As mentioned in the comments, this product does contain black walnut, which would obviously cause a problem for those people with nut allergies. I'm very grateful to the commenter for bringing it up because it is something that didn't even cross my mind (having a family without any allergy problems what so ever).
For those of you who don't have allergic issues...
I am copying in pictures of each of these and adding little descriptions because every time I go to buy them, I forget which one is which (some kits make more designs than others and one is just a refill) and the descriptions all sound the same. I have the same problem with buying these that I used to have with Ranch dressing at the grocery store; I somehow always ended up with bacon flavored when I only wanted plain. ... Not that any of these are bacon flavored.
Humm, kinda got off track there.
Anyway, here are all the different kits that I, personally, recommend. There are plenty of other ones out there that I haven't tried. And many people (like the millions in India) are perfectly capable of mixing up their own batches themselves. If you're more competent than me, you should give that a try.
Earth Henna® Body Painting Kit
This is a mini kit has enough for 15 to 20 designs.
Original Earth Henna® Body Painting Kit
This has enough to do 30 to 40 designs.
Earth Henna® Body Painting Kit and Mehndi Book
This contains the Mini Kit (15 to 20 designs) plus a book of designs.
Lakaye Studio - Refill - Earth Henna Body Painting Kit
This is a refill kit that has enough for 30 to 40 designs (and the one I always intend to get, but sometimes I end up with something different).
The Process We Use
-Heat the skin where the design will go. (optional- see below*)
-Transfer design (if using) by placing ink side down on skin and rubbing eucalyptus oil over the top, holding the paper perfectly still while you do it. Do this step as quickly as possible because it tends to smear. (It's much easier to do on a flat part of the body.)
-Apply henna to skin, using nice thick lines.
-Don't move much until it is dry to the touch.
-Leave it on the skin at least 2 hours and up to 6.
-Soak a cotton ball with cooking oil and dab it all over the henna design.
-Let sit for a minute or two and then rub the skin with the cotton ball, loosening and removing the henna.
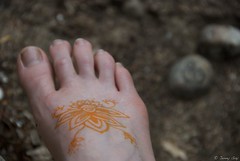
-The color starts out as orange, but darkens to brown within a day.
-Avoid water for 24 hours if you can.
(Thanks, Jenny, for the photos and the use of your foot.)
Tips
*We've had really good luck with using a microwaved heating bag (you know, filled with corn or rice or lentils) to heat the area just before applying the henna. This helps the henna to stain darker and last longer, but is certainly not necessary.
-The skin should be clean and free of lotions before starting. It also helps if you rub the area vigorously with a towel to buff away any dead skin.
-Henna stains darkest (and lasts longest) on the feet and hands (unless you hand wash a lot of dishes), but it will work anywhere on the body.
-If you're squeezing out a line of henna and it stops, DON'T squeeze harder, unless you want a big glob on your design. On a piece of paper, attempt to squeeze it out. If it doesn't come out easily, use a straight pin to clear the tip.
-The longer you let the dried henna sit on your skin before removing it, the longer it lasts.
-Don't go to sleep with the dried henna still on your skin, even if you wrap it with tissue paper like some books recommend. It will crumble off and fill your bed with little henna crumbs... which stain.
-Whenever you need to get the area wet, you can rub oil into the area first to protect it a bit. This will help it last longer.
-If you would like to make up your own designs to draw from directly, just print them up on a laser printer and use just like the included transfer designs.
-If you do want to make your own designs, my favorite books for inspiration are
Mehndi: The Art of Henna Body Painting
(This is actually the book that comes with the kit above)
Mehndi : The Timeless Art of Henna Painting
(This one has some gorgeous designs.)
Important Note
Beware of Black Henna. It is sometimes made with a really toxic chemical (PPD) which can burn the skin.
Labels:
Feeling Good- inside and out,
How To
Wednesday, July 16, 2008
Weird Kid Wednesday- Hair Rubber Band Storage
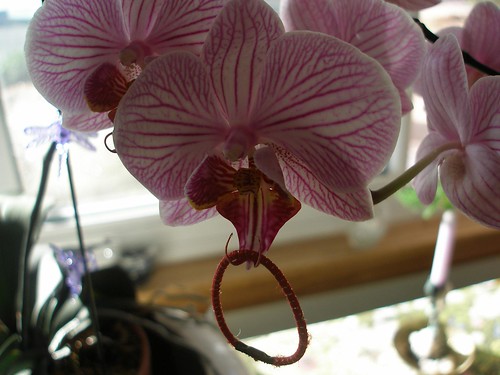
Looking for a place to keep your hair bands? Well, mom's orchid plant seems the perfect spot.
Why?
Where do you keep yours?
Why?
Where do you keep yours?
Labels:
Weird Kid Wednesday
Tuesday, July 15, 2008
My Folia
Last winter, I joined an online gardening, um, thing. I guess it's a gardening journal with photo capability, but really it's a huge community too. It's called Folia. It's kind of like Ravelry, but for gardeners instead of knitters. I don't remember how I found it, maybe they invited me from Flickr or something, but I'm so glad I did.
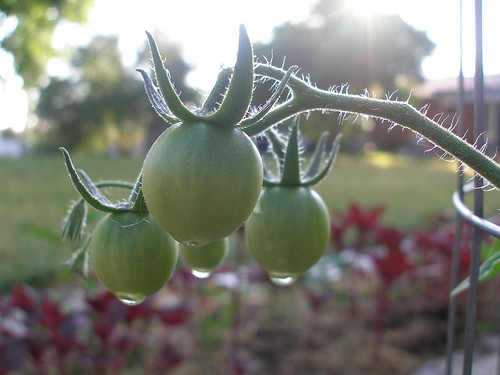
The best part about it is that it helps you keep track of your gardens. You can journal for an entire garden as well as individual plants, like these, my happy little cherry tomatoes.
They have so many options of how to track the things you're planting, harvesting and collecting seeds from. You can sign up for swaps and find other gardeners who are growing the same things you are.
You can even link directly to photos from Flickr to keep a step by step progression of your plants' growth.
Basically, I like this because I have a terrible time keeping track of what I've done in the garden, when I've done it and how well it has (or hasn't) worked. And, using this, I've done a fairly reasonable job of getting it entered. It's that easy to do.
OK, I guess I didn't get as far as I thought because I just checked and I don't have photos uploaded for a lot of the plants. I also don't have all the plants listed.
But, I'm sure that's not Folia's fault. Probably mine. They've made it about as easy as it could possibly be.
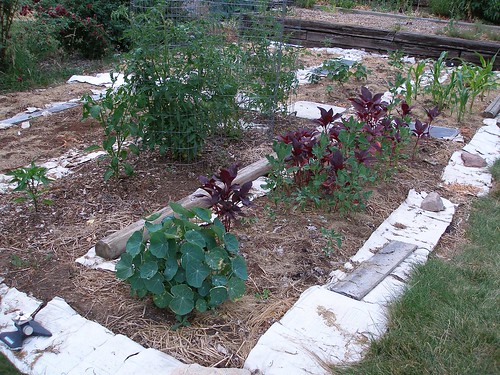
And in case you're curious how the whole Farming in the Suburbs thing is going, here's a picture of my vegetable garden. I don't think we'll be feeding our entire family from this, but it's a start.
The empty spots in the back are where some rude little critters ate up all our broccoli, kale and spinach. I've reseeded a couple of times, but I think it's a bit too hot at this point. I'll try again in the fall.
Labels:
Farming in the Suburbs,
Gardening,
Sheet Composting
Monday, July 14, 2008
Magnetic Art Display
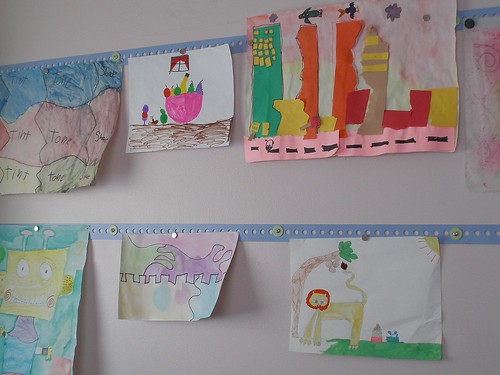
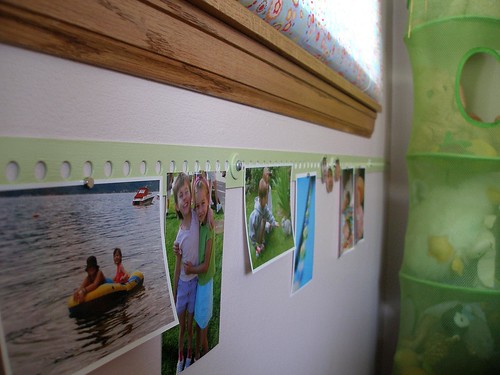
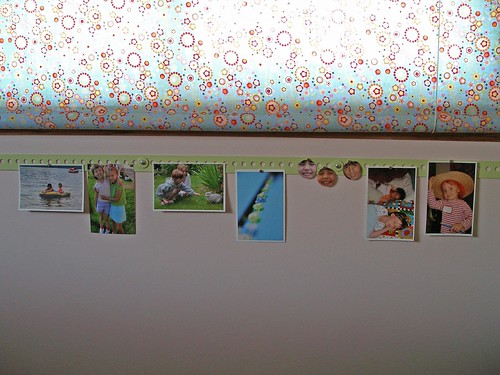
Several years ago, I created these as a way for Joey to easily display (and rotate) all of her artwork.
This weekend, I did up a new one for her favorite photos and thought I'd give a quick tutorial.
Supplies
-1 strip of flat metal with holes in it (make sure you test it with a magnet before you bring it home. And, yes, to find this, I basically walked around the home improvement store sticking a magnet to pieces of interesting looking metal) If you can't find one with at least a couple of holes in it for attaching to the wall, you'll have to drill your own and most likely have to buy a special drill bit for metal.
-First coat of paint- Metal Primer (The important thing to look for on the back of the label is a section called Priming that recommends it for use on bare metal.) If you can find a color you like in this, go ahead and use it as both primer and final color.
-Second coat of paint- Final Color (whatever kind you have or can find- I used left-over semi-gloss)
-Last coat of paint- Clear, Protective Enamel (this isn't completely necessary, but does cut down on the tiny bit of flaking paint that I experienced the first time I tried it.)
-Screws
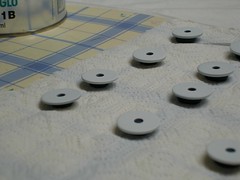
-Washers (I needed these because the size of the holes were bigger than the heads on the screws)
-Magnets
How To
-Basically, I washed everything but the screws with soapy water and a piece of steel wool, rinsed well and let it air dry.
-Then I coated the metal strip and washers with the paints in the order listed in the supplies, letting everything dry thoroughly between coats. (The vast majority of time for this project is really just waiting for the previous coat of paint to dry; it's really only about half an hour of actual work.)
-Then I hung it up (marked the studs, used a level to mark the hole placement, drilled pilot holes and attached to the wall with screws).
Tips
-Originally, I had bought some of that magnetic paint and covered a piece of molding with it. I did several coats and the magnets just didn't stick all that well. Paper tended to go flying if we had the ceiling fan on or windows open. Trust me, the metal works much better.
-You may need to do more than one coat of any one of the paints.
-Read the paint labels for the wait times between coats.
-I suggest using a sponge brush, because it tends to leave fewer marks than the regular bristle brushes.
-I put the metal strip up on saw horses for painting.
-I used small pieces of polymer clay to hold the washers up off the paper towel when painting.
If you want to skip the painting part, it'll just have a more industrial look. The project will also be much more environmentally friendly and a lot easier.
Saturday, July 12, 2008
Friday, July 11, 2008
Thursday, July 10, 2008
Subscribe to:
Posts (Atom)