"Anyone that doesn't agree with leggings as pants can physically fight me.
And I'm going to win because I have a full range of motion due to the fact that I am wearing leggings as pants."
Showing posts with label Farming in the Suburbs. Show all posts

Tuesday, May 1, 2012

Vegetable Grafting

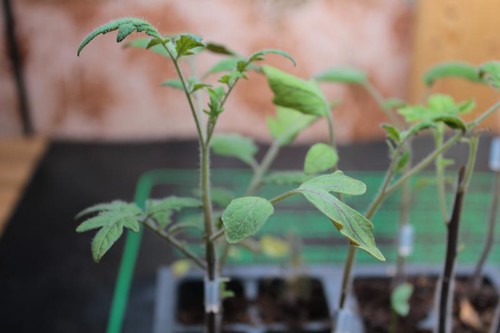
Early this spring I discovered a gardening technique that I had never heard of before.  I'm sure most of you know about grafting with trees, but did you know you could do it with vegetables too?  Tomato grafting allows you to combine the best characteristics of two types of plants into one.

IMG_5534

 I read about it over at A Way to Garden and I totally geeked out.  Two parts of my personality, the avid gardener and the nerdy biologist, were jumping up and down inside my head. 
 
Most gardeners are well aware of the tomato blight, viruses that are destroying tomatoes around the country.  And it's also true that heirloom tomatoes, the best tasting kind, in my opinion, are particularly susceptible.  Really, that's one of the reasons why they started breeding hybrids, to make them more resistant to these viruses.  The problem is that hybrids don't taste as good as the heirlooms.

So what to do?

Armed with a razor blade and a silicone clip, you can take two seedlings and combine them into one super tomato plant via razor blade surgery.  One seedling should be disease-resistant and prolific.  This becomes the rootstock (the bottom half) and controls overall how the plant grows.  The other seedling should produce fruit that taste really yummy.  This becomes the scion (the top half) and controls what the fruit look and tastes like.

It really is just about that simple.  In theory.
IMG_5544
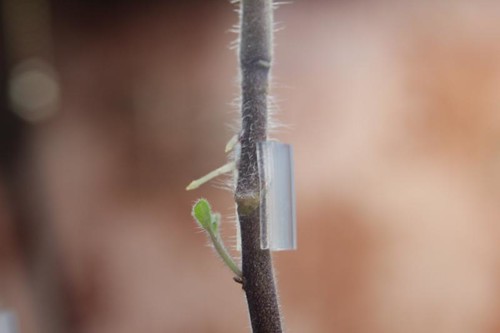
I especially like this picture (above) because it shows how the rootstock on the bottom is attempting to grow itself some leaves while the scion on the top is attempting to grow its own set of roots.  All of these will need to be pulled off to keep that from happening.  If these were allowed to grow, it would ruin all the hard work, producing grodey hybrid fruit and reducing the disease resistance of the plant.

I actually managed to create 6 successfully grafted plants on the first go.  I felt a bit like a mad scientist during this entire endeavor and may or may not have had the words, "It's Alive!" go through my mind every so often.

I started with 12 seeds of Maxifort for the rootstock, which is resistant to F2 (Fusarium Wilt 1 and 2), N (Nematodes), TMV (Tobacco Mosaic Virus), V (Verticillium Wilt), PL (Corky Root Rot) and FOR (Fusarium Crown and Root Rot).  I also started 6 each of Brandywine and Ace (These were the heirloom seeds that I already happened to have).  With Jeff's help, I grafted 7 plants total.  One of which came apart after the first day and started growing quite an impressive set of leaves from the rootstock.  (I won't be planting this one.)

IMG_5538

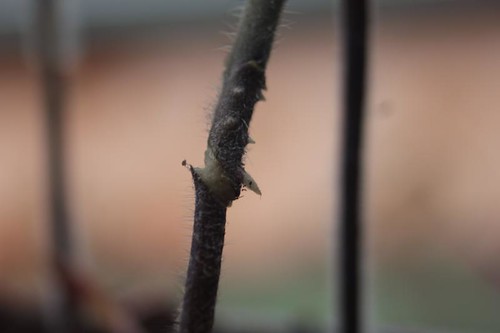
The silicone clip fell off of this guy (below) early on, but the two parts somehow managed to stay close enough together to fuse.  It's definitely less pretty than the others that were held closer together, but I still think it's amazing.
IMG_5505

I won't go into the specifics right now as I am miles away from being any sort of authority on the subject.  Though I do promise to include more info as I figure it out.  I basically followed the instructions in this video for the top grafting, not the side grafting that he starts out explaining.


Oh, I almost forgot.  I have seen grafted tomato plants for sale at a nursery or two around town.  They were running about $12 for a gallon size.  So depending on how many you want to grow, this might be a more economical solution for you.


Saturday, May 28, 2011

OCD Seed Sprouting

When I start seeds inside in those little containers, I have anxiety. If I only plant one seed per pot, I worry that it won't germinate and I will waste space. If I plant more than one seed, I worry that they will all germinate and I will need to thin them and waste perfectly good seeds.

And so I stare at the pots for 10 minutes, trying to make up my mind, doing nothing.

But, no more!

IMG_0795

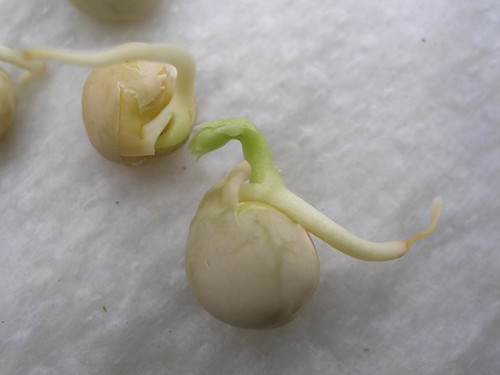
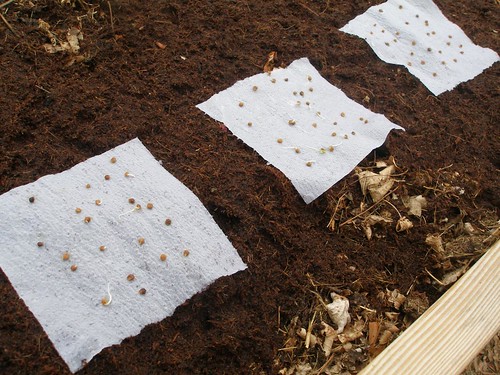
What I tried (and had a rousing success with) this year was getting the seeds to germinate before I ever put them in dirt. Remember kindergarten when you sprouted beans in paper towels shoved in a plastic bag? Yeah, I basically used that method.

P5035282
(how cute are these little boogers?)

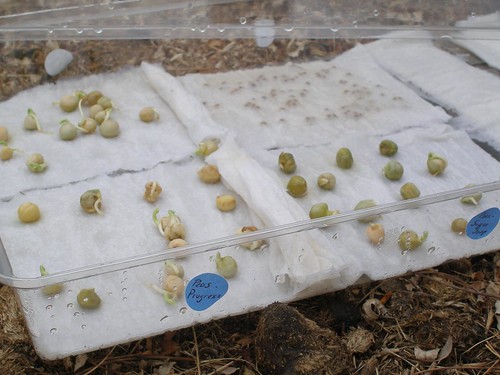
In a seed starting tray, I put the seeds on various sections of paper towels (I bet newspapers would work too), with several layers below and just one layer over top. Then I added enough water to thoroughly moisten the paper (but not enough to pool) and put on the lid.

P5035275
(this picture has the top layer pulled back for your viewing pleasure)

Keep an eye on them and as soon as they sprout, put them in dirt, either directly outside or in individual pots inside. If the seeds are big enough, you can plant them individually (only the ones that have sprouted- wasting nothing!).

Note- at this point, because the peas are legumes, I should have applied inoculant to them. But I forgot. And had to come back later and dig it into the soil.

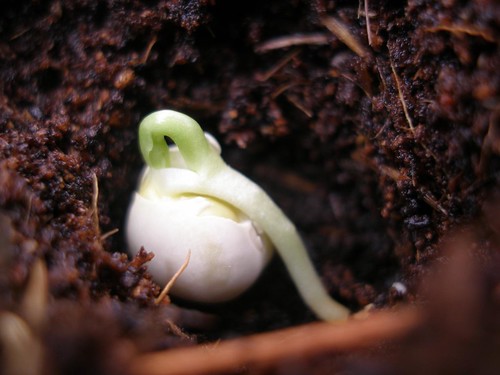
If you can determine which part is the root and which is the sprout, plant accordingly.

P5035278

If you're not entirely sure which end is which, just lay it on its side. It'll sort itself out.

P5035283
(this guy grew just fine. in fact 100% of the seeds that I planted this way have grown.)

And if they're tiny, you can put them out directly, still on the layer of paper beneath them, and cover it (leaves and all) with a thin layer of soil.

P5035305

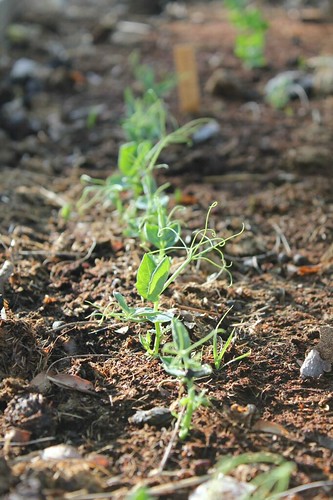
In a few days, they'll have popped through.

IMG_0221

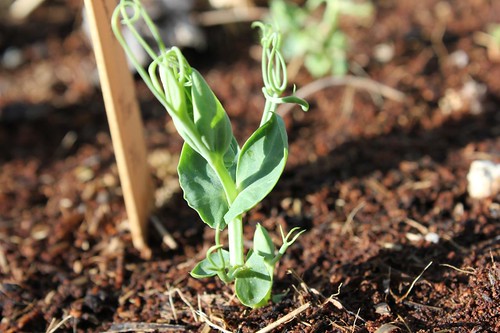
This worked really well for my second batch of pea seedlings. I'd better get them something to climb on soon.

IMG_0778

This method also seems to work especially well for plants that you're supposed to plant directly in the garden because they don't like to be transplanted. The problem with direct seeding in the garden is that it's more difficult to provide the right moisture and temperature during germination, which allows the seeds to germinate faster and in higher percentages.

In fact, I found this chart that shows the optimum soil temperatures for various types of plants. For example, lettuce can get a 98% germination rate at a soil temp of only 32 degrees. But it will take 49 days to do it. At 77 degrees, you'll get 99% germination, but in only 2 days.

The chart also helped me figure out why most of my spinach failed to germinate on the first go round. At 68 degrees, you can expect only a 52% germination rate and at 77 degrees, only a 28 % rate. It does best at only 50 degrees, the average temperature of our garage. Like lettuce, it will sprout at 32 degrees, but will take 63 days to do so.

So, you know, just something to keep in mind.

Monday, April 25, 2011

Spring Planting in Raised Beds

Last year at this time I was publishing post after post of Easter egg tutorials. (click here, here, here and especially here to see what it looks like when I'm on my holiday crafting A-game.)

This year I have other things* going. Things which don't involve writing for this blog, apparently. Luckily, I was able to scrounge a few moments when I wasn't actually doing those things in order to write about them. And put together a video too.

I know, right?

One of the things is gardening. Which I'm basically obligated to do after last year when we built beds for the garden so late that there was no time to plant anything that season.

105NCD80_DSC_5035

In an effort to reach a personal goal I set for myself (wait, I haven't written about that either! Gah.), I am attempting to grow upwards of 200 pounds of produce in our garden. In one season. It's a somewhat random number I picked out of the air, based loosely, and optimistically, on Finny's amazing harvest.

That is despite the fact that while her bed looked like the picture on the left on Feb 7, my bed looked like the one on the right on Feb 8.

finnys sunny garden P2085023

California vs Colorado, no one should be surprised here.

First thing's first, we had to fill up the empty beds.

PA033811

This happened back in October during a two week long burst of energy. Everything we used came either from our yard or for free from craigslist. The only thing we paid for was gas to pick it up.

And look! I put all the pictures I took back then into a real and actual video. With music, even.


The important gardening lesson I've learned in the last 24 hours is that the wind is not your friend. The wind rips covers off of cold frames and flattens seedlings.

But that's ok, because it just gives me more material for my new blog where I celebrate all the wonderful mistakes in my life and invite you to join with me.

*The other major time suck has produced no usable pictures and so I refuse to write about it until I have at least one good one. Joey has informed me that I am letting my readers down and even offered to write up the post for me. We'll see if it comes to that.

Wednesday, October 6, 2010

Raised Beds- A Long Time Coming

Now that it is well into autumn, I have finally put the finishing touches on the raised beds that were supposed to hold our 2010 vegetable garden.

105NCD80_DSC_5035

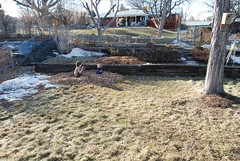
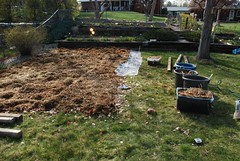
My efforts to sheet compost and garden directly over the lawn have been less than stunning, probably because I attempted to convert such a large area and didn't build it up high enough.

DSC_2580.jpg DSC_3958.jpg
(Feb 2008, April 2008)

PA033811
(Oct 2010)

Late this past winter I started planning for raised beds. I researched, drew up plans and figured out how much wood I'd need. And somewhere along the way, I got it into my head that I wanted the beds to be adjustable for height. That way, when I rotate crops, I can make the tomato bed, where ever it is, three sections high and leave something like the lettuce only one high. So I designed interlocking pieces, with the posts offset to fit down into the section below it, holding it in place. I'm not sure that this is actually necessary, but I like it anyway. Cause I'm a nerd like that.

P8013335

Then this spring, I ordered the wood to be delivered, thinking I was so clever and had saved myself the bother of borrowing my dad's pickup and schlepping the boards home myself.

Wrong-o.

The smugness of watching the company dump all that wood at the side of my house wore off quickly, just as soon as I realized how much wood there really was in the minimum deliverable order and the fact that we needed to move all of it to the back porch to keep it out of the elements.

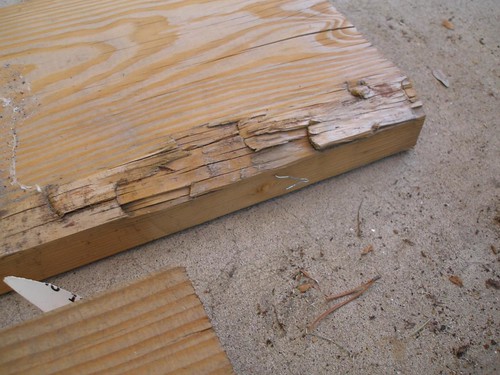
Then there was the second problem of less than perfect wood. I somehow imagined that the guy I spoke to on the phone would go out back and lovingly pick out the straightest, most uniform and undamaged pieces of wood he had. He did not. I feel sure he looked at my purchase as an opportunity to unload some of the more warped and ragged of his stock.

P7053073

So, these are the most recent DDWDDD. Don't buy wood sight unseen. My advice is to find a friend with a pickup and trade them for beers (or the promise of fresh grown produce) and buy only as much wood as you need. If you must have it delivered, though, go and pick out your boards yourself first. Trust me on this one.

105NCD80_DSC_5033

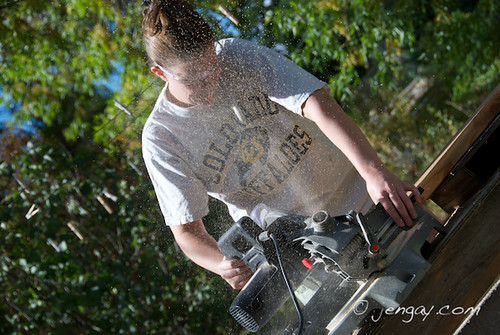
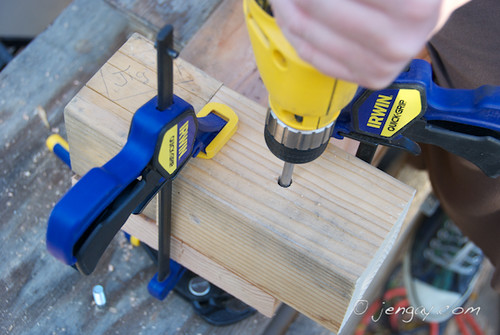
I won't lie to you. These were a lot of work. But that's only because we made so damned many of them. Really, I probably could have reduced the scope of the project by about 2/3rds and actually gotten around to growing some vegetables this year.
105NCD80_DSC_4913

Not that it took us the entire summer to make these. What took us the entire summer to do was work on them for a day, get discouraged because it wasn't going as smoothly as we'd envisioned (thank you warped boards) and then wait several weeks before attempting it again. That pace tends to stretch out the time line a bit. Jeff and I finished about half of them and then just couldn't find the motivation to tackle the second half.

105NCD80_DSC_4981

Eventually though, I felt the time crunch and got a move on (it was also easier once I'd decided to put them together with bolts and nuts instead of deck screws). I even sat out in the rain one afternoon, putting one together. Then Jenny and Kam spent several days at my house and we developed an assembly line process that really moved things along.

105NCD80_DSC_4933

Kam, despite the obvious handicap of being 4 years old, was surprisingly helpful.

And also adorable.

105NCD80_DSC_4934


After they were all put together, we dug them into the ground. Then Joey and I attached a bunch of pipes that will hopefully make it super easy to set up trellises as well as hoops for frost and bug protection. Looking at the finished beds, I realized that this might be the perfect example of me making things much harder on myself than strictly necessary, but I am so very pleased with it.

PA033812

And I also realized that when it takes me this long to finally finish a project, the actual moment of completion is less "Woo hoo!" and more "How could it have possibly taken so long to finish this?"

I'm also trying not to dwell on the fact that they aren't, technically speaking, finished, as they now need to be filled with many truckloads of sheet composting material.

Thursday, September 9, 2010

Crabapple Butter

There is a contrary part of my nature that loves the process of taking something that seems totally useless and making it into something great. Which might explain my compulsion to turn crabapples into apple butter every year. (For those of you who don't know, regular apple butter is basically a thickened applesauce. It's sweeter and also spreadable.)

P9083726

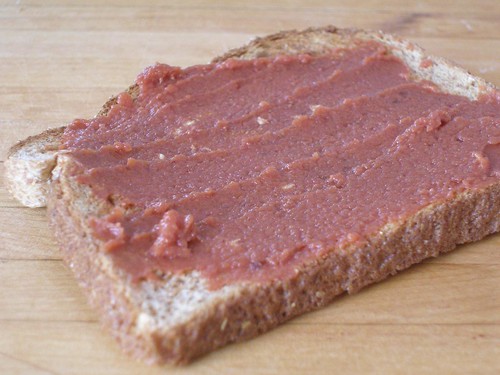
Crabapple butter is fantastic on toast or a topping for hot cereal. You could throw some of it in a smoothie or on top of ice cream. Our kids even love to eat it plain, though it is pretty tart. You can make it with or without sugar.

105NCD80_DSC_2653

The process is fairly straightforward.

105NCD80_DSC_2641

First you pick a bunch of crabapples, avoiding any that have holes or are bruised. Don't worry if they still have stems, though.

105NCD80_DSC_2637

Part way through harvesting we decided to spread a big sheet out on the ground to catch those that fall because when they're ripe, for every one crabapple that you pick, five will shake themselves out of the tree.

105NCD80_DSC_2614

Rinse them well. Add more water to the pot with them. If you've got a smaller batch, you can add enough to just cover them. But for the bigger batches, I've found that adding 5 or 6 cups and then keeping the lid on will do the trick. (If you add enough water to cover a big batch, you'll end up with way too much water in the end.) Just make sure that it doesn't all evaporate when it's cooking. You can add more as necessary.

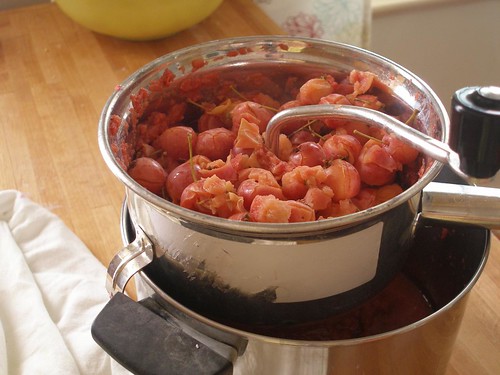
Now you can simmer these guys until the skin starts to split and they are really soft. Turn off the heat and let them cool a bit because this next part can be messy, and if they're still hot, it'll be messy *and* painful.

Now comes the one piece of kitchen equipment that you may not already have, a food mill. I got mine from Aurora (who was selling it at a garage sale) and even though it's sort of wobbly to use, it does get the job done.

P8193515

The kids love to use it, so, you know, free labor.

P8193518

Scoop the apples in there and rotate the handle while pushing down. You'll need to use your other hand, or a helper, to keep the thing steady. I'm sure there are more expensive models that work better than mine, but I've learned to make do.

As you turn it clockwise, it pushes the apples through the sieve at the bottom. If you turn it counterclockwise, it cleans the holes by scraping off the skin and seeds. If you don't have one of these, you can also use a spoon and a fine meshed sieve, working the mixture through with the back of the spoon.

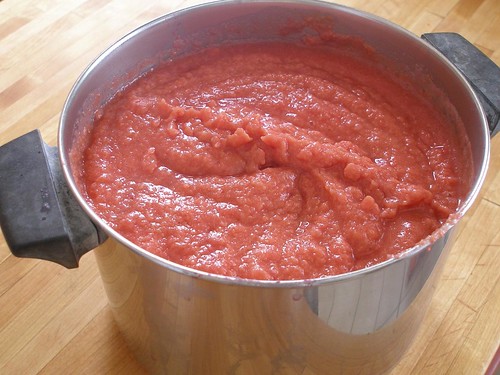
What you'll have at this point is basically pink, tart applesauce, well, crabapplesauce if you want to be technical about it.

P8193521

You can keep it plain, or add spices and sugar. I usually add just one thing... cardamom. I really like its flavor with the crabapples. I usually add about a half teaspoon for every four cups of sauce. And part of the appeal of using crabapples, is that they're so tart, so we don't add much, if any, sugar (maybe a half cup per batch). But feel free to add as much as you like.

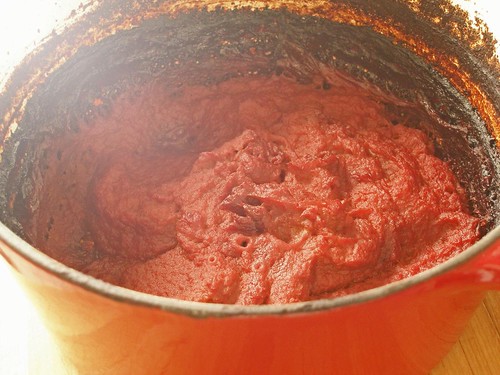
To turn this applesauce into "butter" I usually cook it down on the stove until it's nice and thick. Though, this year I tried it in the oven, which I preferred. Pour all the sauce into an oven proof pot, or if you've got a huge batch, into two oven proof pots. I used an enameled cast-iron and the ceramic insert from my slow cooker. Clean off the sides of the pot really well with a spatula. Set the oven for 325 degrees. Put the pots in and cook for 2 or 3 hours, stirring occasionally. What this does is cook out much of the water, reducing the volume and thickening the mixture. When it's done, it'll look like this.

P8253562 copy

Just scoop out the non-charcoaled stuff at the bottom. I'm guessing that if I'd been more diligent about scraping the sides of the pot with a spatula both before and during cooking, there'd be less black. But I'm fine with this because it didn't require me to stand over the stove for hours on end.

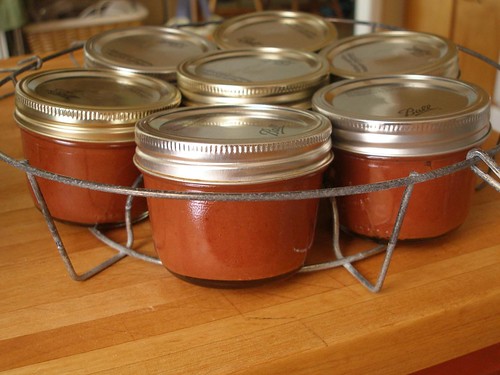
I canned this in little half pint jars using the waterbath method. If you haven't canned before, please know that it isn't particularly difficult, you just need to follow the directions.

P8253564

The original plan was to make these for Christmas presents. But if Joey has her way, I doubt there will be any left by then.

Monday, April 20, 2009

Organic Gardeners Unite

Remember the excitement you felt when you heard that the first family was going to put in an organic garden?

DSC_0181.jpg

To me it felt like, Yes, finally somebody in charge has the same values that I do. And that felt amazing. Honestly, it gave me so much hope for my children's, grandchildren's and great-grandchildren's future.

And it also encouraged me in growing my own organic garden. All the while, fantasizing about freshly picked and grilled beans.

DSC_0301.jpg

But, get this. The Mid America CropLife Association (MACA for short, a group that represents the makers of chemical pesticides) is upset with the idea that the garden will be organic.

In fact, what they said was, "the thought of it being organic made [us] shudder."

Funny that. The thought of putting poison on the earth and into our bodies makes me shudder.

MACA is petitioning the first lady to reconsider using organic methods, and it's up to us to petition just as loudly to encourage her to stick to her guns. You can see a copy of their letter to Michelle Obama here.

In case you think my desire for an organic garden is just touchy-feely, hippy-dippy stuff (no offense, I'm very touchy-feely and totally hippy-dippy myself), I would like to supply you with the following facts...

Dangers of Pesticide Use
-The occupation of farming has been linked to cancers of the central nervous system, lungs, lymph nodes and blood (Horne and McDermott, p 187).
-Children's exposure to pesticides in their food is higher than that of adults because "pound for pound of body weight, children drink more water, eat more food, and breathe more air than adults" (Landrigan and Garg, p 450).

DSC_0114.jpg

-A study by Curl, Fenske and Elgethun studied the level of pesticides in the bodies of preschool aged children. They determined that children who ate diets with conventionally grown food had six times more pesticides in their bodies than those who consumed organic diets (377).
-The most disturbing fact about the above study is that they found that those children eating conventional diets had exposure levels higher than that allowed by the EPA, while those eating organic diets were within safe levels (377).

DSC_0262.jpg

-Children lack the necessary enzymes that allow them to properly metabolize (break down) organophosphate pesticides so they are at an even greater risk for poisoning (Landrigan and Garg, p 450).

DSC_9050.jpg

-Organophosphate pesticides, which make up about 70% of the pesticides used in the US are "chemically similar to the chemical warfare agents originally produced during World War II, and they work by interfering with the nervous system of insects, as well as humans, other mammals, birds, and fish."
-"Symptoms of exposure include nausea, headaches, twitching, trembling, excessive salivation and tearing, inability to breathe because of paralysis of the diaphragm, convulsions, and at higher doses, death." ("What is an Organophosphate (OP) Pesticide?")

And one final note. According to Horne and McDermott, "we are losing about one third of our crops to pests in the United States, virtually the same percentage as before pesticides began to be used heavily" (181). Farmers pay more money than ever for chemicals, but are in the exact same spot in terms of crop loss. There is only one group of people who are benefiting from the use of these chemicals. I'll give you one hint, it's not the farmers and it's not the consumers.

If all of this infuriates you as much as it does me, then please do one (or all) of the following.
-Write to the Obamas and let them know your feelings. Really. You can do this. It only takes a minute or two. (Feel free to copy in anything from this post.) They need to hear from you. And it will feel so good when you hit submit.
-Sign this petition to the board members of MACA, letting them know that many of us care about the future of organic gardening. Who knows, maybe it'll convince them to go into another business. One that doesn't poison people.
-Forward a link to this post (or of the petition to MACA) to all of your friends and family. I rarely send out mass emails, but I think this one is important. Let them know that chemical fertilizers are poison.
-Buy organic produce the next time you go shopping and support those farmers who are trying to be part of the solution. Voting with your dollars always counts for more.
-Go to Local Harvest and sign up for an organic CSA (Community Supported Agriculture) or just find out what local farms are in your area.
-If you're really hot and bothered over all of this, join the Organic Consumers Association to keep up to date on all things organic.
-Start a vermicomposting system to make sure all of your food waste gets turned into compost for your soil.
-Right now is the perfect time of year to start your own organic garden, even if it only involves growing a few seeds in the windowsill. Start where ever you can. Because it is so worth it.

DSC_0113.jpg
The site Peaceful Valley has some wonderful, organic supplies for growing your own.

------------------------------
Works Cited

-Curl, Cynthia, Richard Fenske and Kai Elgethun. "Organophosphorus Pesticide Exposure of Urban and Suburban Preschool Children with Organic and Conventional Diets." Environmental Health Perspectives 111.3 (2003): 377-383.

-Horne, James E., and Maura McDermott. The Next Green Revolution: Essential Steps to a Healthy, Sustainable Agriculture. New York: Haworth Press, 2001. ("Writing in the first person, Horne describes growing up in a sharecropper family in Oklahoma, running his own ranch, and consulting with farmers as an agricultural economist. He shares what he learned as the Kerr Center experimented with new "sustainable" approaches to old problems on the Center's ranch/farm, and the experiences he has had working with the USDA's Sustainable Agriculture Research and Education (SARE) program. He has a broad perspective on what is happening in sustainable agriculture both on the farm and at the research station.")

-Landrigan, Philip J., and Anjali Garg. "Chronic Effects of Toxic Environmental Exposures on Children's Health." Clicial Toxicology 40.4 (2002): 449-456.

Friday, March 20, 2009

This Lawn is Your Lawn*

Just after Barack Obama was elected president, I ran across a group called Kitchen Gardeners International. They had created a campaign called Eat The View that was petitioning the president elect to replace the front lawn of the white house with a kitchen garden.

(Here's a quick little cartoon explaining the history of growing food at the White House. Good lesson for the kiddos too.)


The Garden of Eatin': A Short History of America's Garden from roger doiron on Vimeo.


Of course I signed their petition and put myself on their (e)mailing list.

And just yesterday I received an email from KGI announcing that the Obamas will actually be putting in a garden.


I'm not even sure exactly why it is that this makes me so very happy.

But it does.

* The title was borrowed from another video at the Eat The View site.

Friday, August 22, 2008

My Cornfield

Jeff: The garden's looking pretty good. Pick anything lately?

Me: No, I'm not sure how you know when the corn is ready.

Jeff: The button pops out.

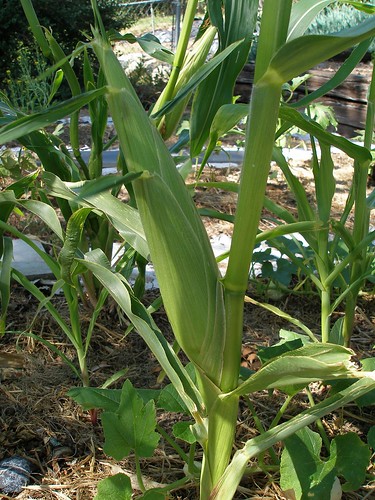
P8220024

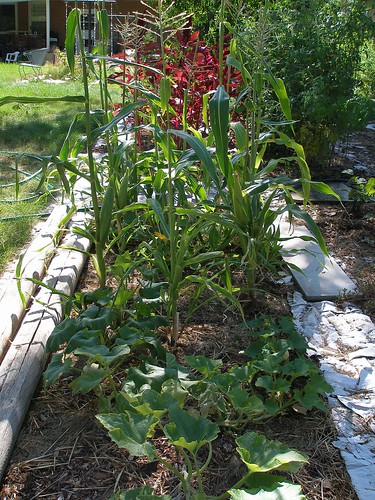
And here is a photo of the smallest cornfield ever.

P8220025

Impressive, huh? Those things are like four feet tall. Luckily I don't have to worry about any children living in my corn.

So that's good.

Wednesday, August 13, 2008

Grow Your Own- Mexican Dandelion Greens

Yes, we have actually harvested some produce out of our garden. Wee hoo!

DSC_9081.jpg

DSC_9122.jpg

DSC_9139.jpg

So, when Finny hosts a Grow Your Own Challenge, do I decide to use any of the actual vegetables from the actual garden?

I do not.

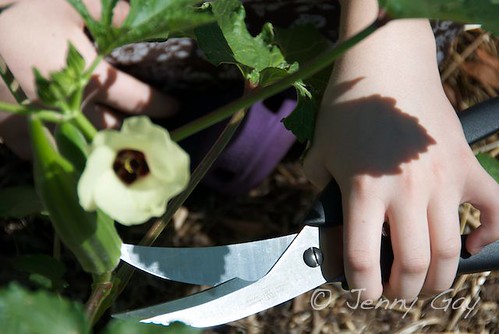
No. To me, it sounded like the perfect opportunity to attempt to cook dandelion greens. This is mainly because of the fact that we don't actually have enough of any one type of vegetable to make cooking them worthwhile. We have a couple ancho chilies, 10 leaves of spinach, a few jalapenos, 4 okra and a couple handfuls of tomatoes (which we're mostly just eating raw-so so good), plus some purple green beans (yes, I'm pretty sure they should be called purple beans, but, really, would you have known what I was talking about?).

DSC_9146.jpg

We do have lots and lots of dandelions, though. Which, cook down into not as much as you'd expect.

Anyway, I found a recipe for dandelions in my favorite vegetable cookbook ever (Vegetables Every Day). But, because I am apparently unable to ever follow a recipe as written (I use them more as a starting point than anything), it was completely different. Still great, though. If you don't want to do it like mine, the original recipe just called for a couple strips of bacon instead of chorizo (and no potatoes or chipotles).

P8120170

Here it is.

Ingredients
1 lb or so of dandelion leaves, washed really really well in two batches of soaking water with thick, lower part of stems removed
Anywhere from 1/2 to 1 lb Mexican chorizo (because everything tastes better with chorizo)
1 onion, diced
potatoes (how ever many are about ready to go bad in your storage container or at least that's how many I used)
salt
1 chipotle in ancho sauce, chopped super tiny small (because those pieces are hot)
2 teaspoons red wine vinegar

1. Start a big pot of water boiling. When it boils, poke the potatoes with a fork and then toss in the water. (OK, you all realize that you shouldn't actually throw the potatoes in the water, right? Just place them in there carefully.) Cook until tender.
2. While that's going, start the chorizo over medium heat. Once it's completely cooked, remove the chorizo, leaving the fat in the pan.
3. Add the onion to the chorizo fat. Add a pinch or two of salt. Cook till it's completely soft.
4. By this point the potatoes should be done. Take them out (I use one of these). Don't drain the water. Let cool a bit and chop up.

5. Bring the water back to a boil, add the dandelions and 1 teaspoon salt and cook until tender, about 6 minutes. Remove the greens, let drain, cool and chop.
6. Add the chipotle and the potatoes to the onion, cook for a bit, until the potatoes soak up some of that yummy chorizo fat.
7. Add the chorizo and dandelion, followed by the vinegar and salt to taste. Stir and cook until everything is well combined.

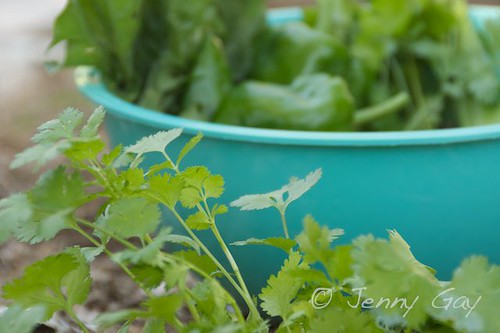
I served this over some homemade refried beans on tostada shells. Along with some cilantro and tomatoes from the garden. And Cotija cheese, one of the bestest cheeses ever invented. Oh yah, and sour cream smeared on the shell first so every bite has enough (although it did eventually ruin the structural integrity of the tostada shell and we had to eat these with forks).

It was worth it, though.

Also, be sure to stay tuned for more Grow Your Own. I'm totally going to exploit the fact that our youngest doesn't go to public school and have her pick crabapples for several hours tomorrow. I'll shout math problems to her while she's up in the tree so it'll count as homeschool.

Is it child labor if they're learning?