


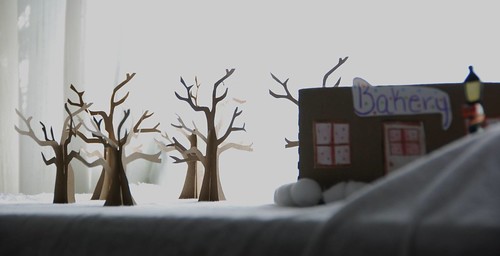
It wasn't until Joey and Randa started creating a winter scene that it occurred to me to make a whole forest of cardstock trees. I told the girls that they could use the big table in the living room, but had to save one corner for me.
And, thanks so much, Jenny, for taking such gorgeous photographs of this. I love how it feels like you're right down in there.
(If you're curious, that's a big sledding hill in the right foreground. There will be more pictures of the full table next week after the girls work on it this weekend.)
So, after some fiddling about, I created the following template for downloading from Flickr. (Click on the picture, choose 'All Sizes' and download the original size. This will print out on a regular 8 1/2 x 11 inch piece of paper. Thick cardstock works best.)

I'm also trying out a new service called Scribd.
Paper Tree Template Copy
Or go here to download.
Cut just inside the lines so they don't show on the finished piece. Also, when you cut the straight lines in the middle of the trunk, cut out a very thin sliver, on either side of the line, like in the next picture, and remove it so that the cardstock fits properly when you slide the two pieces together. The thicker the paper you use, the thicker this sliver needs to be.

These are fairly easy, if a bit time consuming, to cut out. You could easily create much simpler versions, though. Just make sure that the vertical cuts are perpendicular to the bottom of the tree. Also, make sure that the bottom of the tree is completely straight and fairly wide, which will create a sturdy base.
This table is near a window and the light creates some really interesting shadows on the various planes of the tree. They really are lovelier than I expected. I am so happy with them that I'm having to restrain myself from covering the entire table with them.
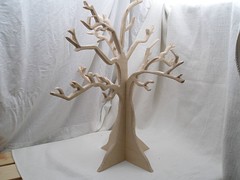
And just because I love the original wooden necklace tree stand, here's a picture of it again. This makes a nice winter decoration in and of itself... if I could only find the right home for it.
--------------------------------
Enjoy this tutorial?
Get more like it by subscribing to my RSS feed

11 comments:
Thank you! Wouldn't it be great in a lightweight wood, a bit larger, with delicate ornaments? Oh, now you've got me dreaming!
Oh how beautiful. I just love homemade seasonal decorations. Your girls' winter scene is so peaceful.
Oh, how cool! Thanks for the template!
These are so beautiful! Thank you for the pattern.
The different color contrasts of each tree are so cool.
Now Jaden wants to make some and she wants to know if that is the street light she gave Joey.
Thank you all for the nice comments!
And yes, Aurora, that is the street light Jaden lent Joey. Doesn't it work perfectly with the whole scene?
Thanks, Jaden!
these would be great to put on ponoko.com!
I want a forest in my house! Thanks for the template - I starred it in Reader and will be going back to it once this incessant work business is out for the holidays.
WEE! Free time to make a house forest!
So awesome! I've already saved it ... now I just need to come up with a way to use them. :) Thank you!
I love this! Thank you for the template.
Post a Comment