"Anyone that doesn't agree with leggings as pants can physically fight me.
And I'm going to win because I have a full range of motion due to the fact that I am wearing leggings as pants."

Friday, December 31, 2010

In My Life

In lieu of the ubiquitous Best Of post, how about a mind-blurring, possibly twitch-inducing video of all my flickr pictures (made over at Pummelvision). Which, ya I get it's still a Best Of of sorts. Just a recap of the last 5 years of my life (actually now that I think about it, some of my pictures are over 10 years old, but really there are some scanned pictures of my mom's from before I was born).


The first time I watched this I actually got a bit teary. In a good, I-really-like-my-life sort of way. It goes way too fast to focus on much of anything, but I think I like it like that. And each time I watch it something different catches my attention. Like in the letter from my mom, I can see the word "stubborn" very very clearly. It makes me smile.

Has anyone else tried this? I'd love to see yours if you do.

Update- I took the liberty of making Jenny's pictures into one of these too. Unsurprisingly there's more of me in this one.


Peace out, y'all.

Wednesday, December 29, 2010

The Best Bread Pudding. Ever.

This is our friend Peter.

106NCD80_DSC_1528

He used to be a chef.

In fact, we worked together at a restaurant almost 20 years ago. He was good friends with my mom and we've since adopted him into our family.

This is Peter's bread pudding.

106NCD80_DSC_1516

It is very delicious. And super easy. Peter agreed to make up a batch and share the recipe with you all.

One Word of Warning- Do not make the full batch unless you have many people to share it with. This stuff is impossible to say no to. And I'm pretty sure that, though it has the same ingredients as french toast, it doesn't have the same number of calories (a fact which has not stopped me from eating it for breakfast).

So, there's that.

Ingredients
-1 loaf white bread (the cheaper the better. really, it's ok, go for that 79 cent loaf sitting there)
-2 & 1/2 T. vanilla extract
-1/2 t. cinnamon (you can double this if you really want it to taste cinnamon-y)
-6 large eggs
-1 & 1/2 cups sugar (though when I made my batch of this, I went with just 1 cup and it was still very good- don't tell Peter, but I actually prefer it a bit less sweet. You make the call.)
-1 & 1/2 cups half and half
-1 & 1/2 cups heavy whipping cream

How To Put It All Together
-Tear up the bread into pieces. These don't need to be either uniform nor perfect. Lay them on a cookie sheet with sides (I believe this is technically called a jelly-roll pan, but I have never called it that). Put in a 225 degree oven for 5 or 10 minutes, stirring it around occasionally, so the bread gets dried out somewhat. You're not going for crisp-dry here, just day old stale.

106NCD80_DSC_1279

-After it has dried, pull it out, let it cool (possibly using this cute yardstick trivet) and pile it in a buttered baking dish (about 9 by 13 inches should be good).

Like so.

106NCD80_DSC_1287

-Turn the oven up to 325 degrees.

-In a largish bowl, mix the vanilla and cinnamon with a whisk.

106NCD80_DSC_1293

-Add eggs, sugar, half and half and cream.

106NCD80_DSC_1296

-Whisk until the sugar is dissolved (when you can no longer hear or feel the scritch scritch noise of the sugar crystals against the side of the bowl).

106NCD80_DSC_1305

-Pour this mixture evenly over the bread.

106NCD80_DSC_1322

You may or may not use all of it. But apparently it's good enough to drink. If you have no fear of raw eggs, that is.

106NCD80_DSC_1475

I think my Uncle Doug found it a bit too sweet.

106NCD80_DSC_1482 106NCD80_DSC_1485

-You don't need to completely submerge the bread, just up about three fourths of the way.
-Let it soak for about a minute and then push the bread down into the mixture (your hands are clean, right?)

106NCD80_DSC_1328

-You don't want any of the bread to still be dry, but not an excessive amount of pooled custard either.

106NCD80_DSC_1337
(pretty much like this, though it could have a teensy bit more liquid, in my opinion)

-Now comes the only slightly difficult part. Put that dish inside another, larger one (no duh, huh? like you're going to put it in a smaller one) and add water to the bigger one. This water bath helps to moderate the temperature so you don't get scrambled eggs.

106NCD80_DSC_1341

-Cover loosely with tinfoil and carefully put it in the oven.

106NCD80_DSC_1345

-Let it cook for about an hour (maybe longer), till it's no longer jiggly. Then pull off the tin foil and cook another 5 minutes or so.

-Be really, really, really careful when you pull this out of the oven. That water likes to splash. But if everything goes well, you will be rewarded for your efforts with this.

106NCD80_DSC_1489

-You can drizzle with caramel sauce (either homemade or store-bought), but honestly, I don't think it needs it.

106NCD80_DSC_1506

You can also make these individually in ramekins. The only difference is that they don't need to cook as long.

106NCD80_DSC_1424

106NCD80_DSC_1467

Note- special thanks to Jenny and Brad for volunteering their house for the bread pudding party and to Jenny for taking all the pictures.

Update- I made another batch of this last night (for a New Year's Eve party) and after eating one bite a friend said, "That's the best thing I've ever eaten."

Wednesday, December 22, 2010

Iced Gingersnap Tags

A couple of weeks ago I ran into a blog post that really started to get under my skin. The longer I thought about it, the more irked I became. Essentially, Chile referred to people who can successfully ice a sugar cookie as over-achievers.

PC224926

And that got me to thinking because (A) I don't like to think of myself as an overachiever, (B) My kids and I have been successfully icing sugar cookies for many years and (C) I believe that most projects like this are totally doable, there are just usually some tricks to learn (and maybe you just need to give yourself once or twice to get good at it). Calling it an overachievement gives people an excuse to not try. It means you expect perfection, which takes all the fun out of it.

And it is fun. Once you've got the icing made, this will entertain the kids for hours. Seriously. This year I made up two different batches (once with a 12 and 4 year old, the next time with an 18, 16 and two 12 year olds) and each time they decorated cookies for at least two hours.

Originally I started a batch of cookies and set about writing down all my cookie icing tips. And then Buster wrecked them, which prompted an idea that is much simpler and even cooler.

Skip right to the cookie icing and then turn your creations into tags.

PC224968

PC224969

At this time of year we always have a tin of gingersnap cookies from CostPlus around. These are perfect for this project because most of them are unbroken. We tried it with nilla wafers, but they were pretty banged up.

To start with, we drilled little holes in the cookies using a toothpick.

PC194891

There is a lot less breakage if you keep the cookie flat on a plate and twirl the toothpick as you push it in. And there will be breakage. But that's fine by me cause I get to eat all the broken ones.

Now let me explain something about icing. The way to get a smooth surface is to create flood icing. But if you only use flood icing, it'll run off the side of your cookie. So you need to mix up regular royal icing to create a dam.

Tip: I suggest seriously limiting your palette. I always use white and two or three coordinating colors. That way, no matter what kind of icing job you do, at least they'll all match. It's surprising how much this helps.

See like here. Even Kam's little piles of icing look cute all together.

PC104855

PC104869

Usually I make up one big batch of royal icing using the recipe from Cookie Craft, the one for piping, not flooding. (If you click here and go to page 16, you can see the recipes.) I've always used the pasteurized egg whites in the past, but this year tried Martha's recipe with meringue powder because I know how people freak out about eggs, even if they're pasteurized. I think I prefer the egg whites because this year's icing was a bit grainy in texture. But, like I said, we aren't aiming for perfect.

This works best if you have a standing mixer because you'll want to mix the icing ingredients for 3 to 5 minutes. You want it nice and thick, so that it'll hang from the paddle.

PC194880

What you have now is a batch of thick icing for piping. In several places, I've read that you should mix two batches (one for piping and one for flooding) and then tint them to match each other. But that's not how I do it because I am terrible at getting the same color more than once.

What I do is take this batch, divide it into 4 roughly equal parts and tint them individually.

PC194882

After I tint each one (using gel food coloring), I take half of it out and put it in a pastry bag. (Yes, I cheat and close these up with rubber bands. Also, I always put a piece of damp paper towel at the bottom of a glass and then stand the bags up in that. It keeps the icing at the opening from drying out.) I usually mix the color into them in the standing mixer, but I think next time I might try doing them directly in their individual jars.

PC104848

Then I add one, maybe two, teaspoons of water to the remaining icing. Voila! This is now flood icing. This can go into squeeze bottles, which they sell at Michaels.

PC104849

Now use the piping icing (in the pastry bag) to make a corral for the flood icing like so.

PC194884

Fill it a little more than halfway with the flood icing.

PC194886

And spread it out with a toothpick.

PC194887
(Notice how there are bubbles in this? Well, there shouldn't be. It's a sign that I added too much water. That's okay, though, because remember... fun, not perfect. They turned out fine.)

Now to add designs that lay flat with the background, go ahead and add flood icing right now. I find the way it self levels to be terribly satisfying.

PC194889

You might want to taste one or two, just, you know, to make sure they're okay.

PC104862
(Oh, Little Cookie, I am so going to eat you.)

You can drag a toothpick through these (before they start to dry) to get fun designs.

Randa made this one by making a bunch of circles and then dragging it out in a starburst pattern.

PC224980

You can also skip the flood icing to let more of the cookie show through or just create some texture (I think the brown of the gingersnap looks really nice with these colors).

PC224977

PC224979

Now, these need to dry on a cooling rack, for about 24 hours, I'd say. Once you've verified that they are solidly dry, you can flip them over and use the piping icing to write people's names on them. (BTW, go ahead and stick the piping bags and their glasses into the fridge when you're done after the first day. The icing will keep at least 24 hours, maybe 48. When you pull them out again, just squeeze some out to clear the tip a bit and begin piping.)

PC204916

Once that side is dry, you can string em up (I used hemp) and tie them on your packages.

PC224936

And I'm guessing that once you get the hang of icing these guys, you'll want to make your own sugar cookies to create larger- and customized- canvases on which to work.

Monday, December 13, 2010

Water Balloon Luminarias

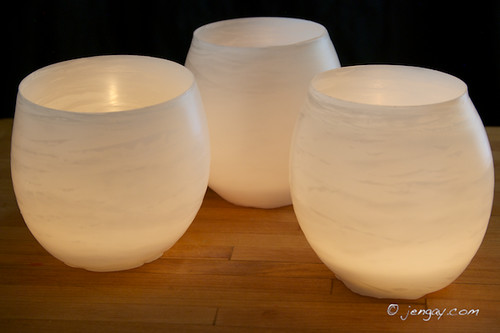
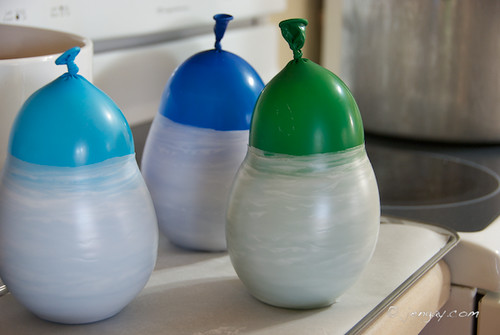
These are some of my favorite gifts to make. They're fairly simple, inexpensive (less than a buck each) and lovely. Each one has a unique, organic form that I can stare at for hours.

They would also make gorgeous table decorations for a wedding reception.

106NCD80_DSC_0842

The Simple and Abbreviated Instructions are as follows...
-Fill balloons with water (not water balloons, regular ones).
-Dip them in high melt wax until desired thickness
-Pop balloon and drain water
-Smooth top on hot cookie sheet

As usual, though, I've included a much more detailed version. And pictures. Lots of pictures because Jenny helpfully offered to photograph this project.

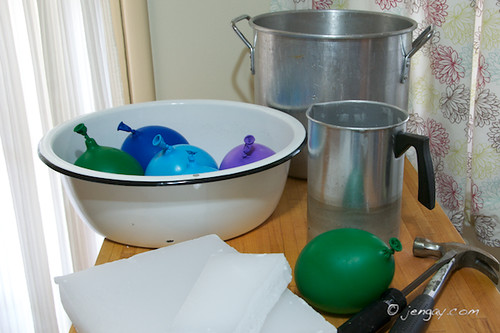
These really only require just a few Supplies to make.
-a large screwdriver and a hammer
-recently purchased, high quality 12" balloons (Don't buy actual water balloons. You don't want the kind that break easily. Fill a couple test ones way overfull to check their strength.)
-a double boiler, which consists of the following...
*an inner container for the melted wax (at least 5" wide and 8" tall)
*an old pot for the water (the outer container)
*something to lift the inside container up off of the bottom of the pot (a metal cookie cutter will work)
-an old cookie sheet and parchment paper (not shown)

106NCD80_DSC_0655

I also always pick up a pack of soy, tealight candles, the kind in plastic containers, not metal. I linked to some on Amazon so you can see them, but they've got 12 packs of them at Target for only 4 or 5 bucks. This kind won't ruin the luminarias because the soy melts at a lower temperature than regular wax and also because the kind with metal containers will conduct too much heat and melt right through the bottom.

Obviously, a battery operated LED tea light would work too, but I prefer real candles.

OK, so On To The Making, shall we?

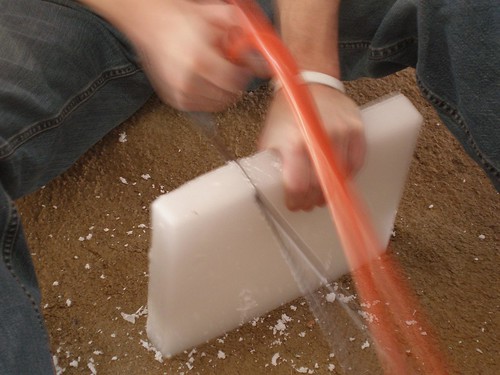
For our first attempt, we used a saw to get small enough pieces of wax. And by "we" I mean Jeff. Because I didn't have enough patience for that nonsense. But since Jeff is immune to nonsense (or at least has learned to pretend to be during our 13 years together), he volunteered. This took a really. long. time.

PC200053

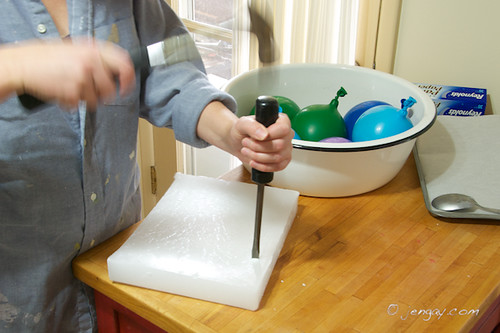
Luckily, in later years, I found a much better solution. Using a screwdriver instead of a handsaw will save you about 45 minutes and a huge mess.

106NCD80_DSC_0692

I took a couple of wacks at it, working the screwdriver partially in and removing it, lining up the holes in a straight line. After a few, a nice sized chunk easily broke off.

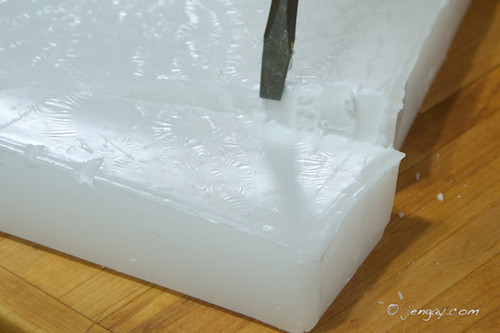
Next time I'll do it on a folded up towel on a slab of concrete or something, though. You run the risk of gouging whatever it's on. Which is something I didn't notice until the next day.

106NCD80_DSC_0696

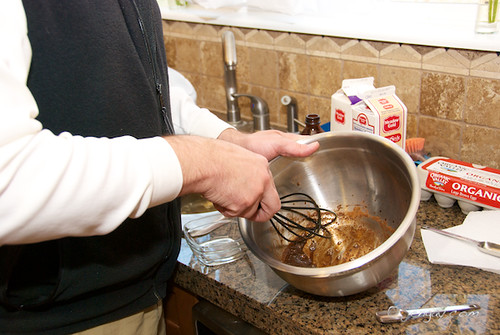
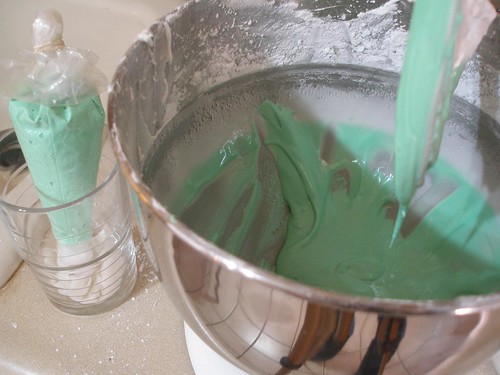
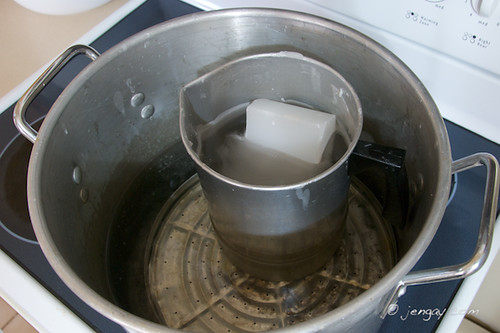
Then I melted the wax in the double boiler. The picture below shows my set up, with wax in the inner container and water in the outer container. If you want, you can use a much smaller outer container for the water, like shown here. In fact, I'd check that link for more information about safely melting wax. If you are attempting this, DO NOT put the wax container directly on the stove; it can create a very interesting fireball if overheated. Also, it's a good idea to have a fire extinguisher on hand, just in case.

106NCD80_DSC_0684

A couple tips for this bit.
-The water only needs to be at a bare simmer. Boiling isn't necessary or helpful.
-The water level only needs to be a couple of inches up the side of the inner container, not at the same level as the wax inside.
-Make sure to add more water as necessary to account for evaporation. DO NOT let this boil dry.
-Only add enough wax so that the level is about 3 or 4 inches from the top. The water balloon will displace lots of wax, so you don't want it filled to the top.
-Try to keep the wax at 180 degrees (F) while working.

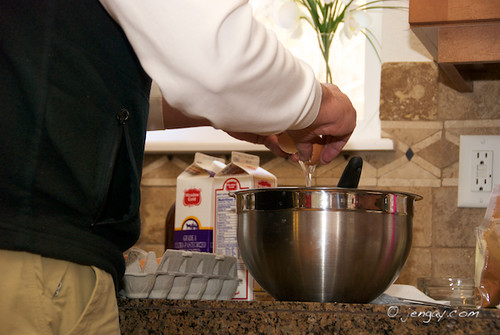
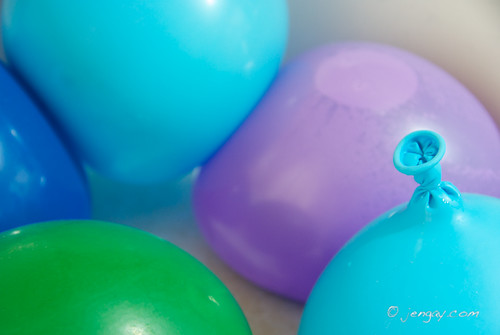
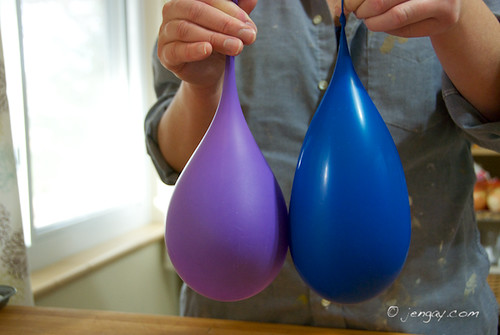
While the wax is melting, I fill up the balloons with water, letting as much of the air out as possible before tying them closed. Make sure that these are small enough to fit down inside the inner pot without touching the sides.

106NCD80_DSC_0666

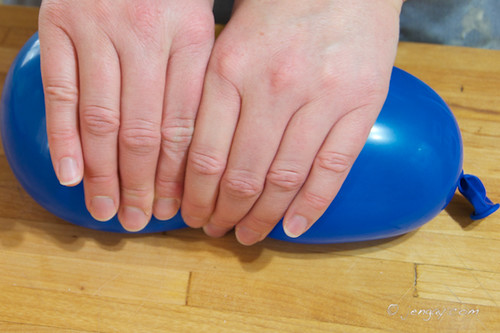
Since some of these seemed somewhat misshapen and a bit too squatty, I adjusted their shape, rolling them back and forth like so.

106NCD80_DSC_0716

It can make a difference.

If you care about that sort of thing.

106NCD80_DSC_0724

Note- I definitely should have unrolled my sleeves down to my wrists, for a bit of protection. Just sayin.

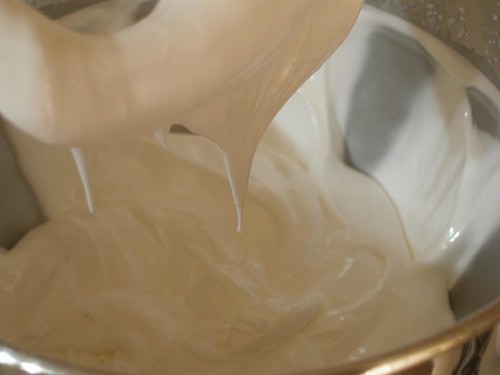
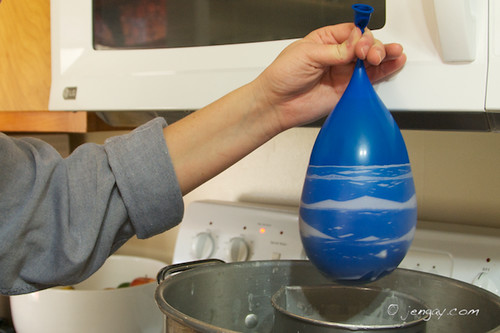
Once the wax is liquefied, I slowly dip one balloon 3 times and then place it on a parchment paper covered cookie sheet, pushing down gently to make the bottom flat. On the last dip of the three, I try to pause for a few seconds, shaking it a bit and letting as many of the drips as possible fall off before setting it down.

106NCD80_DSC_0725

106NCD80_DSC_0729

Note- if you forgot to remove all the air from the balloon, just make sure that you don't dip it any further than the water/air line. In fact, don't get near it. The water inside regulates the temperature and, you know, keeps the balloon from exploding. Also, be sure to keep the balloon from touching the side of the container.

Then I dip two more balloons the same way. I only have three going at a time because it's easier to keep track of the number of dips.

Then I repeat. Total, I do anywhere from 5 to 8 sets of 3 dips (15 to 24 layers total), depending on how thick I want them. This time they were on the thinner side, only 15 layers.

106NCD80_DSC_0752

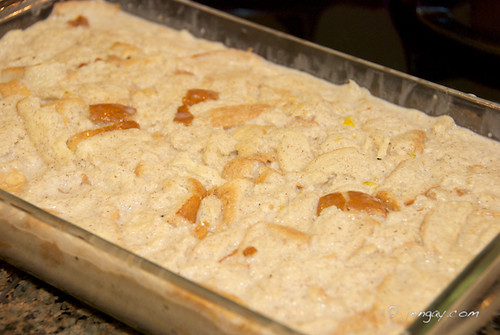
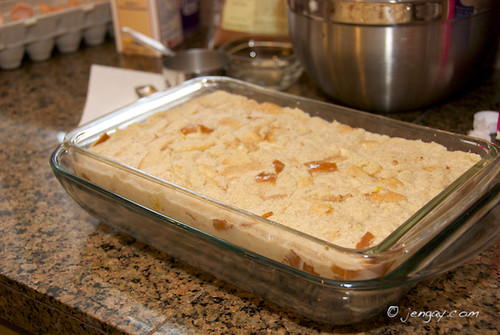
After they are completely cooled, I empty them over the sink.

106NCD80_DSC_0766 106NCD80_DSC_0767

The tops will be raggedy at this point. I've considered leaving them this way, but I'm worried they'll get mangled.

106NCD80_DSC_0807

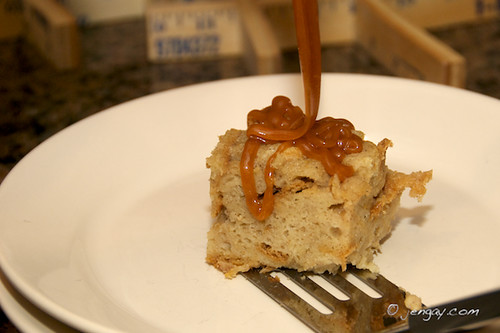
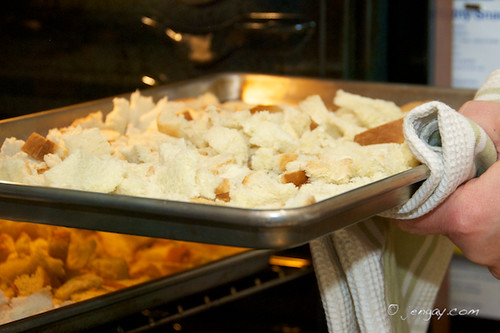
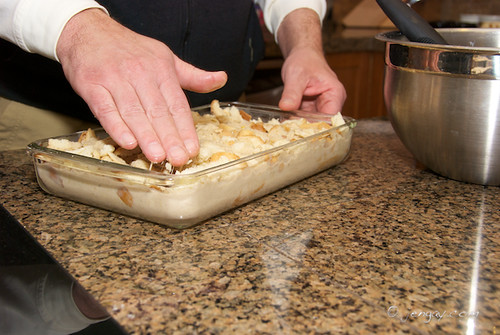
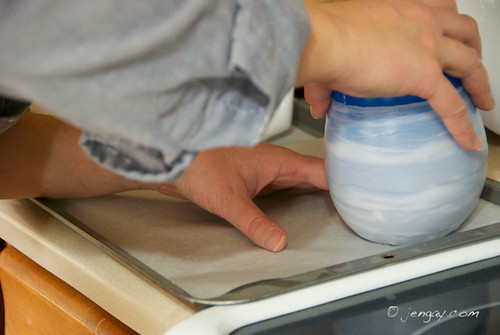
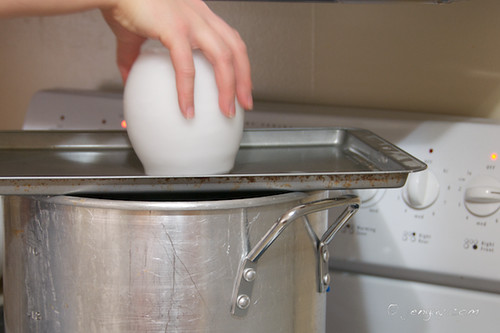
Now I remove the parchment paper and place the cookie sheet on top of my double boiler. After about 5 minutes, it gets hot enough to melt the rim smooth.

106NCD80_DSC_0826

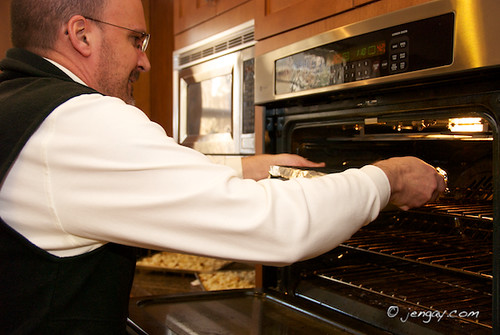
If you're using a smaller double boiler, you can put the empty cookie sheet in a low oven and heat it that way. Just rub the top of the luminaria around on it until it's smooth.

Add a tealight and you're done.

One final and important note- The idea originally came from Peak Candle Supply, where I bought my wax. I've made these on many occasions and have never had any problems. But if a balloon were to break during the dipping process, it would be very bad. So this project is very much one to do at your own risk.