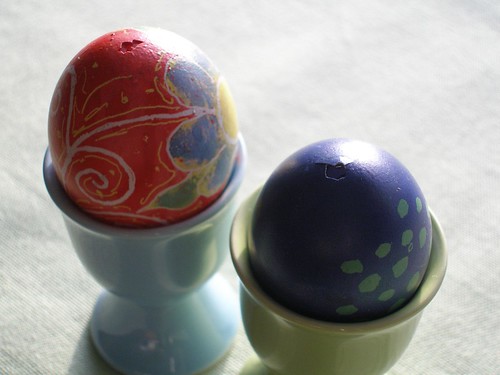
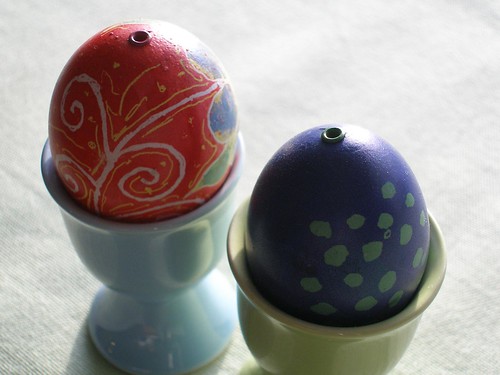
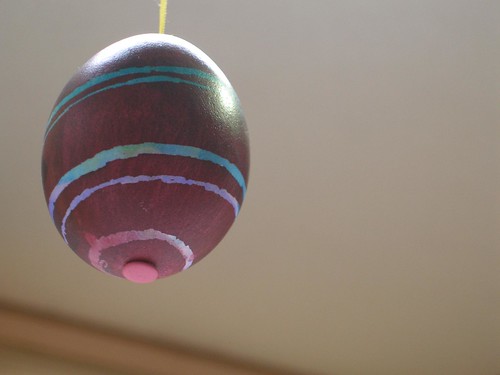
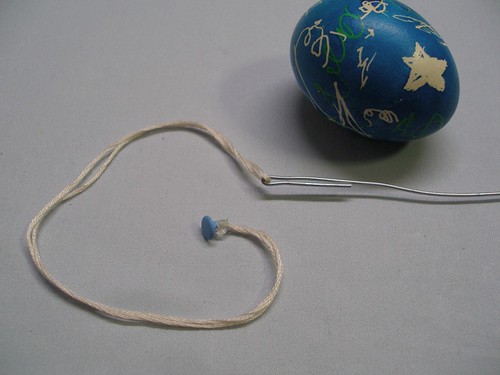
"Anyone that doesn't agree with leggings as pants can physically fight me.
And I'm going to win because I have a full range of motion due to the fact that I am wearing leggings as pants."
Showing posts with label How To. Show all posts

Monday, December 13, 2010

Water Balloon Luminarias

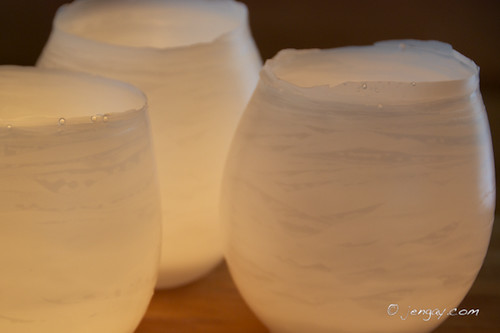
These are some of my favorite gifts to make. They're fairly simple, inexpensive (less than a buck each) and lovely. Each one has a unique, organic form that I can stare at for hours.

They would also make gorgeous table decorations for a wedding reception.
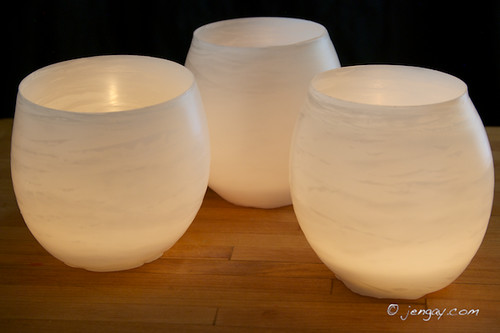
106NCD80_DSC_0842

The Simple and Abbreviated Instructions are as follows...
-Fill balloons with water (not water balloons, regular ones).
-Dip them in high melt wax until desired thickness
-Pop balloon and drain water
-Smooth top on hot cookie sheet

As usual, though, I've included a much more detailed version. And pictures. Lots of pictures because Jenny helpfully offered to photograph this project.

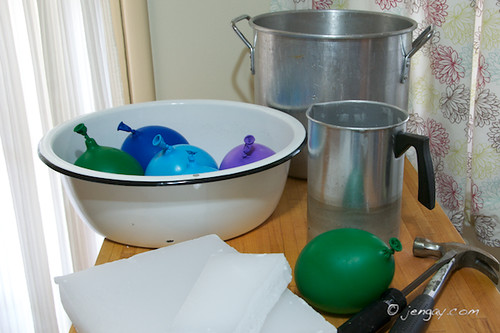
These really only require just a few Supplies to make.
-a large screwdriver and a hammer
-recently purchased, high quality 12" balloons (Don't buy actual water balloons. You don't want the kind that break easily. Fill a couple test ones way overfull to check their strength.)
-a double boiler, which consists of the following...
*an inner container for the melted wax (at least 5" wide and 8" tall)
*an old pot for the water (the outer container)
*something to lift the inside container up off of the bottom of the pot (a metal cookie cutter will work)
-an old cookie sheet and parchment paper (not shown)

106NCD80_DSC_0655

I also always pick up a pack of soy, tealight candles, the kind in plastic containers, not metal. I linked to some on Amazon so you can see them, but they've got 12 packs of them at Target for only 4 or 5 bucks. This kind won't ruin the luminarias because the soy melts at a lower temperature than regular wax and also because the kind with metal containers will conduct too much heat and melt right through the bottom.

Obviously, a battery operated LED tea light would work too, but I prefer real candles.

OK, so On To The Making, shall we?

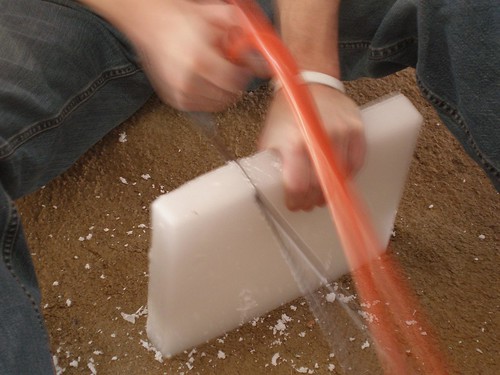
For our first attempt, we used a saw to get small enough pieces of wax. And by "we" I mean Jeff. Because I didn't have enough patience for that nonsense. But since Jeff is immune to nonsense (or at least has learned to pretend to be during our 13 years together), he volunteered. This took a really. long. time.

PC200053

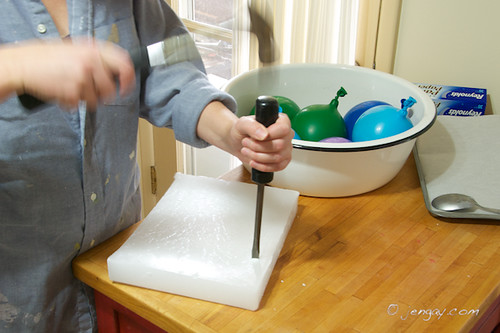
Luckily, in later years, I found a much better solution. Using a screwdriver instead of a handsaw will save you about 45 minutes and a huge mess.

106NCD80_DSC_0692

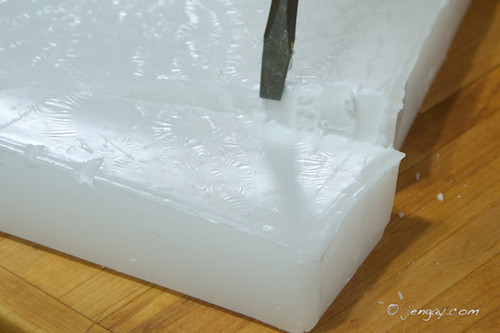
I took a couple of wacks at it, working the screwdriver partially in and removing it, lining up the holes in a straight line. After a few, a nice sized chunk easily broke off.

Next time I'll do it on a folded up towel on a slab of concrete or something, though. You run the risk of gouging whatever it's on. Which is something I didn't notice until the next day.

106NCD80_DSC_0696

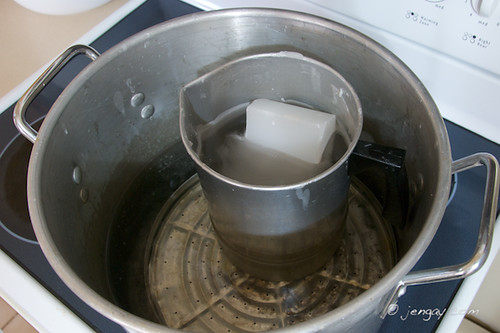
Then I melted the wax in the double boiler. The picture below shows my set up, with wax in the inner container and water in the outer container. If you want, you can use a much smaller outer container for the water, like shown here. In fact, I'd check that link for more information about safely melting wax. If you are attempting this, DO NOT put the wax container directly on the stove; it can create a very interesting fireball if overheated. Also, it's a good idea to have a fire extinguisher on hand, just in case.

106NCD80_DSC_0684

A couple tips for this bit.
-The water only needs to be at a bare simmer. Boiling isn't necessary or helpful.
-The water level only needs to be a couple of inches up the side of the inner container, not at the same level as the wax inside.
-Make sure to add more water as necessary to account for evaporation. DO NOT let this boil dry.
-Only add enough wax so that the level is about 3 or 4 inches from the top. The water balloon will displace lots of wax, so you don't want it filled to the top.
-Try to keep the wax at 180 degrees (F) while working.

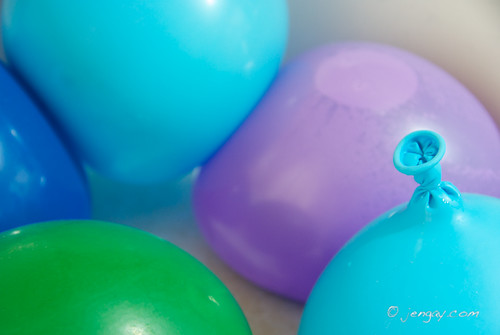
While the wax is melting, I fill up the balloons with water, letting as much of the air out as possible before tying them closed. Make sure that these are small enough to fit down inside the inner pot without touching the sides.

106NCD80_DSC_0666

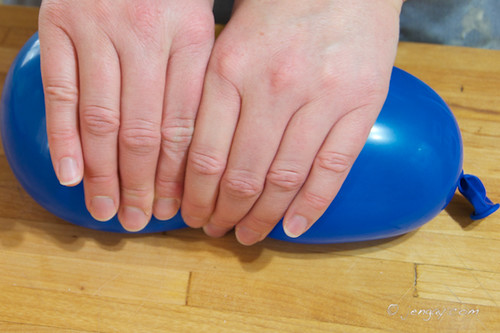
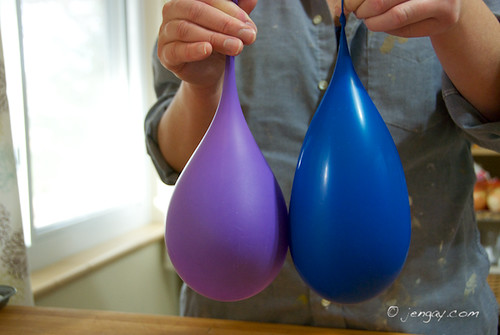
Since some of these seemed somewhat misshapen and a bit too squatty, I adjusted their shape, rolling them back and forth like so.

106NCD80_DSC_0716

It can make a difference.

If you care about that sort of thing.

106NCD80_DSC_0724

Note- I definitely should have unrolled my sleeves down to my wrists, for a bit of protection. Just sayin.

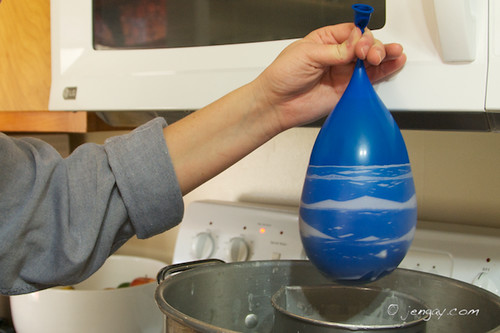
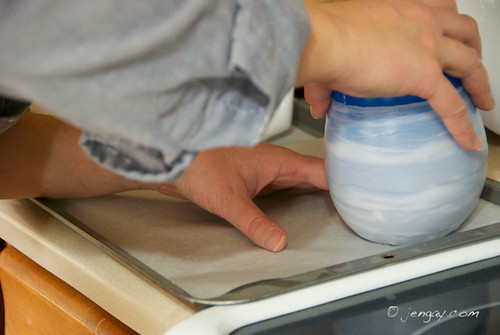
Once the wax is liquefied, I slowly dip one balloon 3 times and then place it on a parchment paper covered cookie sheet, pushing down gently to make the bottom flat. On the last dip of the three, I try to pause for a few seconds, shaking it a bit and letting as many of the drips as possible fall off before setting it down.

106NCD80_DSC_0725

106NCD80_DSC_0729

Note- if you forgot to remove all the air from the balloon, just make sure that you don't dip it any further than the water/air line. In fact, don't get near it. The water inside regulates the temperature and, you know, keeps the balloon from exploding. Also, be sure to keep the balloon from touching the side of the container.

Then I dip two more balloons the same way. I only have three going at a time because it's easier to keep track of the number of dips.

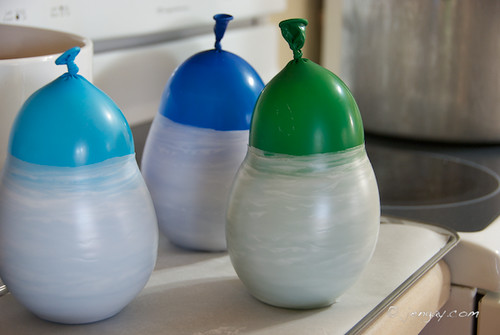
Then I repeat. Total, I do anywhere from 5 to 8 sets of 3 dips (15 to 24 layers total), depending on how thick I want them. This time they were on the thinner side, only 15 layers.

106NCD80_DSC_0752

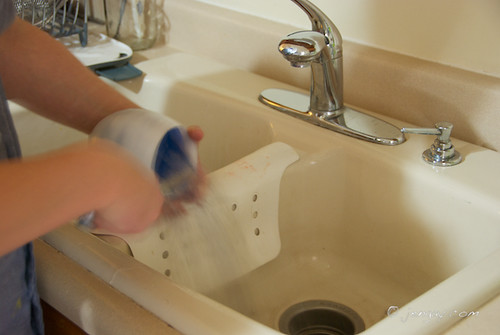
After they are completely cooled, I empty them over the sink.

106NCD80_DSC_0766 106NCD80_DSC_0767

The tops will be raggedy at this point. I've considered leaving them this way, but I'm worried they'll get mangled.

106NCD80_DSC_0807

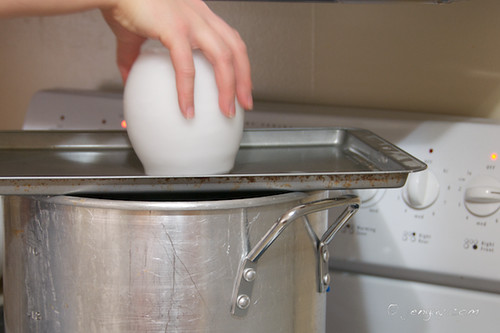
Now I remove the parchment paper and place the cookie sheet on top of my double boiler. After about 5 minutes, it gets hot enough to melt the rim smooth.

106NCD80_DSC_0826

If you're using a smaller double boiler, you can put the empty cookie sheet in a low oven and heat it that way. Just rub the top of the luminaria around on it until it's smooth.

Add a tealight and you're done.

One final and important note- The idea originally came from Peak Candle Supply, where I bought my wax. I've made these on many occasions and have never had any problems. But if a balloon were to break during the dipping process, it would be very bad. So this project is very much one to do at your own risk.

Thursday, November 11, 2010

Prettied Up Pantry

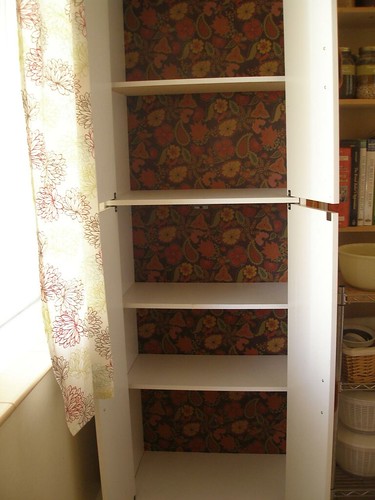
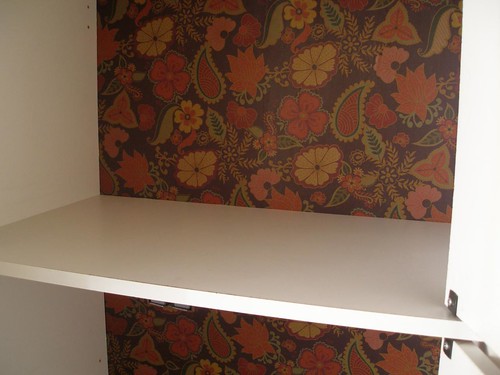
From conception to completion this project took less than 48 hours, which just might be a new personal record. Also it cost less than 10 bucks.

PB014387

And just in case that wasn't enough wonderfulness, I also managed to line the drawers of our butcher block island with some of the leftover paper.

PA314386

So it was like two projects in one.

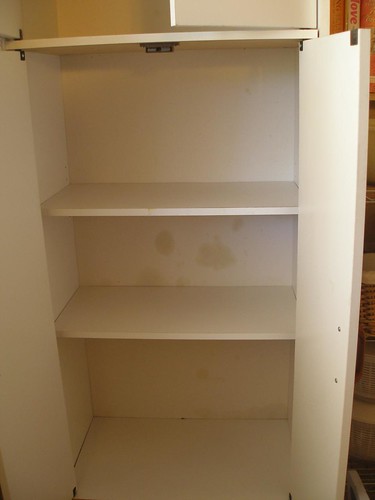
It started as I was pulling everything out of our pantry (which is really just a large stand-alone cabinet in our kitchen). This sucker was here when we moved in and until our kitchen magically grows itself some extra storage space, it's gonna stay right where it is. Anyway, after I pulled all the cans and boxes out, I realized just how very, um... unpretty the inside of it was.

PA304368

So I decided to do something about it.

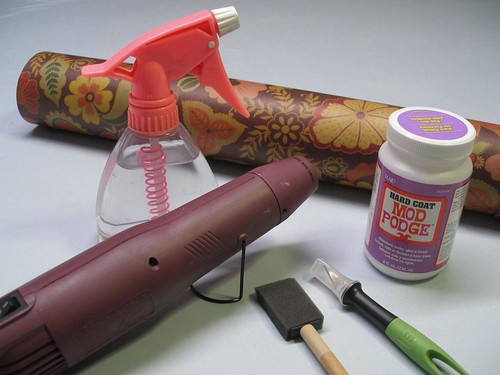
Here are the Materials I used
- spray bottle filled with water
- wrapping paper (mine came from Cost Plus) 4 bucks
- Mod Podge- Hardcoat (I bought mine at Michael's with the weekly 40% off coupons) 5 bucks
- sponge brush (you might want to get one that's bigger than the one in the picture)
- heat gun (like for scrapbooking) This isn't totally necessary, but certainly came in handy. I'm guessing that a blow dryer would work too, but I can't say for sure as ours is old and no longer puts out any heat, just cold air.

PB104440

Now I won't lie to you. Mod Podge is really fiddly to work with. It puckers right the hell up, no matter how carefully you smooth as you go. There is a reason that decoupage involves small little pieces of paper and not big sheets. But I managed to get results so I thought I'd give my thoughts on the process.

How To
- First I removed the back from the cabinet. It left the cabinet itself a bit wobbly, but I kept the doors closed and it survived the process.
-Then I went to work on the the back, sealing up any greasy looking stains with one coat of Mod Podge (MP) and letting it dry completely.
-Starting at one end, I applied a thin coat of MP in sections about a foot long, then smoothed down the paper while my lovely assistants (first Jeff then Joey) held the remaining paper up off the surface. Note- When attaching the first bit of paper, I let some of it hang off over the sides.
-Then I applied more MP and smoothed down more paper.
-After the whole thing was in place, I DID NOT mess with the puckers that formed before my eyes. I learned the hard way that this only causes creases.
-Instead, working with one square foot section at a time, I misted it lightly with water, let it soak in for a minute and then hit it with the heat gun, which I moved back and forth quickly. This shrank just about all the puckers. I was so pleased with myself that I had to record the process. Here's a quick video of the magic.

-After I had it all attached, I let it dry overnight.
-Then I flipped it over and, using an exacto blade and a cutting mat, trimmed the excess paper.
-Back on the pretty side, in order to protect the surface, I did 3 top coats of Mod Podge section by section, letting it dry for 30 minutes between each coat. The first of these did cause some more puckering, but not nearly as much as before. I used the heat gun when necessary.
-Then I nailed the whole thing back in place and called it a day.

PB014389

Done and done.

Wednesday, May 5, 2010

Chalkboard Paint and yes, Mason Jars

Great ideas, everyone! And just so you know, this giveaway will be a random drawing as I could never presume to stand in judgment of your ideas, wonderful as they all are. (I do especially like adaptive reUse's idea for the chalkboard coffee table and Finny's idea for a scoreboard for outside games. I also admire all of you who can plan meals and stick to them. My menu board would be a big crossed out mess as I tend to change my mind at the last minute.)

And I guess I should've known that a couple of you would come up with an idea or two that I actually planned to write about this week. Finny's especially, shouldn't have been a surprise at all (over time, I've realized that she and I have a similar kind of crazy, because, hello, just look at this fantasticness). I don't know Anna well, but she's right there with us, at least when it comes to storage; I'm not sure how she feels about tomatillo t-shirts with pithy gardening geek sayings. (And also, lame, "tomatillo" is not deemed a word according to my automatic spell checker thingy.)
Did any of that make a bit of sense?

So should I just get on with today's post? It's about Mason jars, a subject that I've admitted to having a problem with in the past.

102NCD80_DSC_9656.jpg

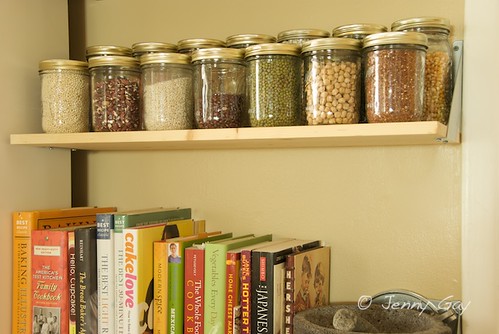
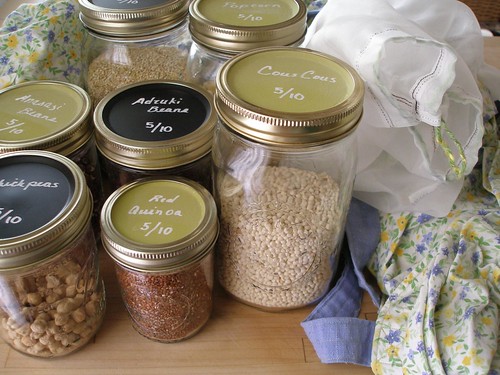
These days I use very few plastic bags thanks to my fabric grocery bags and produce bags. Some time ago I realized that I could also add Mason jars to the arsenal in my war on plastic, especially when it came to buying dry bulk items.

P5051563

With the help of some fine sandpaper and chalkboard paint (both the spray can and a homemade batch), I covered the flat part of the 2-part lids. Then I could bring the empty jars right to the store and write directly on the lids.

This was a less than ideal situation until I found the (queue celestial music) Chalk Markers (that should be said in a deep God-like voice). Because regular chalk? Not only did it look crappy, but I couldn't fit much more than the item number because the line it made was so thick.

Oh, but chalk markers? So great.

Writing with thin lines gives me plenty of room to fit in the name, item number and/or date which is super handy because, frankly, I don't know how old most of these things are. Some have definitely been around awhile.

P5051550

And is it lame that the reason I hadn't posted this idea before is because the plain chalk looked ugly? As much as I like functional, I adore pretty.

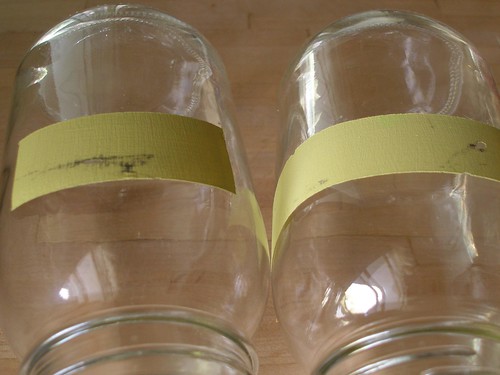
I also tried putting the chalkboard paint on the side of the jars, but it presented a few problems.
1) I had to get special, smooth sided jars because regular Mason jars have all kinds of raised embossing on the side.
2) When I brought the jars to the store and back, the friction created as they rubbed against each other took off some of the paint, which made me very very sad.
P5051551
3) I'm not completely sure I actually like the look. Though, to be fair I've only tried it with the green, homemade batch that matches the kitchen and not the black spray stuff, which looks a bit more, um sleek, I guess. In these pictures, they actually look pretty good, but all I notice when I look at them in real life is that the painted areas aren't completely lined up. And based on my experience with taping and painting these, getting them perfectly lined up is pretty hard to do.
P5041526
And I have just enough OCD in me to be bothered by that. Also, these shelves aren't tucked away in the pantry, but front and center in my kitchen. I just haven't been able to make up my mind to the point where I can commit to painting all my jars.

Tips
-If you're interested in painting on the jars, what I did was tape off the area and do 3 coats of the paint using a sponge brush.
-One thing I have noticed while using the markers on the homemade paint is that it sometimes doesn't come completely clean. It seems to work better if you rub a regular piece of chalk all over it and then wipe it off with a dry rag first, though.
-I didn't have this problem at all with the spray on chalkboard paint. Those puppies wipe perfectly clean.
-The lids are washable, but you don't want to let them soak in water for too long or the paint will start to peel off.
More Tips Thanks to an Email I Just Got from Finny
-These markers are NOT messy at all once they're dry, which takes a minute or three. You can scrape it off with your fingernail, but otherwise they pretty much stay put and don't smear at all.
-To remove the water-soluble kind, you just wipe with a wet rag. And according to the website, to remove the waterproof kind, you can use an ammonia based cleaner, like Windex.

For those of you who haven't yet entered the drawing for a set of Chalk Markers, be sure to check it out. It runs through Sunday night.

Tuesday, May 4, 2010

Chalk Markers Giveaway and Upcycled Planters

The first time I saw Martha's instructions for making a custom colored chalkboard on the wall, I really geeked out. Everywhere I looked, I began to see the potential for chalkboards. And so I started painting them all over the place, using her homemade recipe.

But oftentimes I was disappointed with how the actual chalk looked. It was either not bright enough, or I couldn't write small enough for the space.

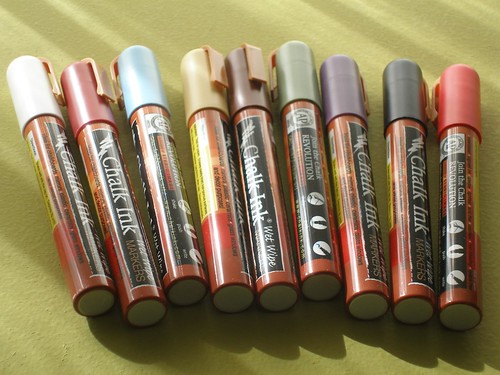
Until, that is, the magical and life-changing day that I discovered Chalk Ink Markers, thanks to Creative Kismet and Maize in Montana.

P5041528

These markers come in 2 different types, water-washable and water-proof. I bought some of the water-washable kind because that's what they carried at the local art store. After doing a small test on the corner of Randa's chalkboard, the girls went to town with them.


P5041533

P5041521

P5041535

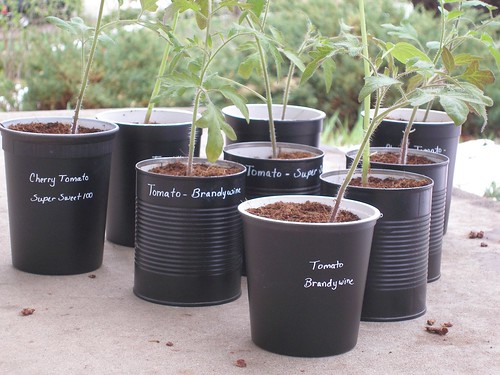
The first thing *I* did was make containers to pot up some of my seedlings by sprucing up some recycled containers using black chalkboard spray paint.

P4241458
(And since these are water soluble, it was a good thing that I normally water all my plants from the bottom. These totally run if they get wet. Though I'm sure the water-resistant kind would work brilliantly. I just haven't bought me any. Yet.)

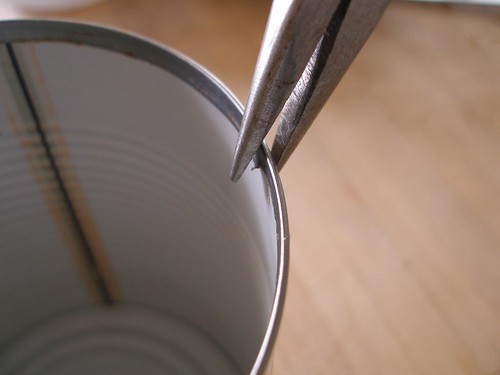
After making sure to remove the hand-slicing bit of metal on the top (and pinching it down flat enough that I could run my fingers over it without getting cut)...

P4171256

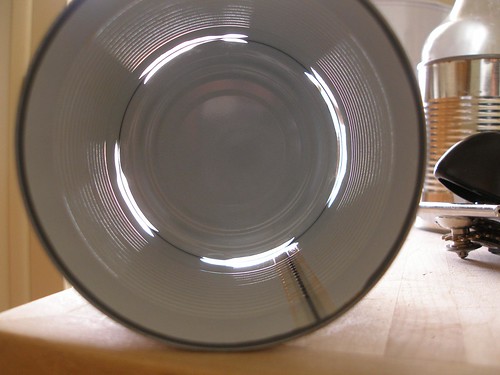
I cleaned them well and put some holes in the bottom for drainage. For the metal cans, I used the can opener to cut several, inch-long openings.

P4171262

For the plastic I either drilled holes or simply stabbed it in several places with a screwdriver, which didn't make the holes I was hoping for, but cracks that drained fine just the same.

Then I sanded the metal with fine grit sandpaper and wiped clean. For the plastic, I went over the entire surface with turpentine on a cotton ball. I was able to spray the metal containers directly with the chalkboard paint, but needed to prime the plastic first with a special primer. Then I sprayed on a few layers of the chalkboard paint, letting them dry in between. As always, when using spray paint, several thin coats are better than one thick one, which will drip and make you sad.

After I planted them, I used the white marker to write the name and date that I started the seeds.

So is anyone else as incredibly excited to own a set of these markers as I was? Because I've contacted the company and they've offered to sponsor a contest here with a 5 pack of markers. Wee!

To qualify for the drawing, just leave a comment letting me know what amazing and creative uses you plan to put these to, should you be the lucky winner.

P5041532

The contest will run through Sunday at midnight during which time I'll post about some of the other chalkboard projects I've done.

If you have any ideas of your own for chalkboard ideas, please feel free to link to them in the comments.

Good Luck!

Wednesday, March 31, 2010

3 Less Frustrating Ways to Dye Blown Eggs

So as many people have mentioned, dying blown eggs is a bit of a pain. But we really prefer blown eggs over hardboiled, so we've soldiered on over the years.

The problems are many. For one, they float. For two, they take in a lot of liquid and slowly drip it out as they're drying. I have tried various methods to remedy this, some have worked better than others, but frankly none of them are both perfect and easy. So here's another post in which I give you a bunch of options, including the pros and cons of each approach.

This is definitely a case when putting more effort will yield better results. I suggest you choose based on your level of patience.

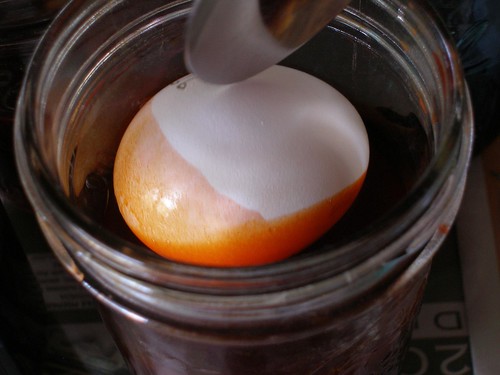
Method 1- Dying the Egg before Blowing
Pros- Eggs will sink nicely in the dye bath. Doesn't require specialty tools, just wax. All of the eggshell gets dyed.
Cons- If you plan to use the egg innards, you'll need to use a food safe dye (not the dyes that come with the Ukranian kit). Can be a bit more messy. There's a risk that you may put a lot of effort into the dying process and then accidentally break the egg at the end. I wouldn't try this method until you feel confidant with your egg blowing skills.

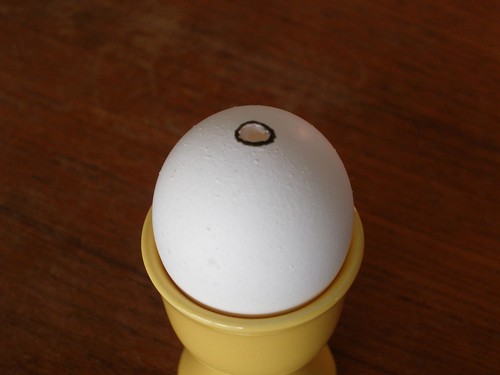
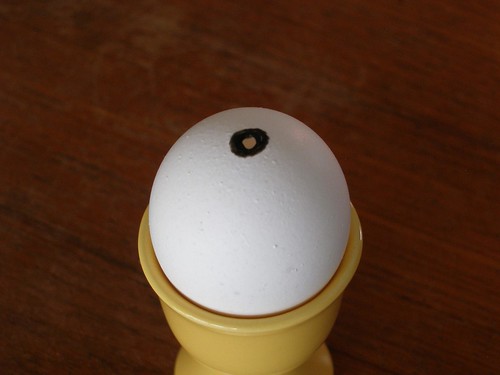
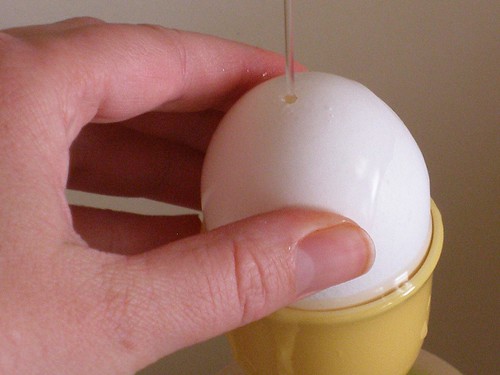
For this method, you'll just dye raw eggs however you'd like. When you're done, dip the ends of the egg into melted wax (from a candle) or drip candle wax over the ends or, if you have one, use the kistka tool to apply the wax. Follow this tutorial to poke holes in the ends...

P3310959
(Small end of the egg)

P3310960
(Large end of the egg)

and carefully blow out the innards, doing your best to keep those innards off the undyed part of the eggshell. The wax will protect the dye at the ends. Melt the wax off in a 300 degree oven for about 5 minutes and then wipe clean with a paper towel (like here).

Method 2- Sealing the Holes with Wax, but Filling the Egg with Water First
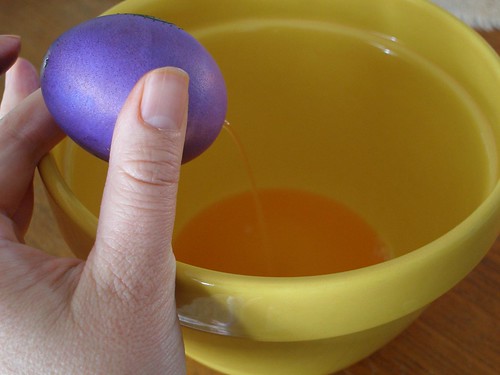
Pros- Eggs will sink in the dye. You can eat the egg innards no matter what kind of dye you use. When emptying the dyed eggshell, it's easier to get water out than the egg innards.
Cons- Will leave a tiny bit of undyed shell near the holes. Is sort of difficult if you don't have the kistka tool. The entire process is somewhat tedious and may make you feel a bit anal retentive.

For this, you'll want to start with already blown eggs. Using the kistka tool, cover the smallest hole with wax. It works best if the tool is really hot (as the wax will come out much easier). You'll want to first make a circle outside the hole.

P3300950
(All I have are pictures of sealing up the larger hole. Pretend these pictures are of the smaller one.)

Let the wax cool and patiently, like, really patiently, fill in the hole, bit by bit. This process may feel really frustrating at first, but it gets better, probably not more than about a minute each.

P3300951

Needless to say, the smaller the hole, the easier this will be. In fact, you might be able to pull off this trick that I show in the video below.


Now, flip the egg over and hold the bigger hole under a thin stream of water filling the egg almost full with warm (not hot) water. (I suggest using warm because if you use cold water, as you work with the egg the water will heat up and expand very slightly, which will increase the pressure inside the egg and force some of it out the holes.)

P3310963 copy

Dry the top of the egg and seal it up with more wax.

Dye as usual.

When you're done, add a bit more wax around the biggest hole to protect the dye like in Method 1. Holding the egg over a bowl or the sink, first pick off the bottom wax and then the top bit of wax and allow all the water to spill out.

P3310968

P3310970

You may need to use the egg blowing tool to get the last bit of water out. Melt the rest of the wax off like described here.

Method 3- Sealing the Holes with Wax
Pros- Keeps liquid from getting inside of the egg making the process much less messy because it won't drip. Doesn't involve emptying the egg after it's been dyed.
Cons- Like Method 2, it will leave a tiny bit of undyed eggshell near the holes. It's sort of difficult if you don't have the kistka tool. The eggs still float in the dye so you'll need to spin them or hold them under the dye with a spoon. (I'd say this method is best suited for quick working dyes like the kind specifically for Ukranian decorating.)

P3310954

Basically, blow the eggs like normal, let them dry and then cover over the holes with a bit of wax like described in Method 2. Or alternately, you can very carefully drip melted wax from a burning candle onto the hole. Dye as you please and then melt off the wax in the oven like so.

OK, so that's it. Information overload? If this is all too much to take in, just carry on like you never read this post. I'm sure however you dye eggs is just fine.

--------------------------------

Enjoy this tutorial? Get more like it by subscribing to my RSS feed

------------------------------

Related Posts-
Easter Prep (for Blown Eggs)
How to Blow Eggs- 7
Ukrainian Egg Dying
P3280899
Egg Drying Rack
P3260818
Hanging Blown Eggs
P3290912
Indoor Easter Garden
102NCD80_DSC_1208.jpg

Monday, March 29, 2010

Hanging Blown Eggs

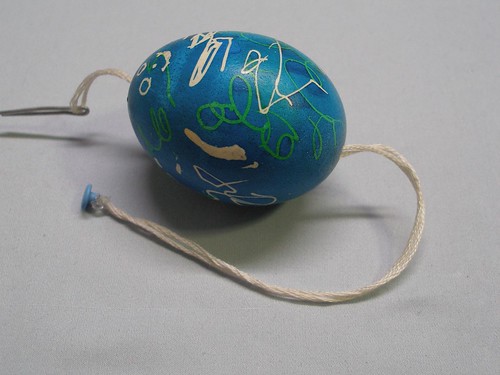
Once your beautiful eggs are all dry, there are quite a few ways to get them ready to hang.

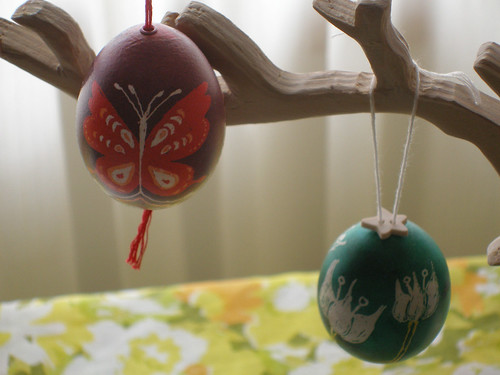
(This year I didn't cut any live branches, so I pulled out my necklace tree for a decoration, as I sometimes do.)

P3290912

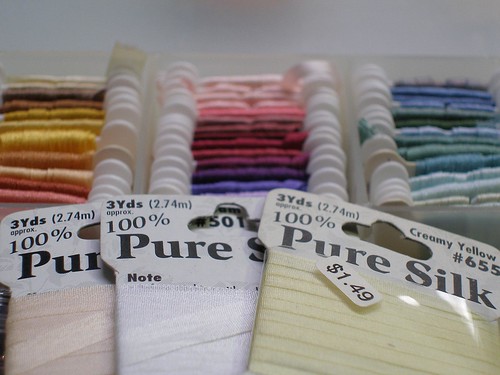
Personally, some of my favorite materials to hang them with are plain ol' ribbon, embroidery floss and even the silk ribbon that's used for embroidery, which I would say I have a plethora of.

P3260831

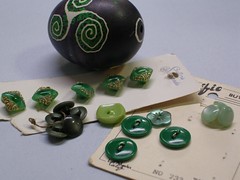
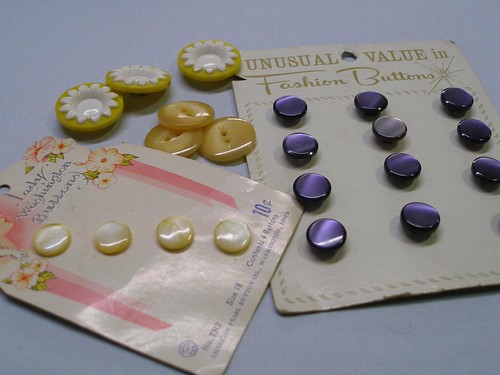
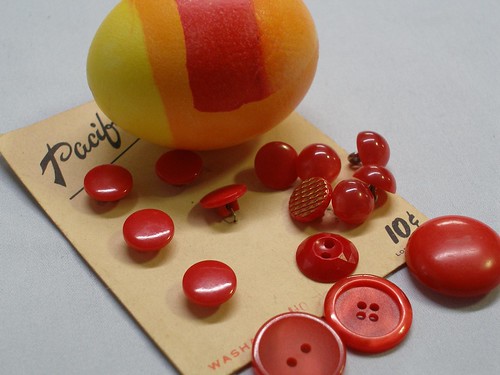
As for how to actually attach it to the egg... well, the method I most often use involves buttons, because I love buttons, especially fun vintage buttons.

P3260824 P3260826

P3260825 P3260827

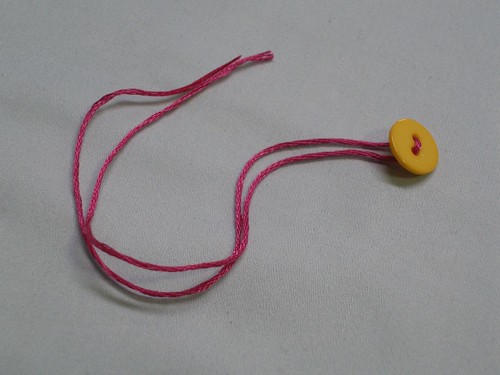
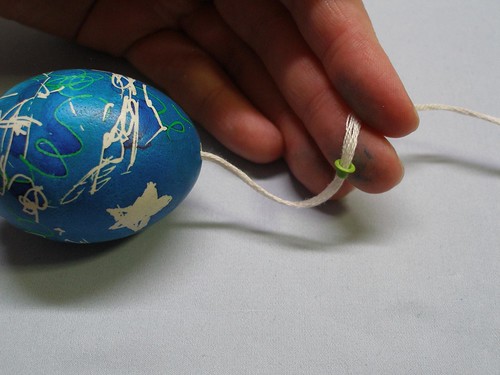
You can do it one of two ways. First of all thread the floss (or ribbon) through the button like so.

P3260863

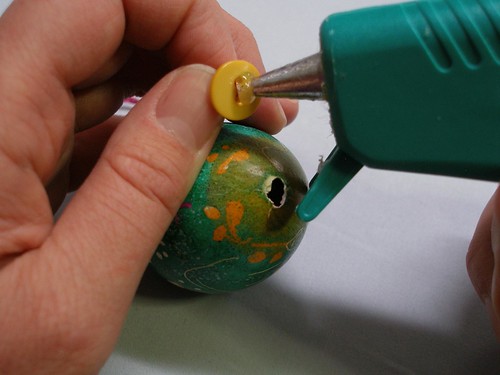
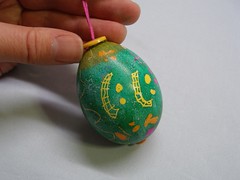
And then you can either simply glue the button to the top of the egg (my preference is for hot glue because it sets so quickly).

P3260864 P3260865

Or, once you've run it through the button, you can thread the ribbon up through the bottom of the egg and out the top. This will hold it in place with no need for glue at all. But it does require you to thread it through the egg, which can be tricky.

I've found a piece of floral wire to be incredibly helpful for this process, especially if either of the holes is particularly small. Note- I just realized that if you don't have this wire, you can straighten out the little egg dipper that comes with most egg dying kits. It's about the same gauge and length as what I used.

Just glue the ribbon to one end of the wire with hot glue (it works brilliantly for this as you can peel it right off).

P3260855

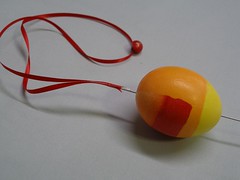
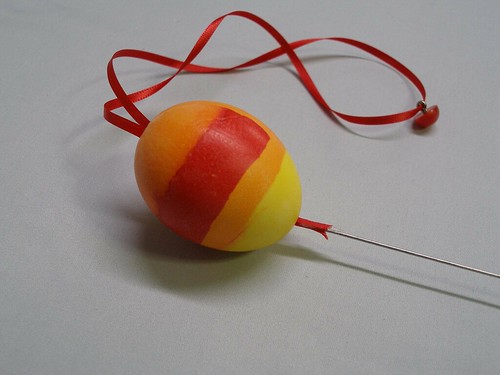
Poke the wire up through the egg and pull the ribbon out the other end.

P3260856

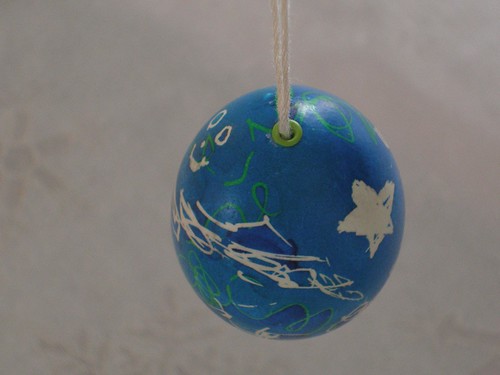
When you pull the ribbon taut, the button will hold everything in place.

P3280888

Now here's the part of the post where I deliver on my crafty geek promise from last week. This idea pleases the OCD parts of my personality to no end.

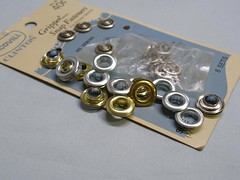
I'm talking metal embellishments, people.

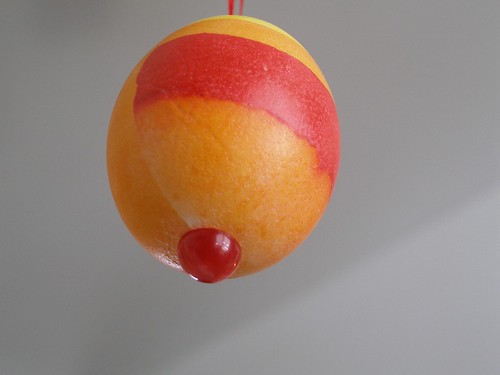
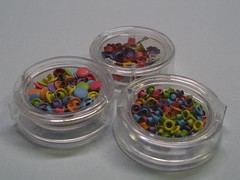
Either the silver or bronze, industrial grommets or the cutsie, painted, scrapbook eyelets. Snaps also came in handy (both functional and scrapbooky).

P3260830 P3230805

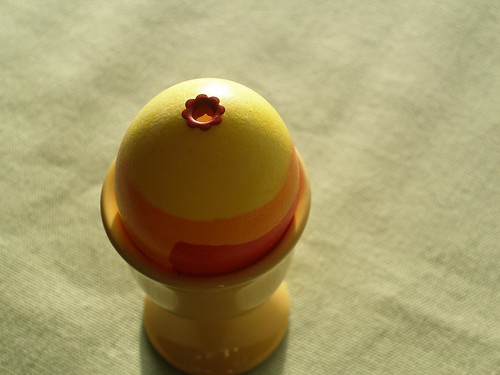
With these I was able to replace a jaggedy hole with such cuteness I thought my eyes might melt. OK, so it's not really all *that* cute, but it is damn satisfying.

I dare you to tell me it's not.

P3290908

You may have to expand the hole just a bit to fit these down in there. You can use a pin to do it, but a dremel tool works wonders.

And check out this before and after. (Jeff did the one on the left and Joey did the one on the right. Aren't they fab?)

P3290905

P3290907

I used the solid little guys (snaps, it says on the packet) to plug up the bottom holes. For some eggs, I just glued it right in there.

P3260884

And for others, I threaded it up from the bottom like I did with the buttons above.

This time, because the top hole was bigger, I just bent the floral wire to hook it around the loop of embroidery floss (which I'd already glued to the snap).

P3260873

Then I pulled it through the egg and the snap held it firm.

P3260874

After that, I slid one of the eyelets down over the floss at the top and glued it in place.

P3260877

P3280887 copy

I have to admit, this last picture satisfies me to my very core.

Now, I didn't include all of these methods and materials to imply that you need to go out and buy a bunch of stuff. I took all these pictures to show you how many options you have. My guess is that a lot of you crafty types probably already have enough of these to start hanging eggs now.

You know, if you want.

--------------------------------

Enjoy this tutorial? Get more like it by subscribing to my RSS feed

------------------------------

Related Posts-
Easter Prep (for Blown Eggs)
How to Blow Eggs- 7
Less Frustrating Ways to Dye Blown Eggs
P3310963 copy
Ukrainian Egg Dying
P3280899
Egg Drying Rack
P3260818
Indoor Easter Garden
102NCD80_DSC_1208.jpg