"Anyone that doesn't agree with leggings as pants can physically fight me.
And I'm going to win because I have a full range of motion due to the fact that I am wearing leggings as pants."

Saturday, May 28, 2011

OCD Seed Sprouting

When I start seeds inside in those little containers, I have anxiety. If I only plant one seed per pot, I worry that it won't germinate and I will waste space. If I plant more than one seed, I worry that they will all germinate and I will need to thin them and waste perfectly good seeds.

And so I stare at the pots for 10 minutes, trying to make up my mind, doing nothing.

But, no more!

IMG_0795

What I tried (and had a rousing success with) this year was getting the seeds to germinate before I ever put them in dirt. Remember kindergarten when you sprouted beans in paper towels shoved in a plastic bag? Yeah, I basically used that method.

P5035282
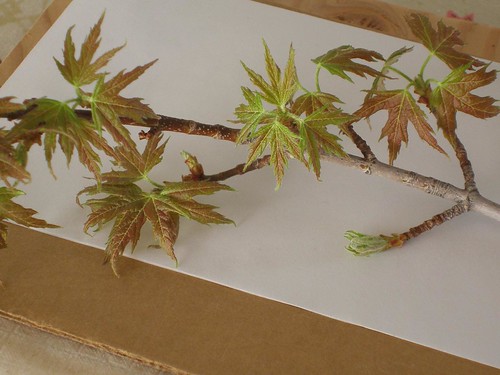
(how cute are these little boogers?)

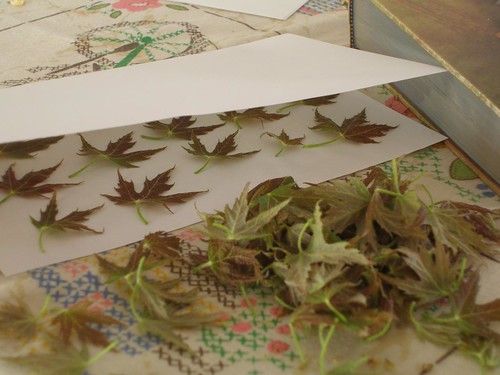
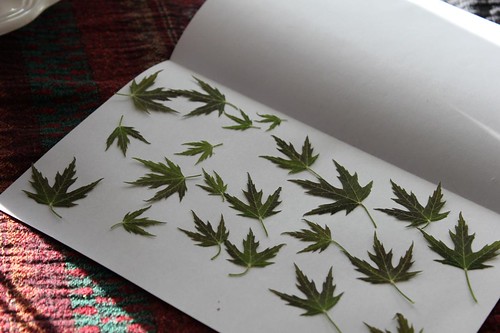
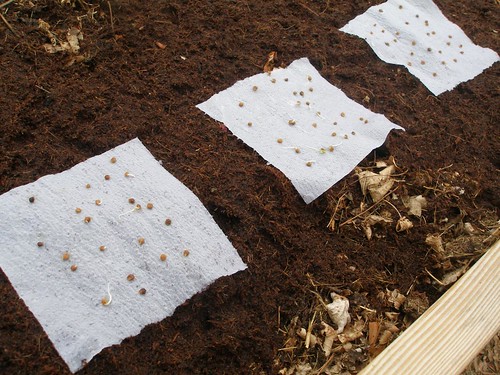
In a seed starting tray, I put the seeds on various sections of paper towels (I bet newspapers would work too), with several layers below and just one layer over top. Then I added enough water to thoroughly moisten the paper (but not enough to pool) and put on the lid.

P5035275
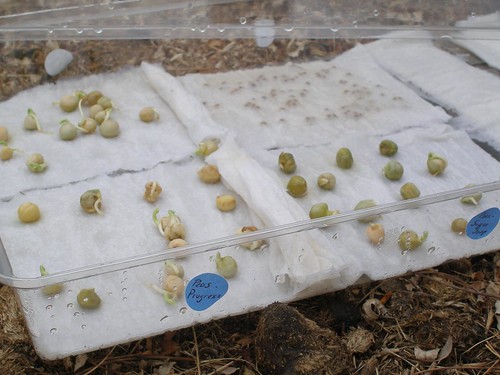
(this picture has the top layer pulled back for your viewing pleasure)

Keep an eye on them and as soon as they sprout, put them in dirt, either directly outside or in individual pots inside. If the seeds are big enough, you can plant them individually (only the ones that have sprouted- wasting nothing!).

Note- at this point, because the peas are legumes, I should have applied inoculant to them. But I forgot. And had to come back later and dig it into the soil.

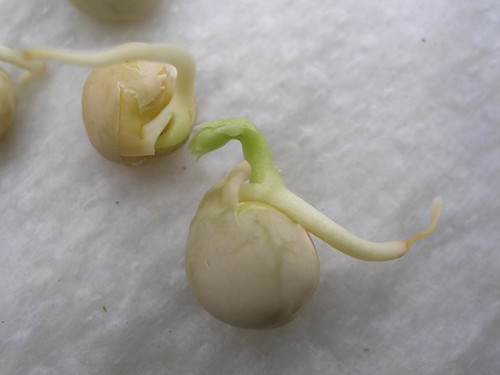
If you can determine which part is the root and which is the sprout, plant accordingly.

P5035278

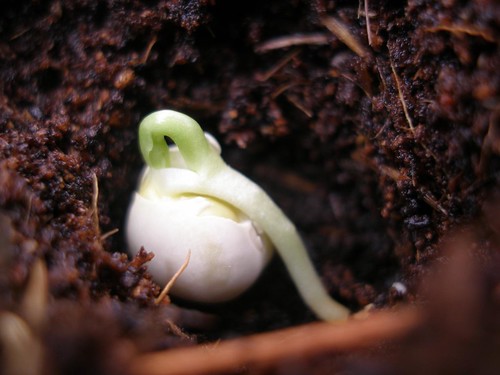
If you're not entirely sure which end is which, just lay it on its side. It'll sort itself out.

P5035283
(this guy grew just fine. in fact 100% of the seeds that I planted this way have grown.)

And if they're tiny, you can put them out directly, still on the layer of paper beneath them, and cover it (leaves and all) with a thin layer of soil.

P5035305

In a few days, they'll have popped through.

IMG_0221

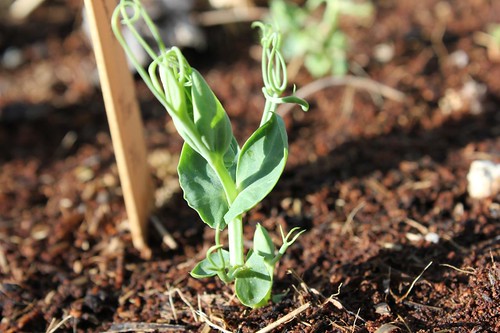
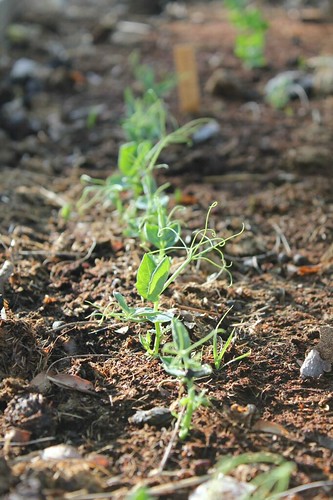
This worked really well for my second batch of pea seedlings. I'd better get them something to climb on soon.

IMG_0778

This method also seems to work especially well for plants that you're supposed to plant directly in the garden because they don't like to be transplanted. The problem with direct seeding in the garden is that it's more difficult to provide the right moisture and temperature during germination, which allows the seeds to germinate faster and in higher percentages.

In fact, I found this chart that shows the optimum soil temperatures for various types of plants. For example, lettuce can get a 98% germination rate at a soil temp of only 32 degrees. But it will take 49 days to do it. At 77 degrees, you'll get 99% germination, but in only 2 days.

The chart also helped me figure out why most of my spinach failed to germinate on the first go round. At 68 degrees, you can expect only a 52% germination rate and at 77 degrees, only a 28 % rate. It does best at only 50 degrees, the average temperature of our garage. Like lettuce, it will sprout at 32 degrees, but will take 63 days to do so.

So, you know, just something to keep in mind.

Tuesday, May 24, 2011

Kenzie

Our oldest daughter, Mackenzie, graduated from high school last week.

IMG_0430

At Red Rocks.

IMG_0550

In a two hour ceremony.

IMG_0467

The temperature was hovering right at about 40 degrees.

IMG_0518

And it started raining about half way through.

IMG_0544

Did I mention the fog?

IMG_0438

It was wonderful.

Wednesday, May 18, 2011

Mexico City Style Tacos

Let me first start by saying that my kids love these tacos. One day Miranda, when she noticed that I was making them for dinner, said, "Sweet, I was thinking about those today at school and was hoping you'd make them tonight."

P5055334

Secondly, this is one of my less meat recipes (as opposed to meatless), though I'll give options for all versions- from full meat to vegetarian.

For health, moral and environmental reasons I try to reduce the amount of meat we consume, cooking at least one meal a week that is completely vegetarian and the rest of the time making most meals around the concept of less meat, where the meat takes up less than a third of the meal.

Quinoa (pronounced "keen-wa") is awesome for doing this. And if you've never used quinoa this recipe is a great place to start. Also quinoa is really good for you. And tastes great.

My brother in law figured out the original, full meat recipe for these, using ground pork. They are great either way.

So let's get started, shall we?

Ingredients-

P5055311

-1 T vegetable oil
-half an onion (minced)
-1/3 pound of pork (you can buy it already ground or do what I do and just use one pork chop and grind it in the food processor)
-4 to 6 jalapenos, deseeded and chopped
-3 limes
-1 cup chopped cilantro
-1 and 1/2 cups uncooked quinoa (you'll most likely want to soak in cool water and drain before using... it has a coating that isn't always washed off in processing)
-3 cups water
-1 or 2 avocados
-tortillas
-optional- 1 t. bouillon or stock (I use beef Better Than Bouillon)

Note- The full meat version would use about a pound of ground pork and no quinoa, water or bouillon. The full vegetarian version would use about 2 cups quinoa, 4 cups water and no bouillon.


Instruction-
-If using the pork chop, cut it into 1 inch pieces and toss them in the food processor. Pulse 5 to 10 times, for one second intervals, until it looks like ground pork (cause um, yah, it is ground pork now).

P5055315

-Add some oil to a pan, followed by the onion.  Cook until translucent.
-Add the pork, 1/2 cup of cilantro and 1/2 cup of the jalapeno to the pan. (Save the rest of the chopped cilantro and jalapenos for serving.)
-Cook, breaking up the clumps with your spoon, until the pork is no longer pink.

P5055319

-Add the juice of one of the limes. (For the full meat version, you're done. Well, except for a bit of salt to taste, which you won't need if you're adding the bouillon with the quinoa in a moment.)
-Now add the quinoa...

P5055320

-the water and the bouillon. (Or for the vegetarian version, start here, adding the cilantro, jalapeno, lime juice, quinoa and water.)

P5055324

-Cook at a low simmer for about 15 minutes, until the quinoa has absorbed all the water and become tender. You can tell it's done if the little curlicue part of the seeds have opened up. It will look like this.

P5055326

-While it's cooking, I usually cut up the rest of the limes and the avocado and put all the toppings in individual bowls. I roll the warmed tortillas up in a damp dishtowel. Then everyone gets to make their own.

P5055337

I just noticed the time stamp from this picture, where Joey's eating her first taco...

P5055339

is exactly 3 minutes prior to this picture, where she's already making her second one.

P5055343

Whether these are all pork, all quinoa, or somewhere in between, they go fast.

Wednesday, May 11, 2011

Luminarias 2.0

I love my plain luminarias very much.

106NCD80_DSC_0842

But change is good too, is it not?

IMG_0307
(you wouldn't believe how many tiny maple leaves I have from yesterday's post)

I've tried all kinds of different methods of adhering these puppies. And the one that, I think, gives the best results involves melting them ever so gently with the tip of a very low temperature iron (like so low that on the scale, it's below the first number). I just hold the leaf in place with the thumb of my left hand, while I maneuver the iron with my right.

I'm not gonna lie. You will get wax on it. You probably will want to use a separate iron (hopefully found cheap at a yard sale?) devoted to crafts for this project. (Heh hem, this is definitely a case of do as I say, not as I do. I just keep wiping the iron clean with a spare rag. Jeff hasn't complained that his shirts are covered in wax yet.)

Also the plants with the little leaves are really tedious to get stuck down.

IMG_0323
(plants, left to right: sweet woodruff, catgrass, purple vetch)

IMG_0308
(this guy in the front is maidenhair fern)

But despite all those cons, I think the results are pretty fun.

Tuesday, May 10, 2011

Spring Pressed Leaves

Normally I start thinking about pressing leaves in the Fall, when all those pretty leaves are hard to ignore. Though recently I realized that Spring leaves are equally lovely. And they have the added bonus of being tinier than fall leaves, just mini versions of their more mature selves, which makes them perfect for using in projects when regular leaves are just too big.

P5065367 copy

Sometimes, before the chlorophyll has made it all the way up, they're even a bit red.

For some of you this will be way too late. For some, it will be perfect timing. But don't wait too long to cut yourself a branch. In the time between when I first pressed these (4 days ago) and today, the leaves on our maple are at least 50 percent larger and completely green.

P5065372

My favorite way to press flowers and leaves is in books. I've been pressing bits of nature between the pages of Little Women since I was a kid. Strangely, I've never read the entire thing. Though anytime I open it there is usually one or two folded pieces of white paper, sandwiching something or other, little presents from my past self, sent forward into the future.

P5065369

Those are maidenhair ferns, a plant I have never been able to keep alive for long in our dry climate, but I do love to press them flat. Today I plan to put these to good use.

IMG_0242

I'll be back tomorrow with pictures.

Sunday, May 8, 2011

What You've Missed

Whenever I see something wonderful in this world, I often think that it's a huge bummer that my mom (who passed away 14 years ago) isn't around to enjoy it.

1981-11-26_7223-05P
(Yep, that's her in the middle with her head thrown back laughing. She looked like that a lot.)

1981-11-26_7223-14P
(And those are my little brothers on her lap.)

It would be ridiculous to list everything she's missed. There's just too much. However, I can think of a few things she would have especially loved.

These are for you, mom.

- Thanks to the internet, it is super easy to share all kinds of wonderful ideas. You can find hilarious and inspiring stuff. Like Flash Mobs. Mom, you'd totally love these. Sometimes I wonder if that's how you imagined the world to be, full of people suddenly bursting into song and dance with you. I think this one would have been your favorite.


And then there's this poem. Thank you for never implying that I would somehow be better if I were prettier.

Really.

Thank you.


- Oh and guess what, Jenny and I made babies and then pushed them right out into the world. Can you believe it? I whined a bit when I had Joey, but not overly so. And Jenny was pretty badass when she had Kam. Neither of our labors came anywhere close to your record setters of less than two hours each when you had us, but we managed just the same.

Top-21

- Not only did Tommy finally come out of the closet (yes I know you probably knew he was gay even though he never said it out loud), but he marched in the Pride Parade. We were all there to cheer for him.

Pride Parade 10

If given the chance, I'm sure you would have been marching along with these people.

104NCD80_DSC_9565

-I know you never really got to see any of the four of us as adults. But I think we're doing a pretty good job.

104NCD80_DSC_9855

We miss you, though.

Happy Mother's Day.