


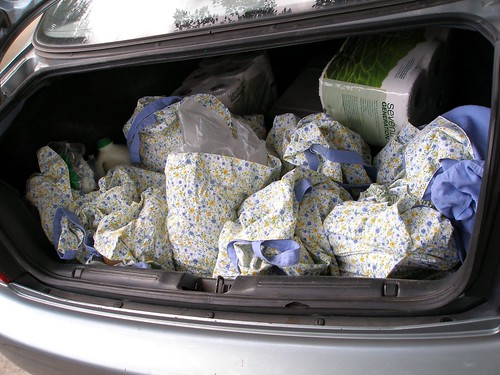
Note (March 09)- I've been using these same bags for just under 2 years. We use them almost every single time we go to the grocery store. And we have 3 kids at home with us, so we shop a lot. We also use them for almost ALL of our errands... clothes shopping, library, even the hardware store. I also wash the bags pretty often. The point it, they have been used hard. Very hard. And even though they're made of fairly thin fabric (which is kind of the point, as I need to be able to cram all of them into their bag, week after week), none of them have ever torn.
To make these, you need access to a sewing machine, but don't even need to sew all that straight. Remember, you just need to make them prettier than the ugly plastic things you're using now. How hard can that be?
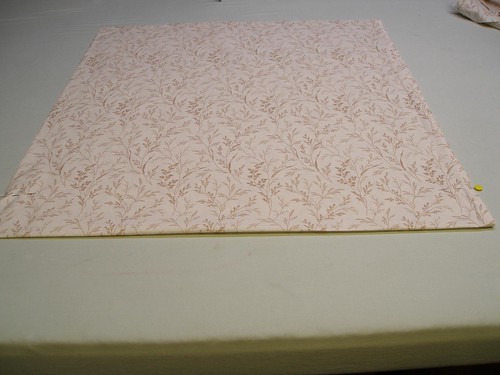
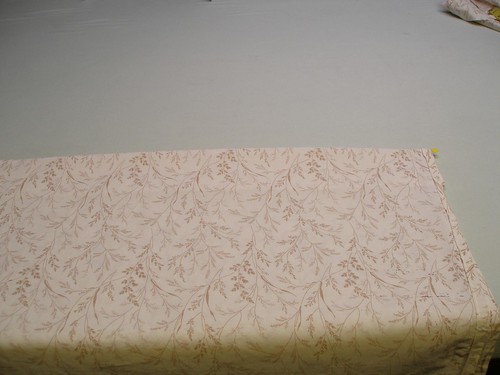
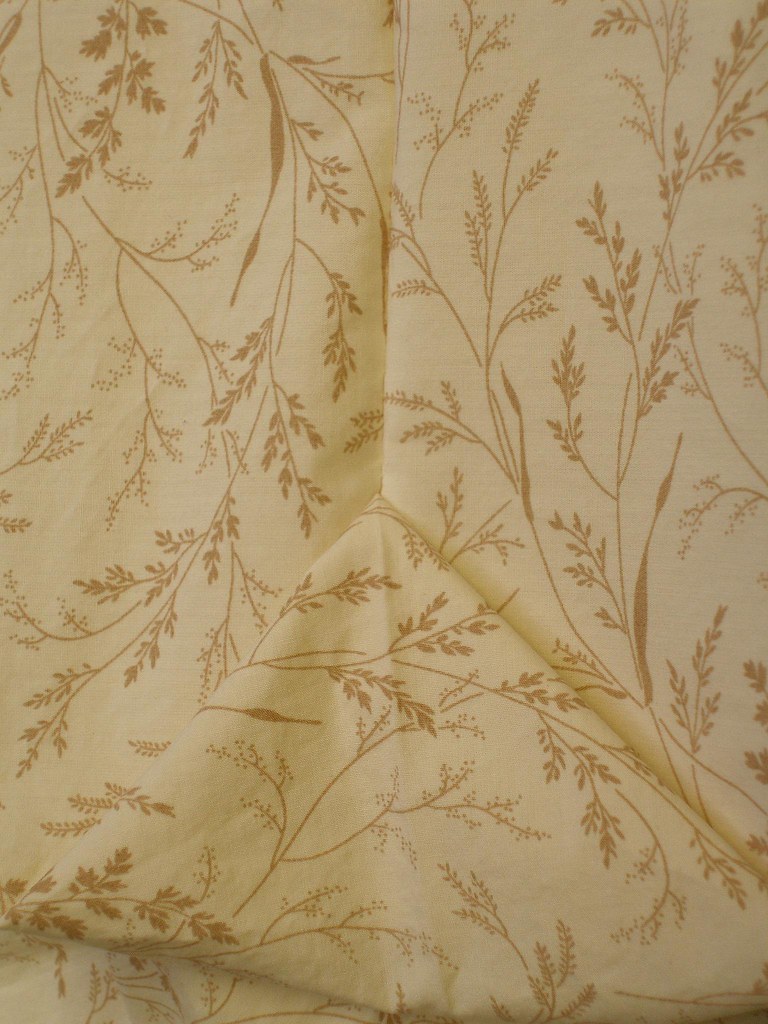
-For my bags, I repurposed an old sheet that was in fairly good condition (not threadbare at all).
-I buy the sheets at the thrift store for between $2 and $4 each. (The price has gone up since I originally posted. They're between $3 and $6 now. Still a good deal, though.)
-I wash them in hot water before cutting.
-I've been able to get between 6 and 10 bags per sheet.
-Flat sheets are easiest, but fitted ones will work too. You'll just need to cut off the elastic (click here to see how to reuse it).
-Cut as many 18" x 42" rectangles as you can from the sheet. (This results in a fairly big bag that's about 17 inches square. You can easily make it bigger or smaller, depending on your needs- and the size of your sheet. Regular plastic grocery bags are only about 11 by 13 inches. I'm thinking of making some more that are smaller and labeling the big ones with 'Light Items Only' because a big bag full of cans is way too heavy, but can be perfect for that jumbo sized toilet paper.)
-Basically, you're just sewing a very crude bag, with no lining. I kept it simple so I could make bunches of them. There's only one little trick that I figured out, shown in the next few pictures.
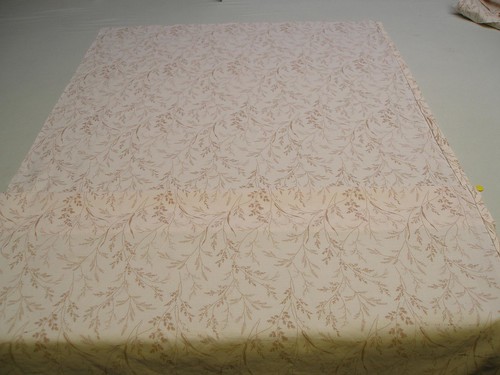
-Fold in half, wrong side together and pin like shown, about 3 inches from bottom.
Now, pull top down...

til it's even with the pins (creating a fold from pin to pin)...
grasp all four layers of fabric at pins...
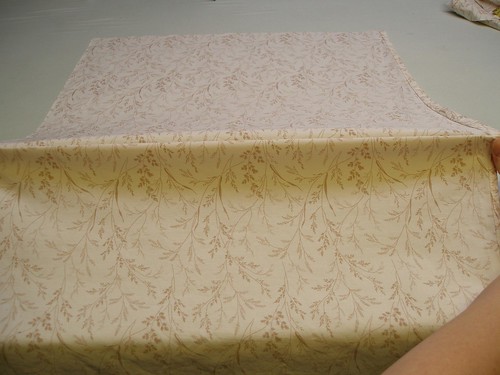
and lift up. Then lay it back down flat.
Note- I just replied to a reader who had some confusion with this step. Here is the clarification I gave her "First of all, when you pull the top down, you’ll be pulling both corners of the front straight down till there is a fold right even with the pins. At this point, yes, you will have 3 layers, but when you pinch at the pins and lift up, the back of the bag will fall over your fingers and make four layers (you’ll have to reposition your fingers at this point). I actually fold the back layer down as I’m pinching, so that, in essence, I am grabbing four layers all at once."
-The wrong sides will now be facing out.
(This is much less complicated than it sounds. Thus all the pictures.)
-Sew up the sides. The third option on this tutorial shows how to run both a straight stitch and a zig zag stitch in order to finish the edges nicely. Unfortunately, because of the folds in the seam, a French seam won't work here. The zig zag does the trick, though.
-If you want to check that you did this right, flip it right side out. It should look like this.
-Turn the bag back inside out and iron each seam to one side.
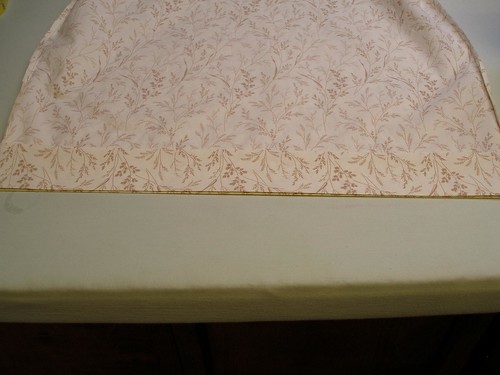
-Fold down top edge of bag about 1/4 inch and iron. (Ya, in these pictures the top of the bag is actually at the bottom of the picture.)
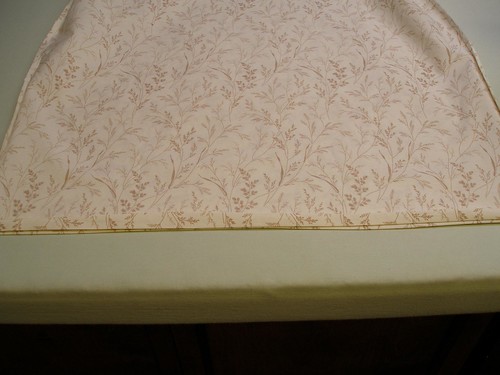
-Now fold the top down again about 2 inches. Iron.
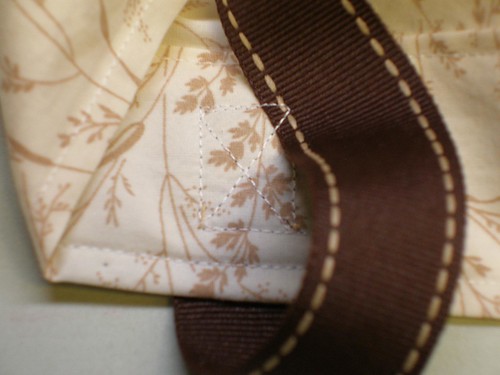
-I pin in squares of scrap fabric to reinforce where the handles go (about 5 inches from the edge). You can use denim or canvas. Just make sure they're right up against the top fold so they get sewn in with the next seam.

-Now, sew two seams all the way around the top of the bag, one 1/4 inch seam parallel to the very top fold and one 1/4 inch up from the bottom fold.
-After that, you can turn it right side out and attach the handles.
-You can use webbing (like I did here) or sew your own handles out of sturdy fabric. I fold the cut edge underneath to keep it from fraying. This step is probably the most difficult; keep with it, it just takes practice.

-Just make sure to keep the rest of the handle out from under the presser foot or you'll end up with this... I can't even tell you how often this happens to me.
-You can attach the handles to the inside or outside of the bag, depending on the look you prefer.

That's it. Please let me know if you have any questions. And I'd love to see any you make. There's even a Flickr group to post pictures on.
One Note- if any men will ever be using these for shopping, you may want to consider doing these from a more masculine print. Jeff originally refused to bring the pretty blue and yellow flowered ones to the store, but has since gotten over it.
Oh yah, here's one last picture... of my grocery bag, bag. It's got a front pocket for the Produce Bags and is closed using my Buffalo Scrunchy (cut off the fitted sheets).
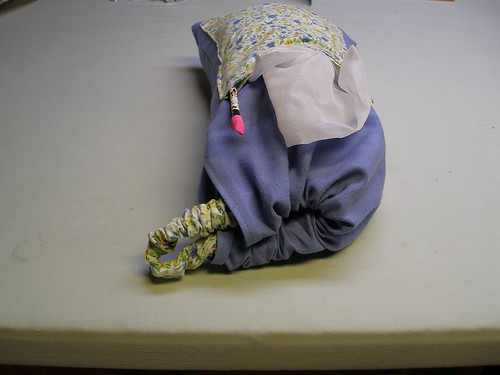
This is basically sewn up with a channel like the produce bags, but bigger and with a pocket.
--------------------------------
Enjoy this tutorial? Get more like it by subscribing to my RSS feed
--------------------------------
Related Posts
Cheap & Easy Fabric Produce Bags
How to Sew Your Own Handles
Buffalo Scrunchies

69 comments:
YOU ROCK! thank you so much for that tutorial. I am not so good at sewing, but I think I could even use the steam & seam thing to make that!
I have a nice recycled idea for the straps -- old seat belts. I bet you can get them on freecycle or at a junkyard for next to nothing. (I have a purse with that as the handles & I love it!)
Thanks for such a great post!
RVM
Awesome! Those are much prettier than the ugly brown ones I am using. :) I might have to make some pretty ones to throw it! Thanks.
Wow. That "one little trick" to make the squared off bottom is absolutely genius. Thanks!
there is something vague in the steps.
after you fold down to the 3" mark
do you lay it back down with the wrong side out or in?
Great tutorial. I have been thinking about doing the same with our unused sheets but never materialized the process. Now I just have to follow your instructions! Not only is your blog helping you finish your projects, but it's inspiring others.
Thanks!
fantastic idea - I posted about it on my blog! Great tutorial too!
Came across your blog thru craft magazine, thanks so much for posting such a fantastic tutorial! :) :) :)
Thanks I'm totally doing this.
Fabulous idea! And I think my grocery store even gives a few cents off my total for bringing my own bags!
Fabulous bags. Thanks for the tutorial :)
I'm so glad you all like this. Thanks so much.
Jgodsey, it is inside out after you pull it down. I've updated the instructions where that should happen. Thanks for catching that.
Love it !!!!!!
Wendy, thanks for sending me the link - these are GREAT! I'll make one soon, and post about it - with a link to your instructions, if you don't mind. I'm going out of town for a couple weeks, so I won't do it until I get back, but I will do it. Thank you!!
Very cute bags! How well do they hold up without some sort of reinforcement on the "one trick"?
Ginger, they've done great so far (and I've been using them consistently since this summer). Although, I only let them load them to a level that's comfortable to carry (ie- not completely full of cans).
If you're worried, you can make them smaller, which will keep the weight down (and also increase the number of bags if you get a discount). :)
These look GREAT.
I can't wait to make some!!!
I love your pattern! I just made my first bag out of yard sale fabric. It is 100% cotton and when I washed it, it of course frayed a good bit on the edges. SO - I added to your tutorial by taking extra-wide bias tape and sewing that over the side edges (turning the tape under at either end). Not only will this stop the fraying, but it should strenthen the bag a bit, too. I sewed it using a bit wider seam allowance to get closer to the edge of the tape. Just thought that I would share. =)
Genie, thank you so much for adding that tip about the bias tape! It's a great idea. I'll have to try it.
Incidentally, on my more detailed version (for sewing newbies), I did add a line (which I've copied to this one now) about doing double quarter inch seams to prevent fraying. It takes a bit longer, but since you only need to do it on two sides, it isn't too bad.
I think the bias tape might be quicker, though.
What is the depth of your bag with the 3" fold?
Thanks, AK in PA
AK in PA, before the bags are filled, they're about 18" square. Because of the way I've done the bottom, the depth really depends on what you put in there. If you fill it with a whole bunch of cereal boxes (or a giant thing of toilet paper) it'll be a couple inches shorter because a lot of the height is used on the bottom. If you have something skinnier, the bottom stretches down and you get the full height.
Though you could certainly adjust the sizes as you'd like. I've been thinking I need to do a few that are much smaller, for heavy stuff because the baggers tend to fill these completely full with cans and I'm not sure the bags like that very much (nor do I for that matter- they're heavy!).
What a great tutorial! I have been meaning to make some grocery bags, because we live in CA, and there are places already banning the plastic bags. I really need to get in gear and make some!
sat down and made my very own bag yesterday thanks to your design. thanks so much!! can't wait to put it to use!
This is awesome! What a great idea, I can't believe I didn't think of it... thanks.
Just a suggestion, but if you make the straps long enough to wrap all the way around the bottom of the bag, you are adding another level of support. You aren't relying on a square inch of fabric at each anchor point to support the weight of the groceries, it is more evenly distributed across the entire bag.
Great Tutorial!
Thanks so much . thanks for sharing, Amy
I just made two of the grocery sacks and LOVE THEM! I can't wait to make more! Thank you for the great tutorial!
Great advice on how to go green without a huge investment. This represents a trend that more of us should be moving towards, in which we provide for ourselves a little bit more, and stop dropping money for everything that we need.
I have to join the ranks of all the people who love this project (and the rest of your blog as well!). I've started 4 - just need to add the straps tonight!
Again, great project and awesome blog!
I must be stupid. I really can't figure out how to get the bottom like that. If I pull up all four edges and then sew the sides then it comes out with them all sewn flat and a funky shallow pocket along one bottom side. What am I doing wrong?
WildernesFamily, I think what you've described is actually how the bags look when they're folded a certain way. Just stick your hand down into the 'pocket' and open up your fingers to move it down to the bottom and open it up.
Let me know if that isn't the case. I've been meaning to actually do a video for these and the produce bags, but haven't gotten around to it.
Thank you so much for letting me know.
Oh good grief. I really am dense. Yes Wendy, that's precisely it.. I just had to open it out properly. Ha. Well now I can try again on the next one. On this bag I just made I unpicked everything and then just did a box corner. Thank you for replying to me and helping this dummy in her time of need. Hehe.
How cool! Thanks for the tutorial. I plan on making a few. :)
looking making my own bags, but cutting out sides and a bottom and then sewing them together, frankly, seemed like a lot of work. Your method works like a charm!
I made 3 tall ones and 2 short ones out of a very cute brown and light blue paisley canvas. I still have to attach the webbing handles
I just finished making 6 of these bags out of a sheet my friend was tossing out!! I must say I love them and thanks to your tutorial I was able to make them with ease!! Thanks for posting!
wow...what a great idea. i was looking at different ideas for tote bags; mainly for putting Christmas gifts in..a gift in a gift:D yours is one of the best so far, and one of the ones i'll be making.
kudzu
thank you for sharing!
You are a lifesaver! I've been hunting for a simple pattern for ages. Thanks so much for sharing!!
You can get cheap webbing for handles from used backpacks or other bags at thrift stores too. I've gotten several yards from one used duffel bag.
This is a great tutorial. I'm pretty good at carrying reusable bags with me whenever I go shopping (they are quite ugly, though); what I'm trying to find now is how to make or where to buy small net bags to replace the plastic bags you put your fruits and veggies into.
Joanna, I've made bags for fruits and veges out of sheer fabric. Hopefully you found the link at the bottom of this post to the tutorial to do just that.
I have made several of these bags. BUT, why after sewing my sides together is one side of my opening a couple inches longer than the other side. Maybe I'am trying to make this more difficult than it really is? I'am hoping this gets to you, as my computer, and sewing skills are quite comparable. Thanks.
Nina, I'm not exactly sure what you mean. Both of my sides are the same length when I do this. The BACK of the bag, though, is sometimes a very small amount longer (like less than a quarter of an inch) than the front. But once you fold it down to hem the top it gets hidden so it shouldn't matter.
Does that answer your question?
Nina, if that doesn't answer your question, feel free to email me directly (mamagay74 at comcast dot net) and I can try to help you out.
Very good post. I have been searching for this post since many days. Now I have implemented the same for my site.
Cool bags! I like your site. I just posted instructions on how to make produce bags our of an old orange bag on my blog. Spot by if you can! :)
great bags, I use backed curtain fabric for my bags, the fabric not only keeps the heat out of your house it also keeps things cool, I put the gusset in last because I always use french seams in my shoppers, you need to turn the bag inside out to do this. the ugliest fabric can make the best looking bags, I buy bolt end fabric as it is cheaper the stores usually sell it at cost so they are not stuck with it, the handles of my bags are made out of the same fabric, I get 2 bags per meter of fabric, they make great presents and sell well at markets and fairs, Even my motherinlaw loves my bags and she hates getting handmade stuff from anyone go figure?
I love the information, I commend them for the idea.
Thank you so much for the tutorial. I just inherited some truely impressive flowered curtains in a thick cotton from my Grandmother. The print is sooooo late 60's it needs new life and now its a set of fabulous grocery bags! Yay!
Thank you soo much for your tutorial. I used pillow cases. I wanted a fast and easy bag. and by using a pillow case i was able to skip several steps. I love the bottom of the bag idea. I have trying to find faster ways to make the bags and that step was what i needed. On my practice bag i completed it in under 20 minutes. Thanks again
Very nice! Scaled down (no straps) they make a perfect lunch sack.
Wow! Such a simple project! What a great idea to help rid the world of some of those pesky plastic bags.
Great job!
Simple and easy--my kind of project. If solid color material is used, kids could decorate the bags with fabric paints--great for home or gifts.
I have a nice recycled idea for the straps -- old seat belts. I bet you can get them on freecycle or at a junkyard for next to nothing. (I have a purse with that as the handles & I love it!)
Thanks for the instructions, I made two today out of one king sized sham...using the edging as handles. They turned out super cute!
Love this idea!! As for the handle, if you are into recycling, try using a cut-off waistband from a pair of jeans or jean shorts. I have used them for handles on other things.
Thanks so much for the tutorial! I am almost finished making the first bag. Just in the process of putting on the handles. this is one of my 1st sewing projects and its turning out great!!
Anon, I've cut up some jeans to use as handles and it works brilliantly! Just haven't updated the post.
Renate, I'm so excited. I'd love to see pictures! mamagay74 at comcast dot net (or comment with a link to them)
I love those fabric bags. The problem with the ones you buy is that they do take a lot of time because you can not fold them properly. So they sit there like nuisence rest of the time. The final bag is even better with the pockets. I love a lot of pockets in my bags and other pocket are handy.
Oh dear... when you say sew up the sides do you mean all the way to the pins? Just the 2 sides are sewn after i do the "grab all 4 corners part"? It does'nt look right when i unfold it. I hope im not too late in asking this.
Anonymous, when you sew the sides, you go all the way from end to end, past the pins. Hope that helps.
I really wanna get my act together to make a video of the process, but I wouldn't count on anything before the new year.
Good luck!
Awesome, I just made first one! I had been looking for a pattern for shopping bags, found this one easy as pie to make and make bigger if you choose! Will be making many more to share with friends to use up all my material! Can hardly wait!
Hiya hun,
Just wanted to let you know that I featured this tutorial on my blog this week. I would love it if you could check it out :)
http://mammymade.blogspot.com/2012/09/mint-stuff-ive-seen-22.html
- Adele @ Mammy Made
Instead of measuring each rectangle, I cut open a paper bag and cut the bottom part off. It made a great template for the rectangle. Only a little smaller than what you suggested.
This is so awesome and easy! Thank you so much for posting it!
The only thing I did different was add a small loop between the handles on one side, to hang the bag from the rack at the grocery store--makes it easier to load. If you were using the old blue jeans for handles thing, a belt loop would be perfect.
Buy handbags online for the best product ranges for you.Shop at fundooshop.com,Here we the latest trends of Bags for low prices.
Designer Handbags Online
Among so many handbags,each having its own personality.Some handbags look very basic and others very elegant and luxurious, some are made with luxurious materials and designs and others with simple but beautiful designs.
Designer Handbags Online
Wendy you are doing a very noble job by sharing tutorials of the fabric shopping bags, indirectly promoting them. As these bags are eco-friendly and great alternative of plastic bags, which are creating pollution on earth.
Post a Comment