


And that got me to thinking because (A) I don't like to think of myself as an overachiever, (B) My kids and I have been successfully icing sugar cookies for many years and (C) I believe that most projects like this are totally doable, there are just usually some tricks to learn (and maybe you just need to give yourself once or twice to get good at it). Calling it an overachievement gives people an excuse to not try. It means you expect perfection, which takes all the fun out of it.
And it is fun. Once you've got the icing made, this will entertain the kids for hours. Seriously. This year I made up two different batches (once with a 12 and 4 year old, the next time with an 18, 16 and two 12 year olds) and each time they decorated cookies for at least two hours.
Originally I started a batch of cookies and set about writing down all my cookie icing tips. And then Buster wrecked them, which prompted an idea that is much simpler and even cooler.
Skip right to the cookie icing and then turn your creations into tags.
At this time of year we always have a tin of gingersnap cookies from CostPlus around. These are perfect for this project because most of them are unbroken. We tried it with nilla wafers, but they were pretty banged up.
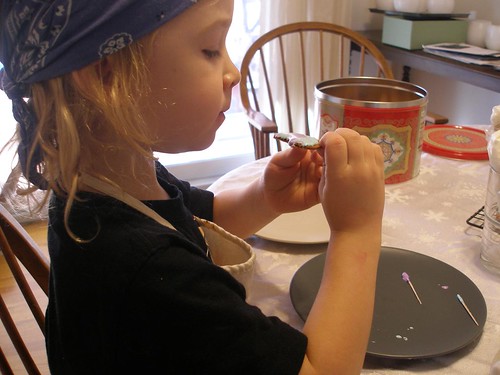
To start with, we drilled little holes in the cookies using a toothpick.
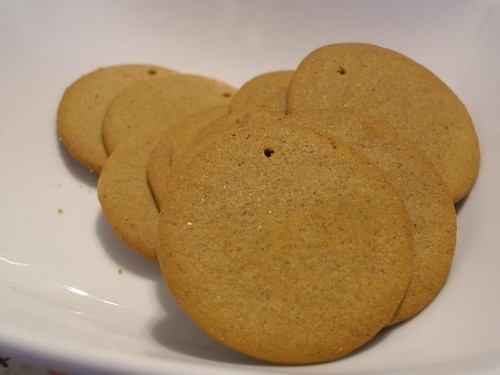
There is a lot less breakage if you keep the cookie flat on a plate and twirl the toothpick as you push it in. And there will be breakage. But that's fine by me cause I get to eat all the broken ones.
Now let me explain something about icing. The way to get a smooth surface is to create flood icing. But if you only use flood icing, it'll run off the side of your cookie. So you need to mix up regular royal icing to create a dam.
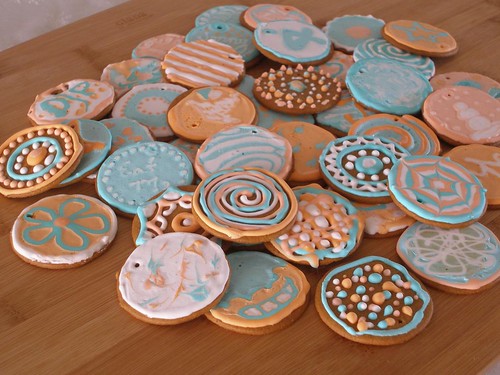
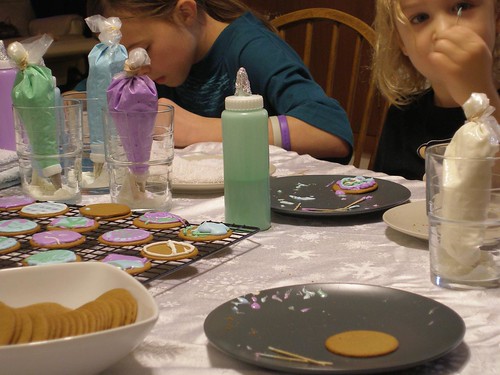
Tip: I suggest seriously limiting your palette. I always use white and two or three coordinating colors. That way, no matter what kind of icing job you do, at least they'll all match. It's surprising how much this helps.
See like here. Even Kam's little piles of icing look cute all together.
Usually I make up one big batch of royal icing using the recipe from Cookie Craft, the one for piping, not flooding. (If you click here and go to page 16, you can see the recipes.) I've always used the pasteurized egg whites in the past, but this year tried Martha's recipe with meringue powder because I know how people freak out about eggs, even if they're pasteurized. I think I prefer the egg whites because this year's icing was a bit grainy in texture. But, like I said, we aren't aiming for perfect.
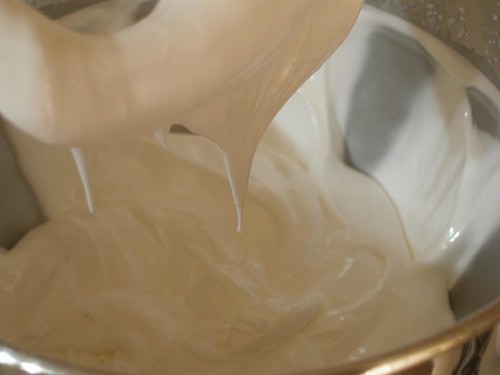
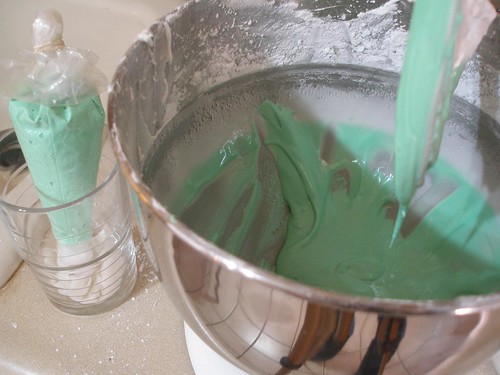
This works best if you have a standing mixer because you'll want to mix the icing ingredients for 3 to 5 minutes. You want it nice and thick, so that it'll hang from the paddle.
What you have now is a batch of thick icing for piping. In several places, I've read that you should mix two batches (one for piping and one for flooding) and then tint them to match each other. But that's not how I do it because I am terrible at getting the same color more than once.
What I do is take this batch, divide it into 4 roughly equal parts and tint them individually.
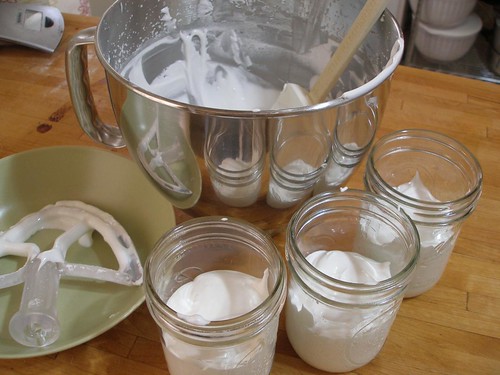
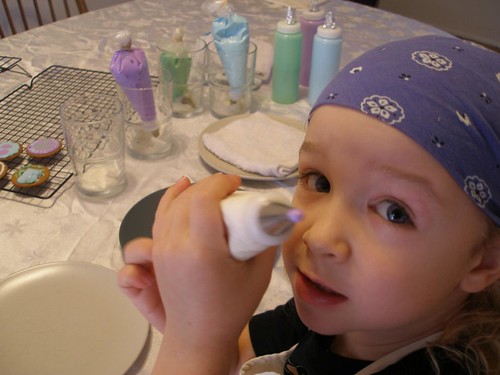
After I tint each one (using gel food coloring), I take half of it out and put it in a pastry bag. (Yes, I cheat and close these up with rubber bands. Also, I always put a piece of damp paper towel at the bottom of a glass and then stand the bags up in that. It keeps the icing at the opening from drying out.) I usually mix the color into them in the standing mixer, but I think next time I might try doing them directly in their individual jars.
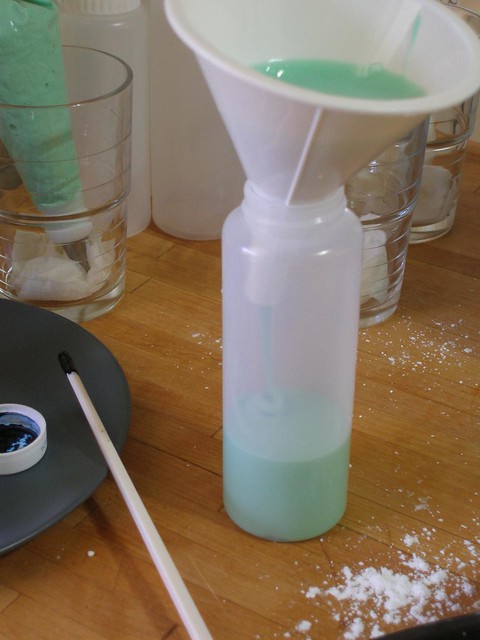
Then I add one, maybe two, teaspoons of water to the remaining icing. Voila! This is now flood icing. This can go into squeeze bottles, which they sell at Michaels.
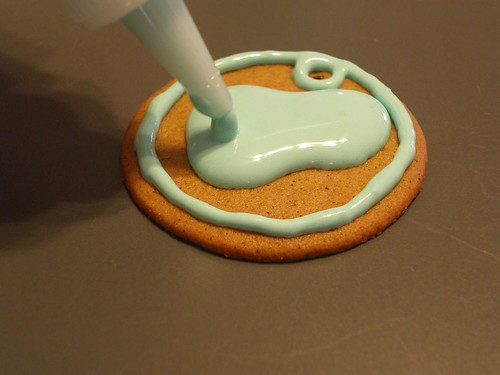
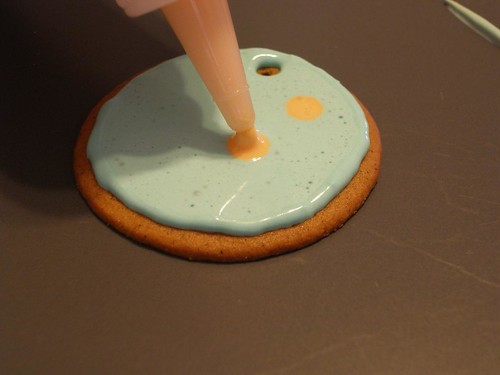
Now use the piping icing (in the pastry bag) to make a corral for the flood icing like so.

Fill it a little more than halfway with the flood icing.
And spread it out with a toothpick.
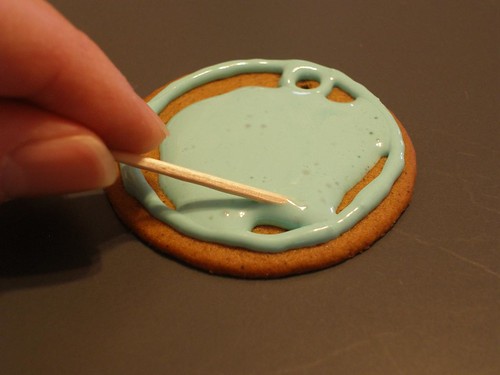
(Notice how there are bubbles in this? Well, there shouldn't be. It's a sign that I added too much water. That's okay, though, because remember... fun, not perfect. They turned out fine.)
Now to add designs that lay flat with the background, go ahead and add flood icing right now. I find the way it self levels to be terribly satisfying.
You might want to taste one or two, just, you know, to make sure they're okay.
(Oh, Little Cookie, I am so going to eat you.)
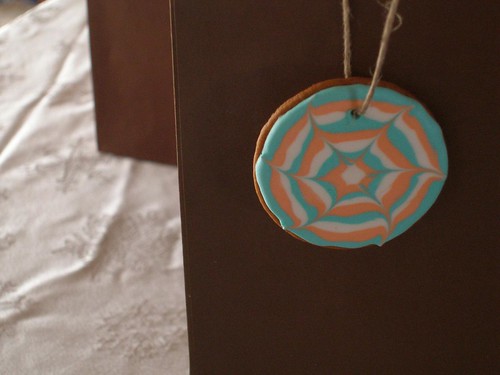
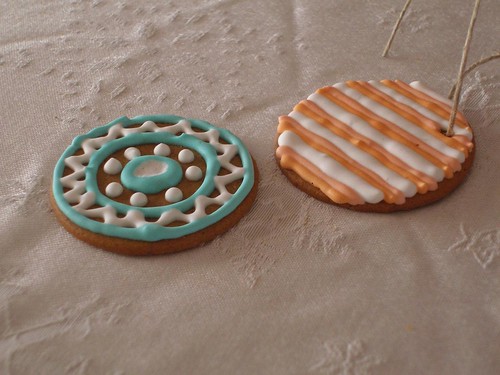
You can drag a toothpick through these (before they start to dry) to get fun designs.
Randa made this one by making a bunch of circles and then dragging it out in a starburst pattern.
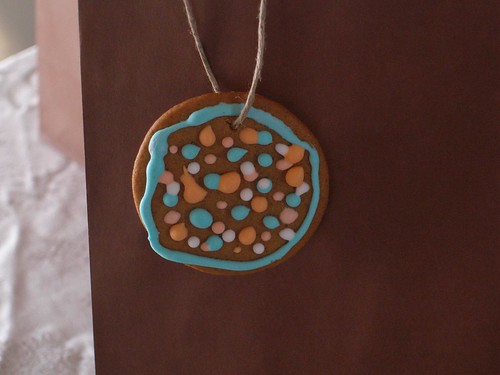
You can also skip the flood icing to let more of the cookie show through or just create some texture (I think the brown of the gingersnap looks really nice with these colors).
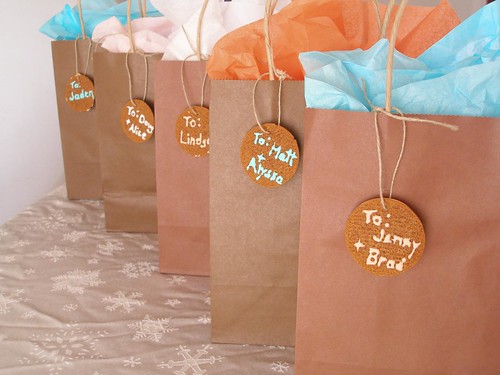
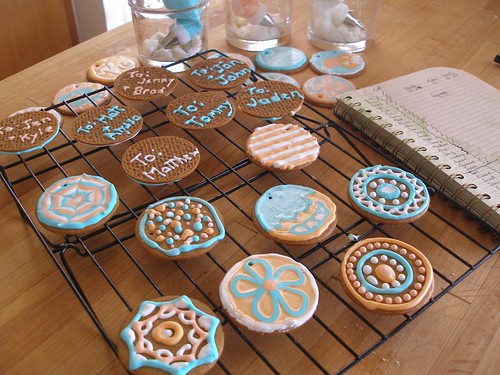
Now, these need to dry on a cooling rack, for about 24 hours, I'd say. Once you've verified that they are solidly dry, you can flip them over and use the piping icing to write people's names on them. (BTW, go ahead and stick the piping bags and their glasses into the fridge when you're done after the first day. The icing will keep at least 24 hours, maybe 48. When you pull them out again, just squeeze some out to clear the tip a bit and begin piping.)
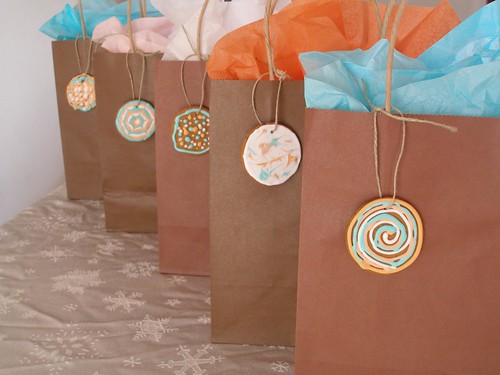
Once that side is dry, you can string em up (I used hemp) and tie them on your packages.
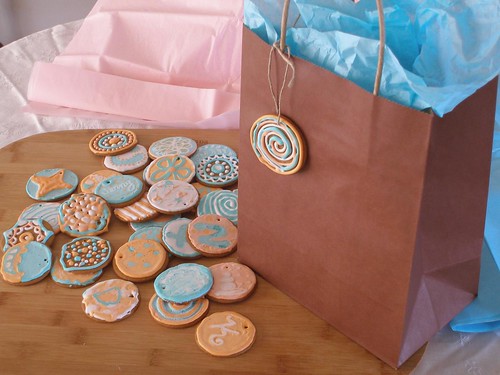
And I'm guessing that once you get the hang of icing these guys, you'll want to make your own sugar cookies to create larger- and customized- canvases on which to work.

7 comments:
omg! I found your blog yesterday and I am starting to love this little place of yours... thank you for the inspiration.
<3
No problem, Chile. It's just that I'm sad when many people short change themselves with stuff like this. Even Pioneer Woman (who puts all kinds of effort into cooking) referred to a batch of her sugar cookies as "non-snobby" (http://thepioneerwoman.com/cooking/2007/12/my_favorite_christmas_cookies_from_childhood_and_beyond/), implying, I think, that there is such a thing as a snobby sugar cookie. I just want people to know how fun and accessible they are.
i love you. i am struggling with blogging lately. i dont read many blogs anymore. life is sooo much more busy with two littles under 3. sigh...but i always seem to gravitate back to your blog in these times of digital ambivalence.
at a time when many "natural" mama blogs, on these hard days, give me awful feelings of inadequacy, there is something about the way you present your days that are neither impossible to imagine nor ordinary. so normal, but magical.
we have so many things in common someday when my kids have an attention span beyond 10 minutes, im sure we'll be enjoying some of the same treasures you do. and ill be going back through these days for inspiration.
besos
latisha, thank you so much for that comment! It pretty much sums up what I hope to be doing here. The one thing I never want to do is make people feel inadequate. Each of us has our own lives, our own challenges, and comparing ourselves to others is always a bad idea. Yes, I have 4 kids, but our youngest is 12 and our oldest (21) isn't at home anymore. The little guy in these pics is my nephew who I am rarely in charge of for long.
My whole goal with this blog is to give ideas to make things easier, not more difficult. Thank you so much for visiting me.
I LOVE THIS. Amazing, mama!
Just some help with you cheese making endevors. Check out the below link, she has a lot of information on good milk to use in your area, tools of the trade and recipes and cookbooks.
http://www.cheesemaking.com/store/pg/242-FAQ-Mozzarella.html
Oh we so love these! Really you could use them for any occasion! Thank you so for your wonderful creativity!
www.ananasa.com- Home For Handmade
Post a Comment