The problems are many. For one, they float. For two, they take in a lot of liquid and slowly drip it out as they're drying. I have tried various methods to remedy this, some have worked better than others, but frankly none of them are both perfect and easy. So here's another post in which I give you a bunch of options, including the pros and cons of each approach.
This is definitely a case when putting more effort will yield better results. I suggest you choose based on your level of patience.
Method 1- Dying the Egg before Blowing
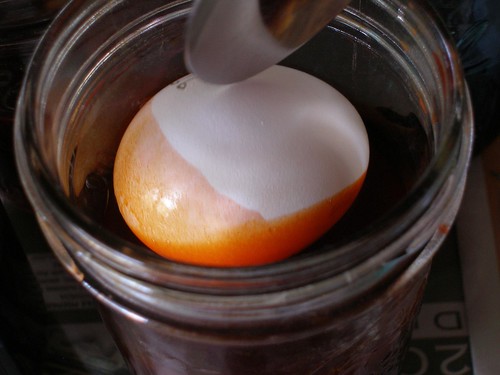
Pros- Eggs will sink nicely in the dye bath. Doesn't require specialty tools, just wax. All of the eggshell gets dyed.
Cons- If you plan to use the egg innards, you'll need to use a food safe dye (not the dyes that come with the Ukranian kit). Can be a bit more messy. There's a risk that you may put a lot of effort into the dying process and then accidentally break the egg at the end. I wouldn't try this method until you feel confidant with your egg blowing skills.
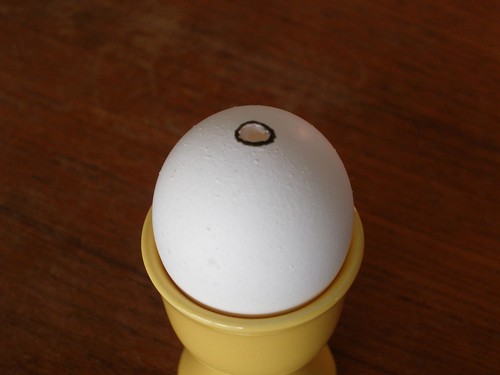
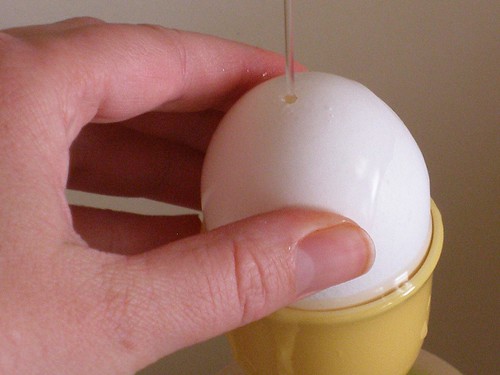
For this method, you'll just dye raw eggs however you'd like. When you're done, dip the ends of the egg into melted wax (from a candle) or drip candle wax over the ends or, if you have one, use the kistka tool to apply the wax. Follow this tutorial to poke holes in the ends...

(Small end of the egg)

(Large end of the egg)
and carefully blow out the innards, doing your best to keep those innards off the undyed part of the eggshell. The wax will protect the dye at the ends. Melt the wax off in a 300 degree oven for about 5 minutes and then wipe clean with a paper towel (like here).
Method 2- Sealing the Holes with Wax, but Filling the Egg with Water First
Pros- Eggs will sink in the dye. You can eat the egg innards no matter what kind of dye you use. When emptying the dyed eggshell, it's easier to get water out than the egg innards.
Cons- Will leave a tiny bit of undyed shell near the holes. Is sort of difficult if you don't have the kistka tool. The entire process is somewhat tedious and may make you feel a bit anal retentive.
For this, you'll want to start with already blown eggs. Using the kistka tool, cover the smallest hole with wax. It works best if the tool is really hot (as the wax will come out much easier). You'll want to first make a circle outside the hole.

(All I have are pictures of sealing up the larger hole. Pretend these pictures are of the smaller one.)
Let the wax cool and patiently, like, really patiently, fill in the hole, bit by bit. This process may feel really frustrating at first, but it gets better, probably not more than about a minute each.

Needless to say, the smaller the hole, the easier this will be. In fact, you might be able to pull off this trick that I show in the video below.
Now, flip the egg over and hold the bigger hole under a thin stream of water filling the egg almost full with warm (not hot) water. (I suggest using warm because if you use cold water, as you work with the egg the water will heat up and expand very slightly, which will increase the pressure inside the egg and force some of it out the holes.)

Dry the top of the egg and seal it up with more wax.
Dye as usual.
When you're done, add a bit more wax around the biggest hole to protect the dye like in Method 1. Holding the egg over a bowl or the sink, first pick off the bottom wax and then the top bit of wax and allow all the water to spill out.


You may need to use the egg blowing tool to get the last bit of water out. Melt the rest of the wax off like described here.
Method 3- Sealing the Holes with Wax
Pros- Keeps liquid from getting inside of the egg making the process much less messy because it won't drip. Doesn't involve emptying the egg after it's been dyed.
Cons- Like Method 2, it will leave a tiny bit of undyed eggshell near the holes. It's sort of difficult if you don't have the kistka tool. The eggs still float in the dye so you'll need to spin them or hold them under the dye with a spoon. (I'd say this method is best suited for quick working dyes like the kind specifically for Ukranian decorating.)

Basically, blow the eggs like normal, let them dry and then cover over the holes with a bit of wax like described in Method 2. Or alternately, you can very carefully drip melted wax from a burning candle onto the hole. Dye as you please and then melt off the wax in the oven like so.
OK, so that's it. Information overload? If this is all too much to take in, just carry on like you never read this post. I'm sure however you dye eggs is just fine.
--------------------------------
Enjoy this tutorial? Get more like it by subscribing to my RSS feed
------------------------------
Related Posts-
Easter Prep (for Blown Eggs)

Ukrainian Egg Dying

Egg Drying Rack

Hanging Blown Eggs

Indoor Easter Garden


8 comments:
Dude. This is totally rad. :)
I love Pysanky Eggs! Great little blog. I will be back!
Your eggs are beautiful. My nine and almost six year old daughters blew out 12 eggs yesterday, the old fashioned way to dye today.
Warm wishes. Tonya
Wow. That is some patient and beautiful handiwork there. I wonder how long it would take someone in my house to accidentally end up with a gorgeous, dyed, blown egg under their foot!
*and goodness, I almost forgot you were one of my giveaway winners, for the toddler book (see Giveaway Winner post - or just e-mail me your address and it'll be there in no time, or in Mama time).
I'm way off track with the egg craft. Looks like you've done enough research and crafting for several people...
Awesome!
These are great tips. The brown eggs really do seem to make the colors richer, don't they?
wow. I need a question answered and there it is. Isn't the internet wonderful?
This is cool!
Post a Comment