


For those of you who are interested in that sort of thing, I'm including a simple tutorial.
Click here to see the giant picture of everything we made.
How To
-Cut out a relatively flat piece of clear #6 plastic.
-Sand one side using fine grit sandpaper (we used 220).
-Cut out your design, either with scissors or if you're not too particular about your punches, use those. (I did get a piece of plastic irretrievably wedged in my sun punch so I think I'll be sticking to scissors from now on out.)

-Color them on the sanded side using either colored pencils or thin sharpie markers.

-Punch any necessary holes BEFORE you cook them.
-Cook them in either a Shrinky Dink oven, a toaster oven or your regular kitchen oven (325 for between 1 and 5 minutes- or about 30 seconds past when they shrink and flatten back out).
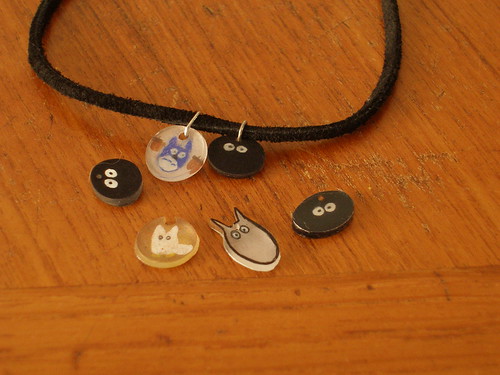
-And I should mention that not all of the number 6 plastic works. So far, the only ones we've had success with was clear #6. The black #6, not so much. Those dustbunnies above were the second try where we colored the clear plastic with black colored pencils.
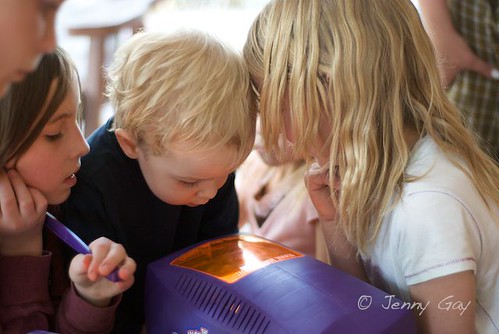
They worked so well that even the adults got involved.
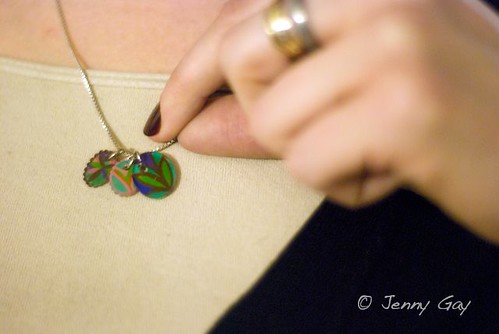
This last one was done by our friend Allison, who unsurprisingly also happens to be a fantastic artist.
And to round out this post, I'm including links to more fun ideas of what to do with your little melted pieces of plastic.
-Wee Wonderfuls: Shrinky Dink Pins
-Elsa Mora: Buttons (I love this idea so much. Imagine... homemade buttons.)
-Craftlog: Spirograph + Shrinky Dinks = Nostalgia Overload
-Craftster: Shrinky Math (This is some impressive jewelry.)
-Planet June: Ring Tutorial (This one looks especially cool, but I haven't had the guts to try it yet.)
--------------------------------
Enjoy this tutorial? Get more like it by subscribing to my RSS feed

6 comments:
This looks awesome!! Only one question; what are common sources of #6 plastic? Milk jugs?
Maggie, we mostly found it used as take-out and strawberry containers. I just checked and our milk jug is #2.
Oh that is way cool! I'd never heard of that. I'll be linking to this project.
Shrinky dinks are so awesome - my boys LOVE them! I entertained a crowd of 7 children for over an hour once with a box of these supplies. Love that last picture.
Thanks so much, Rachel!
Thanks so much for posting this! I finally got my hands on some cut-able #6 plastic! It worked fantastic!
Post a Comment