


Sigh.
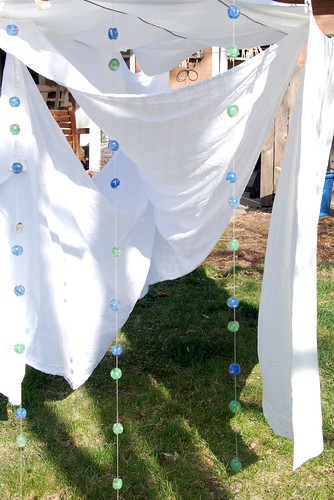
So, I thought I'd show a project that I did years ago. Happily, this thing has mostly withstood the elements. I think only about 2 or 3 pairs of marbles have fallen off in 4 years... and it's been outside the entire time.

I've got 6 of these strings hanging from one end of our clothes line. It looks great when the sun shines through it in the evenings and also looks fantastic in the winter when everything else is covered in snow.

List of supplies...
-Fishing Line
-Flat-backed marbles
-Masking tape
-Glass Adhesive (I used Aleene's Platinum Bond for Glass & Bead)
Instructions...
-Measure and cut fishing line to required length(s) being sure to leave enough at the end for attaching to whatever you're going to attach it to (as well as an extra inch or so at the other end for anchoring into the ground).
-For each pair of marbles, first apply a 2 inch length of masking tape, centered, across the rounded side of one marble (we'll call this marble A).
-Apply the adhesive (slightly bigger than the size of a pea) to the flat side of marble A.
-Push the marble A and the second one, marble B, together gently, flat side to flat side. Don't squish so hard that glue comes out the side.
-Pull marbles apart. At this point the glue should have spread to cover most of the flat surfaces; if not, apply a bit more.
-Let sit (adhesive side up) for a minute or two.
-Lay the fishing line over the flat side of marble A where you want the marbles attached.
-Put marble B, flat side down, on top of marble A, sandwiching the line between the two.
-Wrap the tape up and over marble B to hold in place while drying, being careful not to let it touch any excess glue.
-Do this about 50 more times, with the remaining pairs of marbles.
-Let sit for 24 hours and remove tape.
Notes...
-You may be tempted to use the hot glue gun for this project. Don't. They will pop off at changes in temperature. My first attempt at this was for our bathroom. I hung them from the ceiling around the glass shower enclosure. It looked pretty cool until one of us took a shower. At which point it rained marbles on our heads.
-You can tie the end of the fishing line around one of those little, white circle things that get sewn on the back of drapes (I believe that is the technical name for those) and then run a dowel through each of the circles to hang.
-If you want to hang these outside, like I've done, tie the lower part of the string to something that you can push into the ground (I used plant markers). This keeps them from swinging and getting tangled up.

13 comments:
That is just so pretty! I am going to have to give it a try soon. We need a little bling in one part of the yard, and this would be perfect!
It is lovely. Thanks for the idea.
Oooh! I love these. And I have tons of these marbles around. I've wanted to make something similar for a window in our kitchen, but wasn't sure how to get the beads to stay put. Glue is the magic stuff. Thanks for the idea!
This is soo pretty. I am going to have to try this. Thank you.
those look really pretty.
I love this idea! I was just thinking I needed add some sparkle to our patio. Thank you!
What a great idea!I can just see you sitting there watching the beads shine cool for those ugly spots in a back yard.
Thank you for sharing.
I love these, beautiful!
Thanks for the tip! I like this idea a lot. So simple but many possibilities.
Tricia Garrett
kewl. Just might try this myself. THANKS!
very cute.
This is just so awesome! I may have to do this but I'll put mine in my bedroom. I love watching the light shine in through the windows I think it will look so awesome in the morning! Thanks for posting this and the tute as well!
I saw these on Casa Sugar today, and I'm including them in the Daily DIY! They're fantastic!
Post a Comment