


I did not get any pictures that showed the transition from plain white plaster to finished piece, but it involved foam, black & gold spray paint, fabric, ribbon, hot glue, fabrictack glue, wood and glass pieces.
I was way too busy just getting the damn thing done in time for the class party. Sorry. When someone invents a forehead mounted camera that I can wear constantly and take the pictures using a series of blinks I'll be very happy. Seriously, someone get on that.
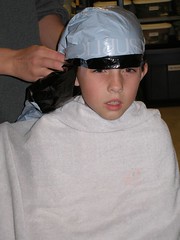
First, you put down the plastic to protect head and hair. Next time we do something like this, we plan to lay a thin towel down under the plastic to create a little wiggle room on the finished product.
The supplies...

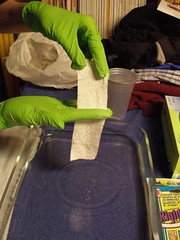
How to lightly squeeze off excess water. Make sure to dump the used water outside, not down any household pipes.
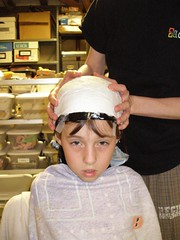
How to apply the plaster of paris gauze. Put pieces crossing each other for added strength.

Do about 3 to 5 layers.

Waiting to dry

After the removal, you can hold it up to the light and check for any see through spots and then add more layers. You want this bottom layer to be pretty sturdy so that when they move around, it doesn't fall apart.
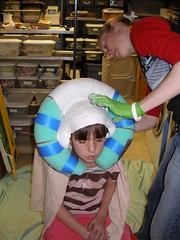
This picture was taken after we made little bowl shaped earpieces (out of the plaster gauze) and attached them (using more plaster gauze). Jenny's marking the line to trim it to match the actual headpiece. We also had to trim around the ears to be able to get it on (since we added the ear pieces when she wasn't wearing it- I'm glad we did it off her head because we wouldn't have been able to get it off her).
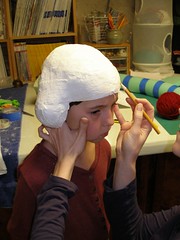
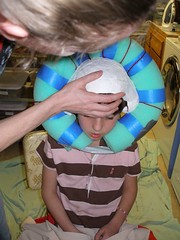
I drilled holes and pulled yarn through so we could tie down the roll of foam that's to become the hair.

Your model will need to wear the base if you want to add any other stuff. That way you know that it will sit properly. That duct tape at the chin kept the roll in place until the plaster dried. Just make sure not to add anything too tight to the face that will prevent you from actually removing the headpiece. (for example- if we had wrapped the foam all the way to the end, it would not have come off her head.)
We added only one layer of strips over the foam because we didn't want it to get too heavy. We probably could have gone with two layers, because I ended up denting it in one or two places when I grasped it to take it off. And the whole thing was plenty light as it was.
What's goin on, Joey?

Does this help, Mommy?

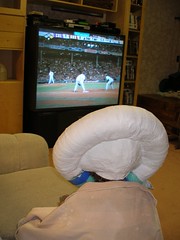
Waiting for it to dry while watching the Rockies playing in the World Series. They never should have tried to copyright Rocktober. Dummies.
After it was completely dry, we cut the duct tape, removed it from her head and then cut the foam at the bottom, shaping as necessary with the scissors. After that, I plastered over the bottom of the foam with more gauze to create the final shape.

1 comment:
If you're interested in seeing the comments from the original post, you can check them out here.
Post a Comment