"Anyone that doesn't agree with leggings as pants can physically fight me.
And I'm going to win because I have a full range of motion due to the fact that I am wearing leggings as pants."

Tuesday, November 24, 2009

Seville and Her Fiance

After several tries, the Contest Winner's stamp is finally done. And I am super pleased with how it turned out. I especially like her fiance's sideburns and beard, even though they were fairly tedious to carve.

PB240004

Part of the reason that it took several tries to carve this bad boy was the fact that the set of Mastercarve blocks that I'd bought for this had a much different texture than the previous ones I'd bought. They were crumbly and the surface was somewhat pocked.

Very disappointing.

I also tried this on the pink Speedy Carve Block but found it much harder to carve. Hard in both senses of the word... both firmer as well as more difficult. I still haven't made up my mind as to which type I prefer.

I guess I'll have plenty of time to figure it out as I carve all the Christmas presents for the cousins this year.

Update- As requested by several people, here's the original picture, as well as one of my tests for the stamped image.

SANY1311 (4)

scan1

---------------------------

Related Posts-
Portrait Stamp Tutorial
A Giveaway

Wednesday, November 18, 2009

Mexican Cabbage

When I made enfrijoladas the other day, I decided to add a side of pan-fried cabbage because as soon as the weather gets cold, I start consuming all vegetables in this form, which is to say either oven roasted or pan roasted. I did this one on the stove.

PB160096

Ingredients
-one quarter of a cabbage- about 2 or 3 cups (this also works really well with most vegetables)
-olive oil (a couple of tablespoons)
-salt (a couple of pinches)
-pepper (a pinch)
-1/4 t chili powder (I also use chipotle powder sometimes, but only about an 1/8th t of that.)
-1/4 t cumin (ground)
-1/8 t garlic powder (you can use a clove of fresh minced, but don't add it till the end, or it will burn and taste bitter)
-your favorite salsa (optional)
(Honestly, for the spices, I usually just start pulling things out of my cupboard and sprinkle them on. But this is my best guess. Sometimes I'll add paprika or Mexican oregano or cayenne.)

How To
Note- The key to cooking vegetables this way is to get the heat right. Unfortunately, that is something you and your stove will have to work out between yourselves. I can tell you that I set mine between 6 and 7, but that may be of little help to you. Also, for quicker cooking vegetables like cabbage and broccoli, you'll want to have the heat a bit higher, so that they get all browned before they become soggy and over cooked. For longer cooking ones like cauliflower and green beans, you'll want to keep the heat a bit lower, so they don't burn before you get them to crisp tender.
-Put a pan over medium/high heat, adding a tablespoon of oil. Let it heat up while you're preparing the cabbage. (However, if you cook on a gas stove, which heats up much faster than an electrive stove, you may want to wait until you've prepared the cabbage before turning on the heat.)
-Shred the cabbage like so...
PB160071
(If using a different vegetable, just cut into bite-sized pieces.)
-Put it in a bowl, drizzle with a tablespoon or so of oil and sprinkle on the salt, pepper and other spices.
PB160073
-Mix well, so everything is lightly coated. Add more oil if it doesn't look glossy.
-Check that the oil in the pan is looking all shimmery. If it isn't, wait patiently until it is.
PB160076
-Add the cabbage and make sure it's in a fairly thin layer. Don't add all of it if it's much thicker than this...
PB160078
-Here's the hard part. Don't stir it. Just let it sit for several minutes (maybe up to five). You'll want to keep an eye on it, but don't mess with it.
-When it starts to get browned on the bottom layer, like this, that's when you can give everything a good stir and take it off the heat.
-If you're using fresh garlic, stir it in now and put it back on the heat for 30 seconds or so.
PB160083

-Taste and add more salt if necessary.
-If you'd like, you can stir in a couple spoonfuls of salsa after you take it off the heat. Joey preferred it this way, but I wasn't too sure about the combo of tomato and cabbage. Something about the acid in the tomato didn't seem to work with the cabbage. But, as I said, she ate a bunch of it rolled up in a tortilla, so that's gotta count for something.

And that's it.

Alternatives
-If you want to cook more than this, roasting is always a good option. Just cut the cabbage into wedges, mix with the oil and spices and put it in a 400 degree oven for about half an hour (as my friend Karin describes).
-Also, oven roasting is my preferred method for cauliflower. When it's raw, I really dislike it, but when it's roasted, it gets all buttery soft and caramelized. I can eat that stuff by the bowlful.
-Changing up the spices for this is super easy. Instead of the chili powder, cumin and garlic, you can use curry powder and garam masala for Indian or rosemary, thyme and oregano for Italian or just the salt and pepper for a more universal flavor.

In fact, I just found this picture of roasted cauliflower with curry powder and garam masala. (And I know that to some of you, those seasonings may seem a bit intimidating, but check the spice section at your grocery story. McCormick's has a tasty garam masala.)

P3100014

Yum. That looks so good, I think I may make some for breakfast.

Tuesday, November 17, 2009

Enfrijoladas

Ever since Jeff found Rick Bayless' recipe for enfrijoladas, it's become a staple around our house. While it isn't particularly quick, it is incredibly easy. The amount of actual effort required on my part is so small that I make it pretty often. Really, it takes like 3 minutes to get everything in the pot. It's also yummy and the perfect comfort food, especially since it's full of protein and fiber instead of processed starches.

It's also one of two recipes that Sean (our oldest- 19) asked how to make on a recent visit home, which I feel is a ringing endorsement.

PB160093

If you've got a pressure cooker, you can do these in less than an hour. If not, you could cook them in a slow cooker all day. Obviously, you can also do these on the stove top for several hours, but you'll have to plan your day accordingly. My pressure cooker is one of my best friends in the kitchen. It makes it super easy to cook dried beans, which are healthy, healthy, healthy and cheap, cheap, cheap.

I usually make a big batch because this works really well as left-overs (you may need to stir in a bit of water because it tends to thicken in the fridge). Feel free to halve the recipe below.

Before we get started, I should give a bit of an explanation about one of the ingredients, the chipotles in adobo sauce.
#1- I love these things. I've used them in just about every type of tomato based recipe I've ever tried, from spaghetti sauce to chili. At first I was intimidated by them, but now I always have them in my kitchen.
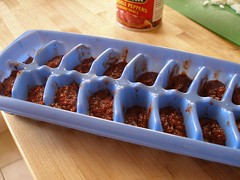
#2- Although they come in a little can, you will never use all of it at once. What I do is puree the entire thing with my immersion blender attachment and then freeze it in individual ice cube shapes. All of those get stored in a mason jar in the freezer. As a substitution, I use about one cube per chili in a recipe.

P5050125 P5050126

P5050127 P9010102
Ingredients
-2 cups of dried black beans
-5 cups of water
-1 or 2 onions (stem and root removed, peeled and chopped in quarters)
-1 or 2 chipotles in adobo sauce (depending on how hot you want it- you can even go up to 3 or 4, but this recipe is kid friendly)
-1 pound of chorizo
-salt to taste
-tortillas (I use little whole wheat ones from Whole Foods, but the original recipe calls for corn tortillas)
-queso fresco (optional)
-tomatillo salsa (also optional)

P7270025

How To
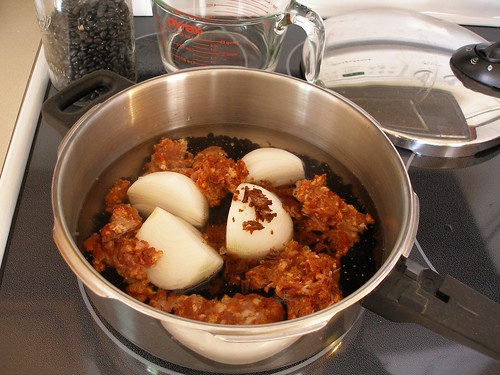
-Check the beans for stones or other debris (depending on your source, you may or may not need to do this every time), rinse them under running water and dump them in the pot.
-Add the water, onions, chipotles and HALF of the chorizo.
-Bring to a boil and cook until the beans are very tender.*
-What you should see is a really loose mixture of beans and water, with the water just covering the beans. If there's too much water, pull some out (but don't toss it just yet, you may need to add it back).
-Here is where I use the immersion blender to blend it til it's smooth. But if you don't have one, you can puree it in a blender (with lid loosely covered and a dishtowel for protection) or a food processor.
-Add salt to taste and, if necessary, thin it with water till it's the consistency of a cream soup.
-Fry up the other half of the chorizo. I like it cooked til it's almost crispy.
-Microwave the tortillas a few seconds till they're warm and pliable.
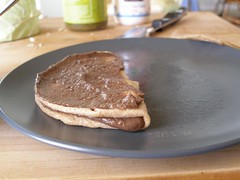
-Place one of them on a plate, spread some of the bean mixture over the top. Then fold the tortilla in half and spread more beans on top. Fold over on itself again one last time and spread on more beans.

PB160087 PB160088
PB160089 PB160090
PB160091

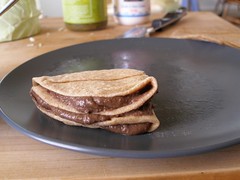
-To serve, top with the chorizo, cheese and salsa. Sour cream's good with these too.

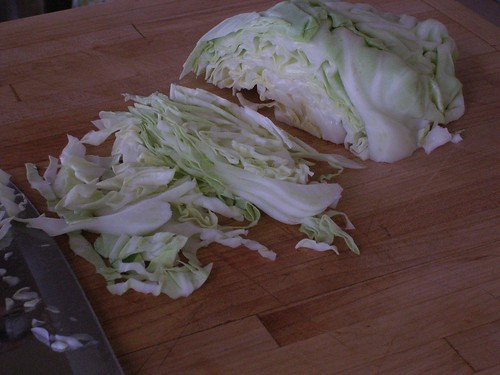
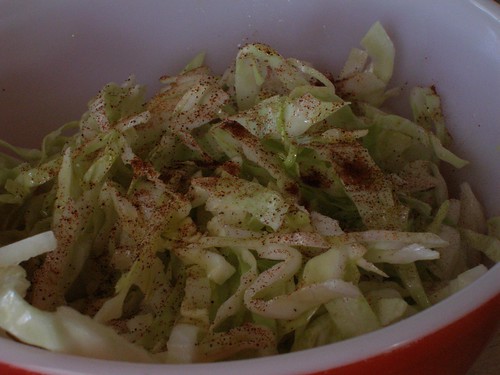
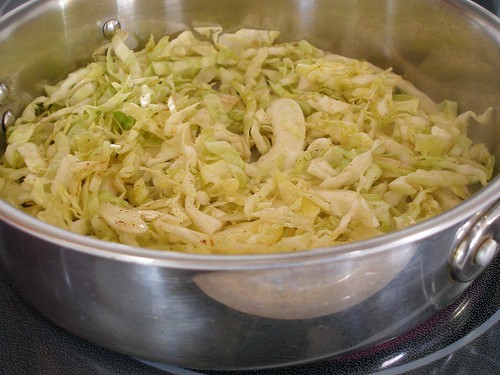
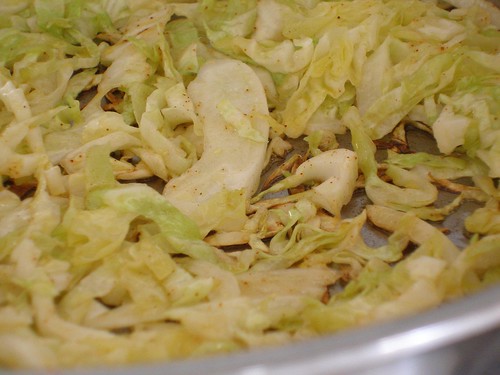
When I made this yesterday, I cooked up some Mexican-spiced cabbage to go on the side.

PB160096

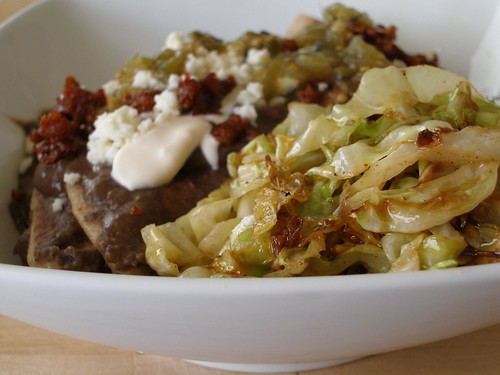
It turned out really tasty and Joey even had a snack of the cabbage rolled up in a tortilla. Yes, my 11 year old ate cabbage rolled into a tortilla. It was that good. Let me know if any of you are interested in a recipe for that.

K- Here's the recipe.

*If using a pressure cooker, just put on the lid, bring to pressure and adjust temp... takes about an hour.
If using a crock pot, you'll probably want to first bring the beans and 6 or 7 cups water to a boil in a pot and then dump those, along with the rest of the ingredients, into the cooker... should take about 6 hours, but you can overcook these if you need to leave it up to 10 hours.
For the stove top, it'll take 2 to 3 hours... just keep adding more water if it's getting dry.

Wednesday, November 11, 2009

Weird Adult Wednesday- Best Day Ever

This picture is of Joey after we heard that the Wiener Mobile was in town.

Strangely enough, though, today's story isn't about her. Mainly because she was not the one who was excited to tears by the whole experience.

IMG_0295.JPG

(Here's the conversation between me and Jenny and Aurora, as best as I can remember.)

Aurora: Today is the Best Day Ever! I went to the grocery store and I saw the WIENER MOBILE! I didn't want to run right up to it and seem too excited, so I decided to go shopping first. But then I started to freak out that by the time I was done they might be gone. The whole time I was inside the store I kept saying to myself, "Be cool, be cool."

Wendy: You were crying weren't you?

Aurora: I was trying not to.

Aurora: So I finished shopping and asked the wiener mobile people if I could have a picture. The lady didn't understand and thought I wanted to take it of just the wiener mobile. So I had to explain that No, I wanted a picture of me standing next to the wiener mobile.

Aurora: Then I asked for an Oscar Mayer Wiener Whistle.

Jenny: I didn't know there was a such a thing.

Aurora: Of course there's a wiener whistle. But she said I needed to sing the song to get it. But I was so excited...

Jenny: and crying by this time, right?

Aurora: Oh yah, totally. So I was so excited (and crying) that I couldn't remember the words, so they had to whisper them to me every other line. But I got my whistle!

Wendy: Probably because they thought you were a special needs person. After you left, I'm sure they even remarked on how high-functioning you were.

Aurora: Yah, something like... Oh good for her. She almost remembered all the words to the Oscar Mayer wiener song.

Best day ever

Love you, Rora. Your enthusiasm for life really does make you special.

(More info about the Wiener Mobile here.)

Friday, November 6, 2009

Let the Wild Rumpus Start!

When I found instructions for a Mad Hatter costume on Threadbanger, I immediately decided that someone in our family needed to to make it for Halloween.

103NCD80_DSC_2618.jpg

Our brother Tommy went for it (with some help from his big sisters, of course) and it was fantastic! He was even done with it for a party 2 weeks before Halloween.

Craziness.

man_craft_1.jpg

One Note about their instructions if you want to try this yourself... in the video, they suggest using thick material to stretch over the form for the hat. Don't do it, unless you want to end up with unwieldy wrinkles (something I discovered as I attempted to hot glue the entire thing together for the first time. Grrrr). Use something stretchy instead. Jenny and Tommy found a gray knit shirt and a black stretch lace shirt at the thrift store to cut up and use.

Also, instead of using wire to create the brim, Jenny had the brilliant idea to just form the top part of it right over a black velvet cowboy- or pimp- hat. Amusing that I can't tell the difference between the two. I guess when you're dealing with black velvet, everything takes on nuances of pimp.

Since Tommy ended up staying in and watching scary movies on the actual night of Halloween, I got to borrow the costume.

Joey completed the theme as the Cheshire Cat. I am so kicking myself for not thinking to use glow in the dark face paint for her smile. Then she really could have disappeared in the dark just like he did.

103NCD80_DSC_3351.jpg

I love Jaden and Aurora as Coraline and the Other Mother. Notice the black nylons stretched over a pair of circular glasses for the button eyes.

103NCD80_DSC_3242.jpg

103NCD80_DSC_3256.jpg

And Kam was just about the cutest Max that ever there was. His Gram D made his costume using McCall's pattern #5956. And a cut down, spray painted, inside-out Burger King crown worked perfectly to complete the outfit.

max.jpg

103NCD80_DSC_3308_mod.jpg

Oh, sweet boy, "I'll eat you up, I love you so."

Thursday, November 5, 2009

Halloween Meringue Cookies

I'm just going to pretend like I haven't been away from this blog for an entire month. If you all could just enable me with this charade, I'd appreciate it.

Thanks.

What I do have for you is a very kid-friendly project that could easily be adapted for any time of the year.

piping.jpg

I made up a super quick batch of meringue batter (... dough... whipped air?- I have no idea what to call this stuff) from this Cook's Illustrated recipe. Then let the girls have at it with piping bags, instructing them to make everything about an inch tall.

Note- Closing the top of the bag with a rubber band is way helpful for little ones, as well as those of us who are not so little. Heh hem.

103NCD80_DSC_3168.jpg

The girls chose to ignore my advice against writing words and instead focused their efforts to create 3 layers to make them tall enough so that they didn't burn. This one was definitely a success, even though it was only about half an inch tall.

103NCD80_DSC_3201.jpg

Using a #2 tip, I piped a bunch of brains, like from Martha's cupcakes, but from this angle at least, they look a bit like toupees.

103NCD80_DSC_3197.jpg

And here's a little slug and a pile of poo.

103NCD80_DSC_3202.jpg

What collection of Halloween cookies would be complete without those?