"Anyone that doesn't agree with leggings as pants can physically fight me.
And I'm going to win because I have a full range of motion due to the fact that I am wearing leggings as pants."
Showing posts with label Our Green Life. Show all posts

Friday, May 28, 2010

Laundry Line

Our new dryer is both solar and wind powered. In fact, if you take into account the amount of chocolate that I eat and the fact that I'm the one who hangs out most of the laundry, you could say it's also chocolate powered.

Um, anyway.

About a month ago, our dryer stopped working.

Under The Laundry

And instead of rushing right out to get it fixed, we decided to make use of the laundry line that, until now, has served no purpose other than as a framework for sheet tents.

Here are some of the pros.

-It takes me anywhere from 5 to 10 minutes to hang out a load (depending on whether it's mostly towels or socks) and about a minute to take it down.
-Most days, a load of laundry actually takes less time to dry out on the line than it would have in the dryer.
-According to the California Energy Commission, the dryer is the "second-biggest electricity-using appliance after the refrigerator."
-According to Lance, hanging out laundry burns over 130 calories per hour. And that doesn't even count the calories burned lugging a basket of wet laundry up the stairs from the basement. Which you know means I'm able to refuel myself with more chocolate. I believe that this is the best perk of all.
-Even though a lot of the time it's just jeans and t-shirt out there flapping in the breeze, sometimes my laundry is pretty enough to make me smile.

... And Forth

For those of you who've never hung laundry on a line, here is the one tip that I always hear in my mother's voice every time I hang out a load.

Breeze

Hang towels on the outside and undies in the middle.

Unless of coarse you've got beautiful underwear, in which case flaunt those puppies.

Friday, May 7, 2010

Nontoxic Chalk Markers for Your Whiteboard

So maybe some of you aren't really all that into chalkboards. You prefer whiteboards, maybe? Well, the chalk markers that I'm giving away work pretty well on those as well. They have a couple of perks that I think make them much better than regular dry erase markers.

P5071688
(Don't ask me what this is a drawing of. I do not know.)

First of all did I mention that they're xylene free?

Because they are.

These puppies are almost completely odorless. Which is so much better than the brain-cell killing markers we previously used on our whiteboard.

For some time now, I've discouraged the use of our whiteboard because it's right near my sewing table. And the entire room stinks for hours after the kids have drawn on it.

Blech.

So I only let them use it during the times of the year when I could actually open a window for ventilation. Because it says so right there on the dry erase marker... Use in well ventilated area. Which really makes me wonder, how many people working in offices have access to open windows? In my experience, very few.

In case you're interested, here are the health hazards of xylene (a common ingredient in regular whiteboard markers), according to OSHA...

Dizziness, excitement, drowsiness, incoordination, staggering gait, impaired reaction time, impaired short-term memory; headache; eye, nose, throat irritation; corneal vacuolization; anorexia; nausea, vomiting, abdominal pain; dryness and scaling of the skin, dermatitis; reversible liver and kidney damage after exposure to sudden high concentrations.

And while some of that does indeed sound like a good time, I think I'll just skip it and have a few gin and tonics instead.

I also like the fact that once the chalk markers have dried, they won't easily rub off on you like the dry erase markers do. But if you use a damp cloth, it comes right off.

All of which makes it the perfect time to let Joey make a little stop animation video on the white board, something she's wanted to do for some time now, but I've been hesitant about because it's such a long project. We're talking hours of drawing, erasing, drawing and erasing again and breathing fumes the entire time.

P5061642

IMG_1488-1

IMG_1489-1

Luckily this was created in a completely stink free environment...


and caused no brain damage-amage-amage-amage-amage-amage! what so ever. (Warning- that link takes you to an audio file. You know, in case you're at work and don't want everyone to know that you're, um, not working.)

Update- And here's the second of Joey's whiteboard animations.


She spent most of Friday making this one. Other than taking some of the pictures on the first one, I didn't help her AT ALL with either of these. She wouldn't even let me see any of this last one until it was totally done, music and all.

Monday, January 4, 2010

Homemade Firestarters

Firestarters are a super simple project. They really come in handy when you're trying to make a fire at home, but they're almost invaluable when you're out camping in the woods. (So says the girl who was taught, as a kid, how to make fires using a flint. Trust me, a firestarter and a match is better.) This project also makes use of nothing new as it's made from 100% unwanted, unused and recycled materials. Which also means that it costs nothing at all.

I love things that are so cheap that they're free.

P1010054

This is a good way to use some of the branches from your Christmas tree, should you still have one hanging around your living room (like we do).

Also, it used up 3 of the dozens of old egg cartons that we have stacked in the garage, the cardboard ones, not the plastic kind.

And the final ingredient in the firestarter recipe is old saved wax. I have a Mason jar (no way) in which I save all the butt ends of burned out candles.

PC290007

How To
Basically, you strip the needles off the branches and fill up the egg cartons with them. The girls thoughtfully left little sprigs on the top of each cup for prettiness and for ease of lighting.

PC290004
(I offered gardening gloves to the girls and, after a few minutes of stubbornness, they accepted.)

While this is going on, you can put the Mason jar into a slowly simmering pan of hot water. The water, as you can see, only needs to come up the sides of the jar a few inches.

PC290010
(These days I have a specific pan that I use for melting wax, complete with a strainer that holds the jar up off the bottom, but I have successfully done this in a regular pan. Just make sure to keep the water at a bare simmer.)

Lay out the egg cartons full of pine needles on an old pan. (I used the one I destroyed doing this.)

PC290012

And, using the kind of pot holders that slip on over your hand, CAREFULLY pour the wax into the egg cartons. (They will weep a bit, which is why you've got them on the sheet.)

PC290013

Once they are completely cooled, you can cut them apart and store them. We keep some of them in a lidded crock near the kindling and the rest with our camping gear.

To use, you just light one of the bits of cardboard or pine needle and build your fire on top of it.

--------------------------------

Enjoy this tutorial?

Get more like it by subscribing to my RSS feed

Wednesday, June 18, 2008

"Reduce, Reuse—Hey, You Gonna Get Rid of That?"

I had to post part of this article because I so wish that we had an actual program like this. I totally suggest heading over to The Onion if you have several hours to spend and need a good laugh.

Dept. Of Sanitation Asks Public To Separate Perfectly Good Stuff From Garbage


WASHINGTON—Nearly 20 years after launching its first nationwide recycling program, the Department of Sanitation unveiled a new environmental initiative Monday that urges citizens to separate perfectly good stuff, such as old toasters and empty picture frames, from the rest of their weekly trash.

"For far too long, Americans have been throwing out working lamps, expensive coasters, and those nice wooden shelves along with their regular trash," Sanitation Secretary Frank DiPietro told reporters at a press conference. "This wasteful practice not only threatens our environment, but it also forces certain individuals who, say, need a new ottoman to rummage through piles and piles of dirty garbage."

"Just look at this coffee table, for instance," added DiPietro. "It's not even all that cracked."

"Each and every person can make a difference when it comes to helping the environment," said Shelley Manning, a sanitation operations coordinator. "Especially if that person has one of those Dustbuster machines they're going to throw away—you know, the kind that picks up bread crumbs and then you can empty the canister when it gets full? Oh, and some sturdy sconces. If somebody has those, they would also be helping out the environment a ton."

An internal study conducted by the department suggests that the new program may reduce landfills by 25 percent, decrease greenhouse gas emissions by 43 percent, and lessen the chances of having to go out and buy an overpriced mattress by nearly 60 percent. In addition, the report—which was published on the back of some perfectly fine dot-matrix printer paper found next to a Dumpster—reveals that for every dented filing cabinet claimed by the new program, an estimated $45 in nonrenewable cash is saved.

Second Hand Items

Just so you know I'm not kidding about how much I'd love this program, here's a picture of some 'not even all that cracked' stuff that I've found. The sheets were from the thrift store (and later turned into fabric grocery bags), but the cubbies were pure curbside, baby.

I just realized that this is the perfect post to mention Trash Pickins, a fantastic group on Flickr (which I found via Soule Mama, I think). They've got some great stuff over there. This one, in particular, is unbelievable.

Thursday, April 24, 2008

DeCluttering While Increasing my Dependence on Technology

I don't know about the rest of you, but I never use our phone books anymore. The only circumstances that I can foresee needing them is in the event of a power outage, when I wouldn't be able to access the oh-so-helpful, everything-I-could-possibly-ever-need, storehouse-of-information that is the internets. Occasionally, my in-laws will ask to see a yellow pages and I will kindly direct them to our computer, but I think they're adapting nicely.

I've saved several phone books for present wrapping and yet-to-be-determined craft projects (because we can always use paper), but mostly I recycle them. Which, I know, is the lesser of evils. I'd prefer not to see them at all.

And then, fortuitously, Aurora forwarded me a link about how to opt out of their delivery. I had to actually pick up a phone, make a couple of calls and speak to real live humans, but it didn't take long, like 3 or 4 minutes max.

DEX- 1-877-243-8339 (option 2 when I called)
Yellow Book- 1-800-929-3556
Verizon- 1-800-555-4833

[Actually, she sent me this link like a month or two ago and I'd completely forgotten about making the calls until I was reminded of it this weekend while Jeff and I were cleaning the garage (inspired by Chile's Cut the Crap, Declutter-a-thon that I've been participating in for weeks before I knew she was even doing it). Jeff said about the yet to be recycled pile of phone books, something along the lines of... "you can get yourself on a list to keep telemarketers from bothering you, but you can't stop them from delivering phone books". Hummm. That sounds familiar. Don't I know a way to actually do just that?]

So, I've made all the calls this morning and will now be forever phone book free.

I am now going to follow up that helpful information with thoughts about how dependent on technology I have become (you know, in an unhealthy way, not the phone book saving way).

As I believe I've mentioned before, I'm a walking contradiction.

You may have noticed that last month I agreed to participate in a Technology Free day (once a week) that was suggested over at Elements in Time. I know how easily both the computer and the tv can suck away time that would be better spent living life.

While pondering this, I've thought of a lot of situations in which my brain expects technology to save the day, instances in which I've become mentally dependent. I've talked to my siblings about this and here's what we've come up with.

1) I have a DVR on my tv (which is basically like TiVo, in that we can pause, rewind and replay anything we're watching). Because of this, I expect to be able to do the same thing with, honest to God, people.

2) My brother Tommy was standing in the pharmacy, scanning the shelves for a particular cold medicine and he had the urge to use Control F (find) option to locate it. I, myself, have often felt this way with printed text. And, seriously, wouldn't that be great for lost keys and glasses?

3) Jenny's had instances in which she would love to have a Control Z (except she says Command Z cause she uses a Mac and all) to allow her to undo whatever she just did. I must not make the kind of life and death decisions that she does because this has never occurred to me.

4) I can think of quite a few art projects (or household chores) in which Copy & Paste would come in extra handy. Yah, all that effort and thought I just expending on that last thing, could I just quickly repeat it again and again? I've folded one basket of laundry, now just copy it with a Control C and now apply right here to the next basket of laundry with a Control V. And done. Oh, there's another basket of laundry, well Control V again.

Oh, the genius of it.

Tuesday, April 15, 2008

Red Juice vs Strawberry Stains

I believe I mentioned the strawberry stains on Joey's Easter dress. I didn't get around to cleaning it until 5 days after Easter. (I know it's 5 days because that's what the date on the picture says. I love time stamping.) Anyway, I use Red Juice for stains like this. It works really well on food stains particularly, not greasy ones so much, but berries and curry and stuff like that.

P3280054
Strawberry stain

P3280056
Immediately (like 2 seconds) after using the concentrated Red Juice

P3280061
A few hours later (I just let it sit, didn't scrub or rinse or anything)

Once when Jeff had an impacted tooth, he got up in the middle of the night for an ice pack and came back to bed with what he thought was a bag of frozen corn (which normally works brilliantly, by the way). In the morning, though, I discovered a bag of blueberries melting onto our comforter. I forgave him because he was all hopped up on pain meds at the time. Besides, the Red Juice worked like a charm. Really. It just dissolved the stain over the course of about 24 hours.

The company that sells it is The Clean Team. You'll need to type "Red Juice" into the search box in the top left corner of that link if you want to see the Red Juice specifically.

The site says this about it... "To start with, the degreaser in Red Juice is made from user friendly and environmentally friendly seaweed, while the degreasers in most similar cleaners are derived from petrol-chemicals. Red Juice is all natural with ingredients such as soybean extracts, palm kernels, and palm oils. Red Juice is pH neutral, non toxic, unscented and completely biodegradable."

It's actually an all purpose cleaner and they sell it in bottles of concentrate, which I really like from an environmental perspective. One bottle of concentrate makes 20 bottles of cleaner, which saves a lot of plastic. Packaging and shipping water is pretty ridiculous, if you ask me.


Monday, February 18, 2008

Growing Pains (note- this post is not about Kirk Cameron)

When someone isn't feeling well around our house, I tend to shy away from pharmaceuticals, both prescription and over the counter stuff. I have several reasons for this...
-unwanted (and sometimes dangerous) side effects,
-news of supposedly safe, FDA approved medicines being pulled off shelves,
-the fact that they tend to fix the symptoms and not necessarily the underlying problem
-not to mention the stress they tend to put on our liver and kidneys

DSCF0007

I've always been willing to suffer through a little more discomfort in order to avoid drugs that actually harm my body or put my health at further risk, while essentially only treating symptoms. Over the years, though, I've found several natural remedies that work as well, and in some cases better, than pharmaceutical alternatives for both the symptoms and the underlying causes.

The first problem that I ever learned to treat non-pharmaceutically was growing pains and leg aches. As a kid, I had awful growing pains. I can remember crying and crying for what seemed like hours as my mom sat up rubbing my legs. When I was pregnant I started to experience the same thing again.

Then I read in one of the dozens of pregnancy books by my bed that it was because the growing baby was stealing my calcium (sneaky little thing). So, I got a decent calcium complex from the health food store and started taking it before bed. This is something I should have been taking anyway, just the regular dose, nothing above and beyond.

And it worked the first night!

Later, when the kids had growing pains themselves, I began giving them the age appropriate dose most nights before bed and it worked for them as well. If I forgot to give it to them and their legs were already hurting, I would give them a half dose of pain medicine along with the calcium, because it does take a bit of time to work.

The older kids could swallow the capsules, but for Joey, I would just open one and mix it into a spoonful of peanut butter. Nature's Way is the one we found that didn't taste gross that way; it just made it a bit gritty. (That link takes you to VitaCost, a company that I buy a lot of my vitamins and herbs from. They don't have everything that I need (and they have a lot of stuff that I wouldn't buy), but they do have brands I like for super cheap. And their shipping is only 5 bucks for any size order, so I order big.)*

I believe that it is fairly important to buy high quality supplements. Most of the stuff sold at the grocery store does not get absorbed well by the body. I usually judge products by whether Vitamin Cottage carries it, because they are fairly strict about what they put on their shelves.

IMPORTANT NOTE-
I do not feel that just because something is natural, that it is completely safe. They wouldn't work as medicines if they didn't cause significant changes in the body. And even though something may be safe at the suggested dose, does not mean it's safe in higher quantities. Also, it's important to remember that what works for one person, may actually exacerbate problems in another person with a different medical history. It is for these reasons that I suggest you check with your doctor before taking anything new.

Just something to keep in mind.

*Wow, a parenthesis within a parenthesis. I think that's a Wisdom of the Moon first!

-------------------------------

Related Posts-
Fighting Heartburn with Peppers
Spicy Pee (Natural Help for UTIs)
Acupressure for Constipation

Monday, February 11, 2008

Worm Composting (3)- Harvesting The Castings

This is what the finished worm castings look like.

2008 02 11 007

(If that doesn't make you want to try worm composting, then you should consider the possibility that you just aren't a gardener.)

  • After 4 to 6 months of feeding your worms, you will notice that the bedding has become much darker and takes up much less space. This is because most of the bedding, food, leaves, paper, etc has been through the gut of at least one worm.The worms are now living in their own poo (castings) and it is now a good time to harvest your compost. Everyone will be happier.
  • The first thing you need to do is to stop feeding your worms for a week or two. This gives them a chance to eat up all the last little bits of food that you’ve added and makes them more willing to move to where you want them to move.
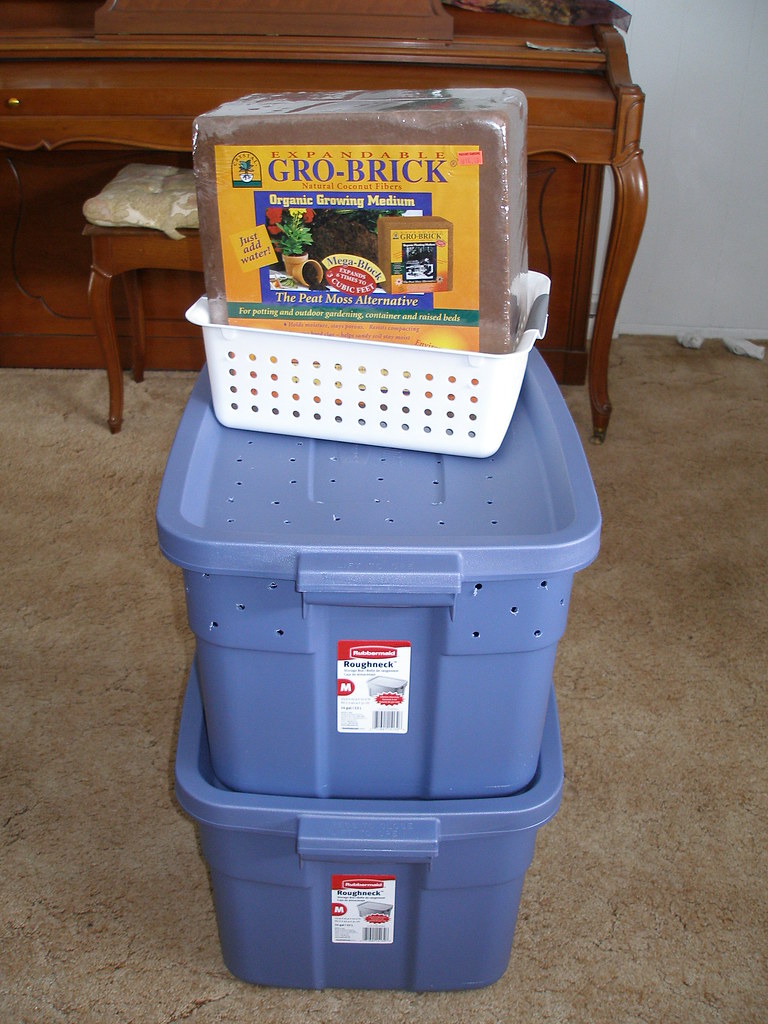
  • There are many ways to actually transfer the worms from old bedding to new. The first is to fill the white plastic basket (see picture of kit here) with new bedding, add food scraps and then bury it down in the bin. Make sure the holes in the sides are buried below the line of dirt. And remember not to add food to the old bedding. The worms will now be attracted to the new bedding and food and crawl through all the holes and into the basket. This way works especially well if you plan to share worms with friends.
  • Another way (the easiest in my opinion) is to shove all the old bedding over to one side of the bin (leaving any big chunks of food) and add new bedding and food to the other side.
(This picture shows the finished compost on the left and new bedding on the right. The compost is actually darker than this, but the flash lightened it quite a bit.)
2007 08 27 005

  • For either of these methods, don’t add any more food to the old bedding.
  • After several weeks, most of the worms will have migrated into the new bedding and the finished compost will be relatively free of worms. You can remove the finished compost (now mostly worm castings) and use it on your garden.
  • The last, and most tedious way, is to manually pull out all the worms. Lay out a big layer of plastic and make little pyramid shaped cones all over it. The worms will move downward, away from the light and you can pull off the top part of the pyramid and add that to a bucket for finished compost. Rebuild the pyramids and keep going until you’ve got a bunch of worms concentrated in a very small amount of compost. Scoop that back into the worm bin to begin your new batch. I have never once done it this way, but it’s the way that Joey would prefer to do it if she knew about it. She tends to sift through the compost I do remove to make sure that no little wormies are getting thrown out in the garden.
  • If you live in Colorado, I'd be happy to share, but I have no idea how I would ship them anywhere else.
--------------------

Related Posts-
Worm Composting (1)- Setting Up the Bed
Worm Composting (2)- Some Other Thoughts
Worm Composting (4)- Troubleshooting
Using Eggshells
Why You Need Worm Poo

Tuesday, January 22, 2008

Cheap & Easy Fabric Grocery Bags

This tutorial gives an overview of how to make a bunch of reusable fabric grocery bags for less than 2 dollars each. (And most of that cost is in the webbing for the handles. They'd cost less than 50 cents if you use denim from old jeans.)

Note (March 09)- I've been using these same bags for just under 2 years. We use them almost every single time we go to the grocery store. And we have 3 kids at home with us, so we shop a lot. We also use them for almost ALL of our errands... clothes shopping, library, even the hardware store. I also wash the bags pretty often. The point it, they have been used hard. Very hard. And even though they're made of fairly thin fabric (which is kind of the point, as I need to be able to cram all of them into their bag, week after week), none of them have ever torn.

P8120008

To make these, you need access to a sewing machine, but don't even need to sew all that straight. Remember, you just need to make them prettier than the ugly plastic things you're using now. How hard can that be?

-For my bags, I repurposed an old sheet that was in fairly good condition (not threadbare at all).
-I buy the sheets at the thrift store for between $2 and $4 each. (The price has gone up since I originally posted. They're between $3 and $6 now. Still a good deal, though.)
-I wash them in hot water before cutting.
-I've been able to get between 6 and 10 bags per sheet.
-Flat sheets are easiest, but fitted ones will work too. You'll just need to cut off the elastic (click here to see how to reuse it).
-Cut as many 18" x 42" rectangles as you can from the sheet. (This results in a fairly big bag that's about 17 inches square. You can easily make it bigger or smaller, depending on your needs- and the size of your sheet. Regular plastic grocery bags are only about 11 by 13 inches. I'm thinking of making some more that are smaller and labeling the big ones with 'Light Items Only' because a big bag full of cans is way too heavy, but can be perfect for that jumbo sized toilet paper.)
-Basically, you're just sewing a very crude bag, with no lining. I kept it simple so I could make bunches of them. There's only one little trick that I figured out, shown in the next few pictures.
-Fold in half, wrong side together and pin like shown, about 3 inches from bottom.

2008 01 20 037

Now, pull top down...

2008 01 20 038

til it's even with the pins (creating a fold from pin to pin)...

2008 01 20 039

grasp all four layers of fabric at pins...

2008 01 20 040

and lift up. Then lay it back down flat.

Note- I just replied to a reader who had some confusion with this step. Here is the clarification I gave her "First of all, when you pull the top down, you’ll be pulling both corners of the front straight down till there is a fold right even with the pins. At this point, yes, you will have 3 layers, but when you pinch at the pins and lift up, the back of the bag will fall over your fingers and make four layers (you’ll have to reposition your fingers at this point). I actually fold the back layer down as I’m pinching, so that, in essence, I am grabbing four layers all at once."

-The wrong sides will now be facing out.

2008 01 20 041

(This is much less complicated than it sounds. Thus all the pictures.)
-Sew up the sides. The third option on this tutorial shows how to run both a straight stitch and a zig zag stitch in order to finish the edges nicely. Unfortunately, because of the folds in the seam, a French seam won't work here. The zig zag does the trick, though.
-If you want to check that you did this right, flip it right side out. It should look like this.

2008 01 20 057

-Turn the bag back inside out and iron each seam to one side.
-Fold down top edge of bag about 1/4 inch and iron. (Ya, in these pictures the top of the bag is actually at the bottom of the picture.)

2008 01 22 008

-Now fold the top down again about 2 inches. Iron.

2008 01 22 010

-I pin in squares of scrap fabric to reinforce where the handles go (about 5 inches from the edge). You can use denim or canvas. Just make sure they're right up against the top fold so they get sewn in with the next seam.

2008 01 22 014

-Now, sew two seams all the way around the top of the bag, one 1/4 inch seam parallel to the very top fold and one 1/4 inch up from the bottom fold.
-After that, you can turn it right side out and attach the handles.
-You can use webbing (like I did here) or sew your own handles out of sturdy fabric. I fold the cut edge underneath to keep it from fraying. This step is probably the most difficult; keep with it, it just takes practice.

2008 01 21 008

-Just make sure to keep the rest of the handle out from under the presser foot or you'll end up with this... I can't even tell you how often this happens to me.

2008 01 21 007

-You can attach the handles to the inside or outside of the bag, depending on the look you prefer.

2008 01 21 009

That's it. Please let me know if you have any questions. And I'd love to see any you make. There's even a Flickr group to post pictures on.

One Note- if any men will ever be using these for shopping, you may want to consider doing these from a more masculine print. Jeff originally refused to bring the pretty blue and yellow flowered ones to the store, but has since gotten over it.

Oh yah, here's one last picture... of my grocery bag, bag. It's got a front pocket for the Produce Bags and is closed using my Buffalo Scrunchy (cut off the fitted sheets).
2008 01 22 018

This is basically sewn up with a channel like the produce bags, but bigger and with a pocket.


--------------------------------

Enjoy this tutorial? Get more like it by subscribing to my RSS feed

--------------------------------

Related Posts
Cheap & Easy Fabric Produce Bags
How to Sew Your Own Handles
Buffalo Scrunchies

Cheap & Easy Fabric Produce Bags

I've been using my set of fabric grocery bags since I made them this summer, but I still kept using the plastic bags from the store for fruits and vegetables. Every time I pulled one off the roll, I thought, "I have got to make some of these." And then by the time I get home, I'd forget.

I finally made 9 of them this weekend. And they cost me exactly nothing because I reused a sheer curtain that we'd replaced.

2008 01 19 010

You can either use tulle or sheer fabric, but really I think the sheer is much easier to work with. The only requirement is that they be see through and lightweight. Sometimes they have sheer curtains at the thrift store, just take em home and wash well in hot water. If you can't find those, tulle is probably going to be cheaper. You can get 4 bags out of one yard, which costs 2 bucks.

Also, if you want them to be painfully cute, you can decorate them with some handmade stamps. I carved up some broccoli and onions special for this project.
P8130064

So, on to the directions.

-First, cut the fabric into rectangles that are 17" by 27", which makes a finished bag 15" tall by 13" wide (with double hemming). You can easily make them bigger or smaller, though. (If any of the edges are excessively frayed, cut that off first before cutting to size.)

-Then you need to hem any sides that are not on the selvedge (finished edge) to keep the whole thing from unraveling over time. You can do it one of two ways, both shown in the picture below. If you need a better explanation of the double hem, check here. If you use the tulle, don't bother with the hemming, just sew the whole thing with a fairly tight, straight stitch. (Note- I've changed this from the original recommendation of a zigzag because straight stitches work much better on tulle. Sorry, August!)
2008 01 19 002 copy

-Next fold in half hamburger-wise (as opposed to hotdog-wise... does anyone else remember this brilliant instruction from elementary school?) and pin. In the picture below, the right side is the bottom of the bag and the left is the top.
2008 01 19 011

-When you sew the side and bottom, start sewing about an inch down from the corner. Also, it's best to sew where the fabric is doubled up on itself, basically somewhere along the hem.
2008 01 19 003 copy

-Once you've sewn the bag, make the channel for the twine by folding down and pinning the top edge like shown.
2008 01 19 004

-Start sewing where shown in the picture, folding the fabric evenly down as you go.
2008 01 19 005

-By the time you've gone all around the top and returned to where you started, you'll have created a channel like this. The openings to the channel are underneath my right finger and thumb (please excuse the paint on my hands, we've been painting Randa's room this week.)
2008 01 19 006

-All you need to do to finish the bag is to tie a knot in some twine, push a safety pin through it and feed it through the channel. Leave about 2 or 3 inches hanging out on each side and tie it in a knot. When you want to close up the bag, just do a slip knot.

Oh, and one more thing. I weighed one bag on the kitchen scale and it's total weight was 0.4 ounces (as compared to the plastic bag which was 0.1 ounces).

That's it.

--------------------------------

Enjoy this tutorial? Get more like it by subscribing to my RSS feed

--------------------------------

Related Posts-
Cheap & Easy Fabric Grocery Bags
Produce Stamps for Produce Bags

Monday, January 7, 2008

A Little Project

Since we keep worm bins in our basement, we save most of our kitchen waste (except meat and dairy) for them. The majority of it goes directly into a huge container that we keep in the fridge until feeding time, but I prefer to do the eggshells differently. It works so much better if I dry them first (which means nothing more than leaving them in their containers and sticking them in the garage) and then crushing them at a later date.

And even if you don't do any type of composting, this might still be a good project for you. Just sprinkle the crushed shells directly around your garden. The calcium they contain is especially helpful for fighting blossom end rot in tomatoes.

2007 12 30 010

Sometimes I crush them with a little flat mallet thingy and other times I toss them in the food processor.

I hadn't done this in a really long time, and recently decided that I ought to, after my life was imperiled by a toppling tower of saved egg cartons.

2007 12 30 011

In case you don't want to count, that's 29 dozen eggs.

This is what it's like to live with the crazy that is me.

Note- I did eventually get around to reusing some of these cartons like Green Bean challenged me in the comments.
Homemade Firestarters

--------------------

Related Posts-
Worm Composting (1)- Setting Up the Bed
Worm Composting (2)- Some Other Thoughts
Worm Composting (3)- Harvesting The Castings
Worm Composting (4)- Troubleshooting
Why You Need Worm Poo

Thursday, August 16, 2007

Fabric Grocery Bags or Highland Dancing, You Decide

So, I believe I've mentioned the fabric bags that I started awhile back. Here is when I bought the sheets I made them with. Here is when I attempted to start making them. Within a week I got as far as getting all the actual bag part of the bags sewn up, all of the handles cut out and pressed, and less than half of the handles actually sewn up and attached to the bag.

They aren't completely done, but I'm using them anyway...
P8120008

Then the communal sewing machine that my siblings and I share kind-of went a little funky. It would sew OK for awhile, then it would just get all tangled up in the back. Of course, it was in the back of the fabric, so I wouldn't see it until I was done with the line. Then I would rip out the bad part of the seam, fiddle with some of the knobs on the machine, do a practice line and start again. It would sew fine for a bit, then start going wonky again.

I am now an expert seam ripper.

Then, the sewing machine itself needed to visit my brother's house. My sister said she was sure she could fix it (with more fiddling of knobs, I believe) and so it went to Tommy's. He needed it to sew up a hornpipe costume.

Just what is a hornpipe costume, you may ask... well, Tommy does (and Jenny, my sister, used to do) Scottish Highland dancing. Mostly, they wear a kilt, but one of the dances (called the hornpipe) requires a hornpipe costume. Duh!

The dance itself involves pantomiming the life of a sailor, pulling the rigging, saluting... basically looking like popeye. It also requires bellbottoms and a jaunty little hat. This is something that I've given them enormous grief over, since they began dancing when they were pretty young and susceptible to sibling teasing. And I used to be a lot meaner than I am today.

However, the hornpipe costume is not nearly as bad as the jig costume for males.

They dress like leprechauns.

Seriously.

I'd include a picture of Tommy in one of those if he ever allowed anyone to photograph him in that state.

So, here's something I found on You Tube that shows the hornpipe pretty well. I included it for both people that know about Scottish dancing and people that don't. It's actually a choreography that includes both the jig and the hornpipe. When the ones in the pants are dancing alone, that's basically what a hornpipe looks like. The rest is pretty untraditional, but also, pretty cool. (Tommy, be sure to watch this!)


So, anyway, this post was supposed to be about my bag project, but it turned out not to be. Sorry.

Added Note- But, I did finally write about it here with a tutorial and everything.

Friday, August 3, 2007

I knew it!

Does anyone else out there think they can control the weather? Because I know that I do. Well, not really *all* types of weather, just whether it's going to rain or not.

Yesterday I was reading a blog post about constructing a rainbarrel to collect water from the roof. I got all excited about it (it's been a project I've wanted to do for a long time) and decided to just do whatever I could to collect it because there was actually a 60% possibility of rain that afternoon. I used these to collect rain from my gutter.

The two big containers *did not* fit under the spout. But that tiny little one (which is actually the bottom part of a potty training chair that I now use for various odd jobs in the garden) did.

*Off subject thoughts...
When my daughter was being potty trained, she didn't know that 'to train' was a verb. When she had to pee, she'd yell, "Mommy, I need to get on the potty train!" Now every time I hear someone speak about potty training, I think, "All aboard the potty train. Whoo whoo!"

Anyway, as I said, the small container was the only one that fit under the gutter spout. So, I went ahead and put it there as soon as it began to rain. Within 5 minutes it was full to overflowing. So I dumped it into one of the bigger buckets and replaced it back under the spout. I would also like to mention that when I pulled it out from under the spout, I had to tip it on it's side slightly, so I lost about one quarter of the water that it contained.

So, as the friends and family that were over visiting can attest to, every 5 minutes, I got up from chatting or shucking corn or grilling corn or frying chorizo to go and empty the small bucket into one of the larger buckets, each time spilling an inch or two of water.

Because of this behavior of mine, it rained for quite a while. The weather gods were enjoying my antics and wanted them to continue. It did stop around the time when I needed to leave to go to a friend's house for beers. The weather gods knew that no matter how much it rained then, I would not be tempted to run home and empty the small bucket into the larger one.

They did, however, know that around eleven o'clock at night the sound of rain falling on the roof would be very tempting to me. Which, I'm fully convinced, is why it began raining at that time. I lay in bed and thought, "I really ought to go and empty that bucket. The water's just overflowing from it and running onto the concrete." And then I'd think about how tired I was, what a long day it had been and I would drift off to sleep, only to be woken a half hour later to the exact same thought. And so it kept raining, trying to lure me out into the darkness with its siren call. It became an internal battle between my neuroses and my laziness. Lazy won.

So, this morning I decided that I would unscrew the gutter from the wall and place a clean trash can under it. It wasn't outfitted quite as nice as the rainbarrels I'd been reading about, but it would catch water, and I wouldn't have to stoop down to help the process in any way.

I got as far as making sure that my weed-picking trash can was cleaned out and then went inside for lunch. As I sat there, I heard a huge clap of thunder and ran out with my screwdriver to try to loosen the spout from the wall. OK, I can do this before it starts raining. Then it started raining. No worries, it's just 4 screws. Except the screwdriver wasn't working because the screws had been painted over. So, I got the socket set and got all of the screws out as it started raining harder. OK, oops wow, now I just need to somehow figure out how, to, slide, this, stupid, garbage can, up, under this dumb downspout (with only 3 inches of clearance). OK, perfect.

Well, not perfect, but at least it'll catch water.


So, I went back inside just as the rain stopped.

Seriously.

As I write this, the sky is a perfectly clear blue with nothing but pretty white fluffy clouds floating through it. And when I was rushing with the screws, I swear to God that the entire sky southeast of my house was a solid gray color, and moving toward me.

I realize that this is the exact reason that I have never before tried to collect rainwater from the roof. I knew that if I was prepared and especially, if it was easy to use, that it would never rain again. If I had one of those fancy barrels that actually has a spigot at the bottom that I could hook a hose directly to, that would totally be the kiss of death and our town would soon be a barren desert.

You're welcome.

Sunday, July 29, 2007

As Nature Does

This very green part of our grass lies directly underneath our crabapple tree. Every fall, it is covered with decomposing crabapples. The rest of the yard does not get this special treatment.
P7270031
As you can see, that organic material really does the job.

Our plan is to reduce the lawn in the back by creating vegetable & flower beds all around the perimeter. So far, though, we've focused most of our efforts on the front yard. (Click that link to see a photo how-to of sheet composting.) Here's what the flower patch looks like today.
P7290039 copy

We put wildflower seeds down so our neighbors didn't have to look at a yard full of hay all summer (hay is the top layer of the sheet composting). Also, some of the seeds we planted are cover crops with good strong root systems that should help to loosen up the soil.

And the pumpkin plants that have come up out of the compost are growing well. I'm sure lots of people wouldn't find this to be a good thing. But I'm thrilled.

As you can see, I enjoy a bit of chaos in the garden.

Sunday, July 22, 2007

Green Week- Last Day

So, I don't have any pictures today, just some important thoughts.

Working to help the environment is not an all-or-nothing proposition. Even taking one small step is better than doing nothing at all. Sometimes, the problem seems so overwhelming, that it is easy to do nothing. But doing nothing only makes it worse.

If you make one change, though, it will encourage you to make another and another and then many more. Until this week, I didn't realize how many things that I regularly do to help the environment; they are changes I implemented purposely to help, but now they are routine and they are easy. There is still a lot to do, though.

"Never doubt that a small group of thoughtful, committed citizens can change the world. Indeed, it is the only thing that ever has." - Margaret Mead


With that in mind, you might want to consider taking the following important steps...

1-Contact your politicians. This is difficult at first, but becomes easier with time. You can type emails, handwrite letters or even call the offices personally. I, myself, have made several phone calls to various politicians (including the president's office). This is the hardest one to do, just making the call. Every time I do it, I get all excited and my voice shakes, but I don't hang up until I've said my peace. I enjoy doing this because I think it is good for me personally. It is good to speak your mind to power, even if only to remind yourself that they are only powerful because they are serving us.

Once, as we walked to the mailbox, my daughter (who was 4 at the time) noticed that the letter we were sending was to the president. She demanded to know why I was writing to him. I explained that he worked for all of us and that I didn't like the way he was doing things and that it was my job to let him know that. I felt so strongly that I had to do it. She literally tried to take the letter away from me. She wanted to know if I would be arrested if I sent it. How on earth does a 4 year old learn these things? How does she know that it *could* put my life in danger if I lived in any one of the many other, less free countries?

The following links have some good tips about writing letters (they're Canadian sites, so you may have to adjust for where you live. I didn't find so much info about doing this in America. Strange.)...
Canadian Parks And Wilderness Society
Sierra Club Canada

With the availability of information on the internet, it is not terribly difficult to find out what letters, emails or calls need to be made and when. Which brings me to the next option...

2- You can check various environmental websites to see what actions they are taking and join in. Here are my favorites (I've linked directly to their action pages, but check out their home pages if you're interested)...

Sierra Club
Environmental Defense
Working Assets - a liberal phone company "that fights global warming, supports organic farming and saves endangered species." We've got both our long distance and cell phone through them. In turn, they donate money to the following environmental organizations... Defenders of Wildlife, Global Greengrants Fund, Natural Resources Defense Council, Organic Consumers Association, Rainforest Action Network, Rocky Mountain Institute, Union of Concerned Scientists, Vote Solar Initiate as well as groups involved in Civil Rights, Economic & Social Justice, Education & Freedom of Expression, Voting Rights & Civic Participation and Peace & International Freedom. See the entire list here.

And here is a good Mother Jones article that advises how to evaluate Environmental non-profits. It also lists many groups that have misleading names suggesting they are working to help the environment, but in actuality are working against it.

3- Be proud of being an environmentalist. Make it look fun, easy and stylish. Honestly, setting this kind of example can change the opinions of many more people than you realize.

To that end, please send me links or pictures or just emails of whatever FUN, EASY or STYLISH environmentally responsible project you may be involved in. I'll post them on my site with links to your site. If you don't have a site, contact me anyway. I'll get your stuff up here. Maybe I'll call it Our Green Life. So keep my address and email me whenever you do it, even if it's months from now.

Let's be that group of "thoughtful, committed citizens."

Namaste

Saturday, July 21, 2007

Green Week- Day 5 (In the Kitchen)

Ooops, didn't get this up yesterday.

Here are 3 things that I do to help the environment when I'm in my kitchen.

P7210011

The first is that I'm currently in the middle of a project of re-purposing our empty beer bottles into water bottles for parties. I'm using these dishwasher safe paints and writing both Water and Tea is various languages. I can then fill them up before parties with either filtered water or iced tea. I'm going to recap them using home-brewing supplies.

We usually go through lots of water when we have people over and plastic bottles are bad, bad, bad for the environment. Peter Gleick (a water expert) claims that each bottle requires so much energy to produce, fill and transport that "It would be like filling up a quarter of every bottle with oil." We do put out pitchers of water and that is good, but these bottles are kind of fun and I think it would get some people thinking about how bad plastic bottles are for the environment.

The next environmentally friendly thing we do is use our pressure cooker. Lots.

P7190001

I love this thing. Really and truly I do. It can cook anything (like this Indian vegetable soup) in almost half the time. I cook whole chickens and pot roasts that turn out really moist and tender. It works wonderfully for all dried beans and lentils and stuff like that. I even cook brown rice in there (because I cook it like pasta and drain off the water). It is the best money we've ever spent on anything.

We use it at least twice a week. Sometimes twice a day. I use it to cook Kitchari, which is made from brown rice, red lentils and Indian spices. You can find the recipe here, but I double the amount of dried spices; it's a bit bland otherwise. I just made this for craft day and everyone loved it.

Which leads to another thing we do... eat low on the food chain. The more of your diet that is grains, vegetables and legumes, the smaller your impact on the earth. It just takes more energy to grow a cow than a soybean. We aren't vegetarians, but we do try to make the majority of our meals plant based, not animals based. Speaking of, here is another one of my favorite recipes that's super easy to do with a pressure cooker (and not too bad without one, if you're interested)... Enfrijoladas by Rick Bayless. We do the version that doesn't use the avocado leaves, but uses the chipotles in ancho sauce instead. This uses chorizo sausage, which I absolutely love, and they carry at Whole Foods. It adds so much flavor, but doesn't make up the majority of the meal.

Because we cook this way, I have lots of mason jars filled with various grains, pastas and legumes. I'm currently writing the weights of these jars on the bottom of each, so I can use them to fill directly from the bulk bins. The cashier can tare them and ring me up. No bags wasted in transporting it from store to my kitchen.