Two or three years ago, I was attempting a new project, an indoor Easter garden complete with sprouting branches to hang blown eggs from. It was something I'd never tried before, but had high expectations for. And my friend Jimi asked, "Doesn't Jeff mind?" referring to the large container of dirt in our living room.
It had never actually occurred to me that he might. If he had a problem with that sort of thing, I don't think he would have stuck around for long. It comes part and parcel with the crazy that is Wendy.

This is not in any way meant to discourage you from trying the following project. It's really fun (especially for kids) and is actually a lot easier than it looks. I think the only reason Jimi questioned my housekeeping skills was because she had not yet seen (nor had I for that matter) the awesomeness of the finished Easter Garden.
I guess I love it so much because here in Colorado, green takes longer to arrive in the landscape that elsewhere in the country. So even though this time of year is all about new growth and rebirth, nature is usually still hibernating and really pretty gray.

There are basically two parts to this project, forcing the branches for the tree and growing the grass for the garden. Though, you could easily do just one or the other with happy results.
1) Forcing Branches
The web's got
many resources with detailed instructions for forcing flowers from branches, but basically it involves cutting branches from trees that flower (several weeks before you need them), and keeping them inside in a few inches of fresh water. Once you bring them in, re-cut them while the stems are underwater (in the sink or bathtub) and then transfer back to their container. This keeps air bubbles from entering the xylem or phloem (don't remember which one brings water up the stem- Botany was a long time ago) and plugging it up.
I usually pick several kinds of branches because I just never know which ones are going to look best at Easter. I sometimes pick a new bunch every week, because it is really hard to guess how soon they're going to bloom. I like the way they look around the house as the buds emerge, changing from plain sticks (which are great in their own Zen way) to pretty little blossoms.

Whatever looks best at the time gets put in the Easter garden. I've used forsythia, lilacs, crabapple and cherry branches. I think the cherries are my favorite (nice tight little buds), but the lilacs are good for green leaves. Every week I trim a half inch off the bottom of each of the branches.
2) Growing the Grass
Then, about 10 days before Easter, I start the grass.
The colder your house, the longer this will take.
Green Bean, I'd give it a couple weeks in your house. :)
I use
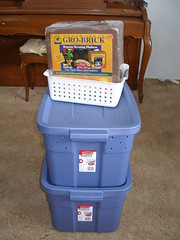
coconut fiber because it's lighter and less messy than regular dirt. And it's not currently frozen in my garden, which tends to slow the process. Also, I'm going to dump the whole thing in
the worm composting bin when it's done, so it's good to use the bedding from that. Dirt would work too, though.
I fill up the container with damp coconut fiber, creating a hole in the middle and then put a fairly large vase in it. It's easier to add the vase now before the grass starts to grow. I leave the vase empty and cover it with either plastic or a lid in order to keep fiber and seeds out. (because I'm messy.)
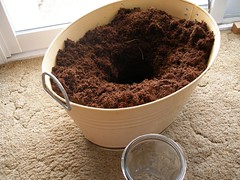


Then I spread the dirt/ fiber with seeds of
Cat Oat Grass that I bought at the garden store, cover it with a half inch of coconut fiber (or dirt), tamp down lightly and cover the whole thing with plastic to keep the moisture in. When the seeds have sprouted, I pull off the plastic. I water gently when it looks dry.
I don't even put it right in a window, just somewhere where it gets a decent amount of reflected light. It tends to grow straighter if it doesn't receive direct sunlight. But if the blades of grass start looking a little anemic, I put it in a sunny window and turn often or stick it under a fluorescent shop light on a timer.
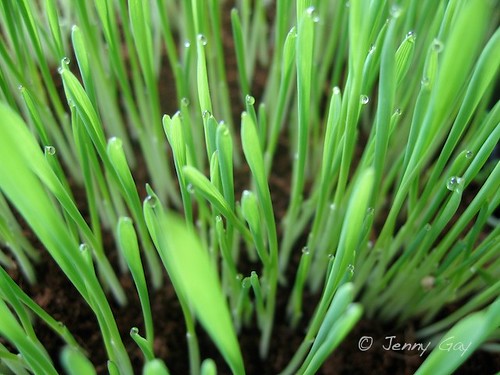
When it's time, I put the container in it's final place, fill the vase with marbles (this helps keep the branches where you put them), water and add the branches. You can add blown and decorated eggs (links to how to do those below) if you'd like, but it's not completely necessary.
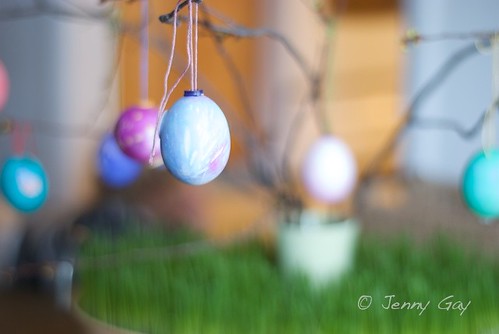
That's it.
One of the things I like about this project is that it makes a great decoration that is completely biodegradable (unlike the basketfuls of plastic grass and eggs). If you don't have a
worm bin you can always toss the whole thing in the garden as mulch. This is also one of the reasons that I'm loving my
stained glass cookies, which either got eaten or worm-binned.
Added Note- If I could get the timing right, it would really fun to force some bulbs underneath all of this. So far, I haven't managed to pull it off.
--------------------------------
Enjoy this tutorial? Get more like it by subscribing to my
RSS feed
------------------------------
Related Posts-
Easter Prep (for Blown Eggs)
 Less Frustrating Ways to Dye Blown Eggs
 Ukrainian Egg Dying
 Egg Drying Rack
 Hanging Blown Eggs

