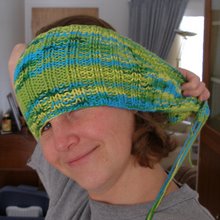
"Anyone that doesn't agree with leggings as pants can physically fight me.
And I'm going to win because I have a full range of motion due to the fact that I am wearing leggings as pants."

Tuesday, December 7, 2010

Sugar Cookies Past

We were woken last night with a large crash from the kitchen. JJ Stinkerbuster must have been trying to help himself to the un-iced sugar cookies and had sent the cooling racks tumbling off the counter. Only one cookie survived unbroken. Jeff got out the dustpan while I tried not to cry.

PC074826

Which is my excuse for sharing pictures that Jenny took 2 years ago.

I have no excuse for not sharing these at the time, though.

DSC_7168.jpg

DSC_7248.jpg

DSC_7209.jpg

DSC_7296.jpg

DSC_7234.jpg

DSC_7285.jpg

DSC_7262.jpg

Kenzie, our oldest daughter (18!), is the one who reminded me that we needed to make and decorate sugar cookies this year. I love that this is something they ask to do every single year. And even though it takes some time (I always bake the cookies on a different day than we ice them), it is always worth the effort, even when naughty kitties interfere with my plans.

Wednesday, November 17, 2010

Weird Kid Wednesday- An Unexpected Toy

"So Mom, can you, like, scan your face with this thing?" says Joey, eying the scanner innocently.

005

004

Apparently so. And it looks like quite a few other things, as well.

014

015

Thursday, November 11, 2010

Prettied Up Pantry

From conception to completion this project took less than 48 hours, which just might be a new personal record. Also it cost less than 10 bucks.

PB014387

And just in case that wasn't enough wonderfulness, I also managed to line the drawers of our butcher block island with some of the leftover paper.

PA314386

So it was like two projects in one.

It started as I was pulling everything out of our pantry (which is really just a large stand-alone cabinet in our kitchen). This sucker was here when we moved in and until our kitchen magically grows itself some extra storage space, it's gonna stay right where it is. Anyway, after I pulled all the cans and boxes out, I realized just how very, um... unpretty the inside of it was.

PA304368

So I decided to do something about it.

Here are the Materials I used
- spray bottle filled with water
- wrapping paper (mine came from Cost Plus) 4 bucks
- Mod Podge- Hardcoat (I bought mine at Michael's with the weekly 40% off coupons) 5 bucks
- sponge brush (you might want to get one that's bigger than the one in the picture)
- heat gun (like for scrapbooking) This isn't totally necessary, but certainly came in handy. I'm guessing that a blow dryer would work too, but I can't say for sure as ours is old and no longer puts out any heat, just cold air.

PB104440

Now I won't lie to you. Mod Podge is really fiddly to work with. It puckers right the hell up, no matter how carefully you smooth as you go. There is a reason that decoupage involves small little pieces of paper and not big sheets. But I managed to get results so I thought I'd give my thoughts on the process.

How To
- First I removed the back from the cabinet. It left the cabinet itself a bit wobbly, but I kept the doors closed and it survived the process.
-Then I went to work on the the back, sealing up any greasy looking stains with one coat of Mod Podge (MP) and letting it dry completely.
-Starting at one end, I applied a thin coat of MP in sections about a foot long, then smoothed down the paper while my lovely assistants (first Jeff then Joey) held the remaining paper up off the surface. Note- When attaching the first bit of paper, I let some of it hang off over the sides.
-Then I applied more MP and smoothed down more paper.
-After the whole thing was in place, I DID NOT mess with the puckers that formed before my eyes. I learned the hard way that this only causes creases.
-Instead, working with one square foot section at a time, I misted it lightly with water, let it soak in for a minute and then hit it with the heat gun, which I moved back and forth quickly. This shrank just about all the puckers. I was so pleased with myself that I had to record the process. Here's a quick video of the magic.

-After I had it all attached, I let it dry overnight.
-Then I flipped it over and, using an exacto blade and a cutting mat, trimmed the excess paper.
-Back on the pretty side, in order to protect the surface, I did 3 top coats of Mod Podge section by section, letting it dry for 30 minutes between each coat. The first of these did cause some more puckering, but not nearly as much as before. I used the heat gun when necessary.
-Then I nailed the whole thing back in place and called it a day.

PB014389

Done and done.

Sunday, October 17, 2010

Sara and Kam

DSC_1936.jpg

What is this life for, if not to help others.
-Prince Mahasattva

Sunday, October 10, 2010

Tomatoes, Basil and Mozzarella

DSC_0291.jpg

One cannot think well, love well, sleep well, if one has not dined well.
-Virginia Woolf

Wednesday, October 6, 2010

Raised Beds- A Long Time Coming

Now that it is well into autumn, I have finally put the finishing touches on the raised beds that were supposed to hold our 2010 vegetable garden.

105NCD80_DSC_5035

My efforts to sheet compost and garden directly over the lawn have been less than stunning, probably because I attempted to convert such a large area and didn't build it up high enough.

DSC_2580.jpg DSC_3958.jpg
(Feb 2008, April 2008)

PA033811
(Oct 2010)

Late this past winter I started planning for raised beds. I researched, drew up plans and figured out how much wood I'd need. And somewhere along the way, I got it into my head that I wanted the beds to be adjustable for height. That way, when I rotate crops, I can make the tomato bed, where ever it is, three sections high and leave something like the lettuce only one high. So I designed interlocking pieces, with the posts offset to fit down into the section below it, holding it in place. I'm not sure that this is actually necessary, but I like it anyway. Cause I'm a nerd like that.

P8013335

Then this spring, I ordered the wood to be delivered, thinking I was so clever and had saved myself the bother of borrowing my dad's pickup and schlepping the boards home myself.

Wrong-o.

The smugness of watching the company dump all that wood at the side of my house wore off quickly, just as soon as I realized how much wood there really was in the minimum deliverable order and the fact that we needed to move all of it to the back porch to keep it out of the elements.

Then there was the second problem of less than perfect wood. I somehow imagined that the guy I spoke to on the phone would go out back and lovingly pick out the straightest, most uniform and undamaged pieces of wood he had. He did not. I feel sure he looked at my purchase as an opportunity to unload some of the more warped and ragged of his stock.

P7053073

So, these are the most recent DDWDDD. Don't buy wood sight unseen. My advice is to find a friend with a pickup and trade them for beers (or the promise of fresh grown produce) and buy only as much wood as you need. If you must have it delivered, though, go and pick out your boards yourself first. Trust me on this one.

105NCD80_DSC_5033

I won't lie to you. These were a lot of work. But that's only because we made so damned many of them. Really, I probably could have reduced the scope of the project by about 2/3rds and actually gotten around to growing some vegetables this year.

105NCD80_DSC_4913

Not that it took us the entire summer to make these. What took us the entire summer to do was work on them for a day, get discouraged because it wasn't going as smoothly as we'd envisioned (thank you warped boards) and then wait several weeks before attempting it again. That pace tends to stretch out the time line a bit. Jeff and I finished about half of them and then just couldn't find the motivation to tackle the second half.

105NCD80_DSC_4981

Eventually though, I felt the time crunch and got a move on (it was also easier once I'd decided to put them together with bolts and nuts instead of deck screws). I even sat out in the rain one afternoon, putting one together. Then Jenny and Kam spent several days at my house and we developed an assembly line process that really moved things along.

105NCD80_DSC_4933

Kam, despite the obvious handicap of being 4 years old, was surprisingly helpful.

And also adorable.

105NCD80_DSC_4934


After they were all put together, we dug them into the ground. Then Joey and I attached a bunch of pipes that will hopefully make it super easy to set up trellises as well as hoops for frost and bug protection. Looking at the finished beds, I realized that this might be the perfect example of me making things much harder on myself than strictly necessary, but I am so very pleased with it.

PA033812

And I also realized that when it takes me this long to finally finish a project, the actual moment of completion is less "Woo hoo!" and more "How could it have possibly taken so long to finish this?"

I'm also trying not to dwell on the fact that they aren't, technically speaking, finished, as they now need to be filled with many truckloads of sheet composting material.

Wednesday, September 22, 2010

Weird Kid Wednesday- Envelope Emotions

Recently found these photos on the camera.

100_4863

100_4861

How are you feeling today?