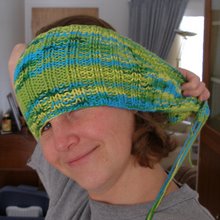
"Anyone that doesn't agree with leggings as pants can physically fight me.
And I'm going to win because I have a full range of motion due to the fact that I am wearing leggings as pants."

Sunday, October 17, 2010

Sara and Kam

DSC_1936.jpg

What is this life for, if not to help others.
-Prince Mahasattva

Sunday, October 10, 2010

Tomatoes, Basil and Mozzarella

DSC_0291.jpg

One cannot think well, love well, sleep well, if one has not dined well.
-Virginia Woolf

Wednesday, October 6, 2010

Raised Beds- A Long Time Coming

Now that it is well into autumn, I have finally put the finishing touches on the raised beds that were supposed to hold our 2010 vegetable garden.

105NCD80_DSC_5035

My efforts to sheet compost and garden directly over the lawn have been less than stunning, probably because I attempted to convert such a large area and didn't build it up high enough.

DSC_2580.jpg DSC_3958.jpg
(Feb 2008, April 2008)

PA033811
(Oct 2010)

Late this past winter I started planning for raised beds. I researched, drew up plans and figured out how much wood I'd need. And somewhere along the way, I got it into my head that I wanted the beds to be adjustable for height. That way, when I rotate crops, I can make the tomato bed, where ever it is, three sections high and leave something like the lettuce only one high. So I designed interlocking pieces, with the posts offset to fit down into the section below it, holding it in place. I'm not sure that this is actually necessary, but I like it anyway. Cause I'm a nerd like that.

P8013335

Then this spring, I ordered the wood to be delivered, thinking I was so clever and had saved myself the bother of borrowing my dad's pickup and schlepping the boards home myself.

Wrong-o.

The smugness of watching the company dump all that wood at the side of my house wore off quickly, just as soon as I realized how much wood there really was in the minimum deliverable order and the fact that we needed to move all of it to the back porch to keep it out of the elements.

Then there was the second problem of less than perfect wood. I somehow imagined that the guy I spoke to on the phone would go out back and lovingly pick out the straightest, most uniform and undamaged pieces of wood he had. He did not. I feel sure he looked at my purchase as an opportunity to unload some of the more warped and ragged of his stock.

P7053073

So, these are the most recent DDWDDD. Don't buy wood sight unseen. My advice is to find a friend with a pickup and trade them for beers (or the promise of fresh grown produce) and buy only as much wood as you need. If you must have it delivered, though, go and pick out your boards yourself first. Trust me on this one.

105NCD80_DSC_5033

I won't lie to you. These were a lot of work. But that's only because we made so damned many of them. Really, I probably could have reduced the scope of the project by about 2/3rds and actually gotten around to growing some vegetables this year.

105NCD80_DSC_4913

Not that it took us the entire summer to make these. What took us the entire summer to do was work on them for a day, get discouraged because it wasn't going as smoothly as we'd envisioned (thank you warped boards) and then wait several weeks before attempting it again. That pace tends to stretch out the time line a bit. Jeff and I finished about half of them and then just couldn't find the motivation to tackle the second half.

105NCD80_DSC_4981

Eventually though, I felt the time crunch and got a move on (it was also easier once I'd decided to put them together with bolts and nuts instead of deck screws). I even sat out in the rain one afternoon, putting one together. Then Jenny and Kam spent several days at my house and we developed an assembly line process that really moved things along.

105NCD80_DSC_4933

Kam, despite the obvious handicap of being 4 years old, was surprisingly helpful.

And also adorable.

105NCD80_DSC_4934


After they were all put together, we dug them into the ground. Then Joey and I attached a bunch of pipes that will hopefully make it super easy to set up trellises as well as hoops for frost and bug protection. Looking at the finished beds, I realized that this might be the perfect example of me making things much harder on myself than strictly necessary, but I am so very pleased with it.

PA033812

And I also realized that when it takes me this long to finally finish a project, the actual moment of completion is less "Woo hoo!" and more "How could it have possibly taken so long to finish this?"

I'm also trying not to dwell on the fact that they aren't, technically speaking, finished, as they now need to be filled with many truckloads of sheet composting material.

Wednesday, September 22, 2010

Weird Kid Wednesday- Envelope Emotions

Recently found these photos on the camera.

100_4863

100_4861

How are you feeling today?

Wednesday, September 15, 2010

Warrior Dash

Did it! (Click this link if you want to see a few more of the strangenesses I've challenged myself with over the years.)

Sometime back in May we signed up for the Warrior Dash, something I wasn't one hundred percent sure I could do, but I damned well wanted to try. It's a 5K run up and down the side of a ski-slope (Copper Mountain) with a bunch of obstacles thrown in for good measure.

105NCD80_DSC_3424 - Version 2

And look we're smiling! In fact, I smiled for most of it. It just felt so good to know that my body was up to the task.

We'd started out at the very back of the pack, the 3 last people in fact, possibly because we knew our best pace and kept to it. By the time we made it to the really steep part of the hill, most of the people around us were walking. Going up the hill, several people even cheered for us as we passed them. A fact which really typifies the race... not a lot of pressure, but plenty of fun.

Jenny and Aurora and I did it, along with Aurora's husband and Jenny's and my little brother Matthew (who painted himself blue in honor of our Gaelic heritage).

Before
P8213525_title

105NCD80_DSC_3398

After
105NCD80_DSC_3520

105NCD80_DSC_3505

So, yes, for those of you who are asking, I did make it over the wall. Luckily it was nowhere near as tall as the one we'd practiced on. There were actually three of them, though, so that sort of made up for it, difficulty-wise. No pictures of us on the wall, but here we are going through mud and jumping over the fire.

105NCD80_DSC_3467

105NCD80_DSC_3473

105NCD80_DSC_3502

And finally, here's a video that I didn't take, but was made on the same course that we ran later in the day, so you can see the obstacles from our point of view. And though it might not look that bad, I have to say the most difficult obstacle was going uphill through the tubes.


Gotta get me a helmet cam for next year's race.

Note- the rest of the pictures from that day can be found here if you're interested.

Sunday, September 12, 2010

Cousins

104NCD80_DSC_2040

I think I have learned that the best way to lift one's self up is to help someone else.
-Booker T. Washington

Thursday, September 9, 2010

Crabapple Butter

There is a contrary part of my nature that loves the process of taking something that seems totally useless and making it into something great. Which might explain my compulsion to turn crabapples into apple butter every year. (For those of you who don't know, regular apple butter is basically a thickened applesauce. It's sweeter and also spreadable.)

P9083726

Crabapple butter is fantastic on toast or a topping for hot cereal. You could throw some of it in a smoothie or on top of ice cream. Our kids even love to eat it plain, though it is pretty tart. You can make it with or without sugar.

105NCD80_DSC_2653

The process is fairly straightforward.

105NCD80_DSC_2641

First you pick a bunch of crabapples, avoiding any that have holes or are bruised. Don't worry if they still have stems, though.

105NCD80_DSC_2637

Part way through harvesting we decided to spread a big sheet out on the ground to catch those that fall because when they're ripe, for every one crabapple that you pick, five will shake themselves out of the tree.

105NCD80_DSC_2614

Rinse them well. Add more water to the pot with them. If you've got a smaller batch, you can add enough to just cover them. But for the bigger batches, I've found that adding 5 or 6 cups and then keeping the lid on will do the trick. (If you add enough water to cover a big batch, you'll end up with way too much water in the end.) Just make sure that it doesn't all evaporate when it's cooking. You can add more as necessary.

Now you can simmer these guys until the skin starts to split and they are really soft. Turn off the heat and let them cool a bit because this next part can be messy, and if they're still hot, it'll be messy *and* painful.

Now comes the one piece of kitchen equipment that you may not already have, a food mill. I got mine from Aurora (who was selling it at a garage sale) and even though it's sort of wobbly to use, it does get the job done.

P8193515

The kids love to use it, so, you know, free labor.

P8193518

Scoop the apples in there and rotate the handle while pushing down. You'll need to use your other hand, or a helper, to keep the thing steady. I'm sure there are more expensive models that work better than mine, but I've learned to make do.

As you turn it clockwise, it pushes the apples through the sieve at the bottom. If you turn it counterclockwise, it cleans the holes by scraping off the skin and seeds. If you don't have one of these, you can also use a spoon and a fine meshed sieve, working the mixture through with the back of the spoon.

What you'll have at this point is basically pink, tart applesauce, well, crabapplesauce if you want to be technical about it.

P8193521

You can keep it plain, or add spices and sugar. I usually add just one thing... cardamom. I really like its flavor with the crabapples. I usually add about a half teaspoon for every four cups of sauce. And part of the appeal of using crabapples, is that they're so tart, so we don't add much, if any, sugar (maybe a half cup per batch). But feel free to add as much as you like.

To turn this applesauce into "butter" I usually cook it down on the stove until it's nice and thick. Though, this year I tried it in the oven, which I preferred. Pour all the sauce into an oven proof pot, or if you've got a huge batch, into two oven proof pots. I used an enameled cast-iron and the ceramic insert from my slow cooker. Clean off the sides of the pot really well with a spatula. Set the oven for 325 degrees. Put the pots in and cook for 2 or 3 hours, stirring occasionally. What this does is cook out much of the water, reducing the volume and thickening the mixture. When it's done, it'll look like this.

P8253562 copy

Just scoop out the non-charcoaled stuff at the bottom. I'm guessing that if I'd been more diligent about scraping the sides of the pot with a spatula both before and during cooking, there'd be less black. But I'm fine with this because it didn't require me to stand over the stove for hours on end.

I canned this in little half pint jars using the waterbath method. If you haven't canned before, please know that it isn't particularly difficult, you just need to follow the directions.

P8253564

The original plan was to make these for Christmas presents. But if Joey has her way, I doubt there will be any left by then.