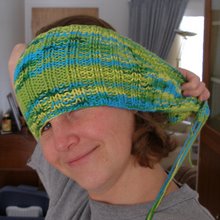
"Anyone that doesn't agree with leggings as pants can physically fight me.
And I'm going to win because I have a full range of motion due to the fact that I am wearing leggings as pants."

Monday, September 29, 2008

Halloween Cookie Shack (Gingerbread House)

I've got more pictures of this project over on Flickr. Just click any of the ones below to get to them.

This is the first of this year's Halloween decorations. I've been thinking about making this ever since I did The House That Stubbornness Will Finish, By God.

P9300008

Here is what I've learned since February.

Tips
-We built the house out of cardboard first (actually empty cereal boxes), then took it apart and used the pieces as templates for cutting the dough.

P9250044

-I learned A LOT about piping from the book Cookie Craft, which I checked out from the library, and will probably be purchasing before the holidays. It has all kinds of fantastic info about creating gorgeous cookies, some of which I used for this project, most of which I haven't even tried yet.

P9280079

-To make the walls stronger (the first batch crumbled), I kneaded in extra flour (about 1/2 cup) for about 5 minutes, because if you want soft cookies, you shouldn't mix it too much and should add as little flour as possible. I thought in reverse. And because the pieces were so big, I also cooked these way longer than the cookie recipe called for, 40 minutes instead of 16.
-Be patient. Be patient. Be patient. It wouldn't be a bad idea to make this over the course of a couple of weekends. One for baking everything and melting the stained glass. And one for piping the decorations and putting it all together. (So as to avoid sliding icing and crumbling foundations.)
-Don't bother melting and breaking up the candies until you're ready to fill the windows because after they sit out for awhile, the pieces stick to each other something fierce and are really difficult to get out of the bowl.

P9280067
(This technique for doing the stained glass cookie windows is so fantastic. It makes the whole process so easy. You don't need to cook sugar or crush candy or make a mess.)

-I figured out an awesome trick for keeping the roof pieces from sliding off. Really awesome. In fact it is quite possibly one of the most clever things I've ever thought of.

Which I suppose puts my life in perspective.

P9280076

Bake two long skinny pieces (these don't need to bake as long as the other big pieces) that are an inch or two shorter than the side wall that the roof piece will be overhanging. Ice them to the underside of the roof pieces like this.

P9290084

After the 4 walls are iced together and hardened to a cement-like state, glue the roof on with icing, resting the skinny piece on the top of the wall.

This technique worked almost perfectly for me. I say almost because there were some issues with length and placement of the supports, which resulted in some unsightly gaps under the eaves. But as I've said before, when learning a new technique, I like to start on something for Halloween, because then the breaks, tears and gaps all add to the shabby charm of the season.

-If you're going to light it up like I have, use either LED lights or a fairly short strand of regular Christmas lights. When I had this thing all lit up, Joey walked into the room and announced It smells like burning chocolate in here. (I'd used a pretty long strand of lights all wound up and shoved in there. Reducing the number of lights got rid of the problem.) So, you know, just something to think about.

And, yah, I think I went a bit overboard with this part.

P9290095

But, I totally couldn't help myself.

--------------------------------

Related Posts-

2008 02 04 002
Valentine's Day Stained Glass Cookies

2008 02 08 019
Valentine's Day Gingerbread House

2008 02 08 029
Crushed Hard Candy

stained glass cookie 2
Stained Glass Cookies Flickr Group

Friday, September 26, 2008

Embroidered Shade

The projects that have been sucking the majority of my time lately have mostly been in Randa's room. She and Kenzi have traded rooms and she's been wanting to paint over Spongebob for quite some time.

After she decided that she wanted blues and greens, I just happened to find this sheet at the thrift store.

P7070018 copy

Since Randa loved it as much as I did, we decided to use it as the main inspiration for her room, both the colors and the design.

Now might be a good time to mention that I have a bit of an addiction to thrifted sheets. There are so many fantastic ones out there that every day I don't go to the thrift store, I feel like I'm missing out. I use them just like regular fabric (after a really hot wash in the machine) and I love them. My only advice is to not get the jersey sheets unless you really know what you're doing; they're a bitch to work with.

To make the curtain, I used two other sheets, both of them white. One of them had some nice stripes, the other was just used as a liner.

P8260031

I'd originally planned to embroider it with some of Randa's artwork from when she was little, but she came up with this idea that I also loved. Basically, she traced a few of the flowers from the inspiration sheet onto a piece of paper (using a lightbox). Then I used that as a pattern for the embroidery. I just used a chain stitch in matching colors of floss.

P7100033

I've never really done much embroidery, so this was a bit of a stretch for me. There is one spot where the tension got a bit wonky, but overall, I'm really pleased with how it came out.

P8260032

This shade is only like one of the 4 or 5 projects for this room redecoration (one of which is the carpet removal). But I thought I'd spread them out instead of creating one ginormous post.

For those of you who are interested, here's the detailed explanation of how to string up this bad boy.

Thursday, September 25, 2008

Stringing Up a Roll Shade

I'm not sure if I've mentioned this or not, but when I was a kid, my mom worked for an interior designer. She sewed all kinds of commissioned stuff... Roman shades, bolsters, bedspreads, stuff like that.

I didn't help out much, but I did learn how to string up a shade with cord and some eye hooks. What I've done in two of the girls' rooms is much simpler than anything my mom ever did and it certainly doesn't hang as nice as her creations, but it's functional and simple and, most importantly, I like it.

Also, if you're interested, there's more info about the embroidery and design here.

P8260034

After I did the curtain in Joey's room, I made the mistake of mentioning that these are pretty easy to make. ;) Well, they are fairly easy for shades (especially if you leave them unlined like I did for Joey's- here and here), but apparently, I had a bit of amnesia about the difficulty level, because this was more complicated than I remember.

P8260031

They're also surprisingly difficult to describe how to make (because I'm totally uptight about including every little detail in stuff like this). But, since I've had a request for a tutorial for these, I'll give it a shot. Please let me know if anything is unclear or if you have any questions what so ever.

Materials and Tools
-A piece of fabric already lined and sewn to the right width of the window, but longer than the heigth of the window by at least a foot. (Basically, I put the two pieces right sides together and sewed them along the sides, not top or bottom, then flipped them right side out and ironed) This would be so much easier if you could find a really thick piece of fabric that looks good on both sides and doesn't fray when cut (For the unlined version in Joey's room I just ironed the edges back on itself and attached with that iron-on fusible stuff- this was before I had a sewing machine.).
-A 1 x 2 piece of wood, cut to the width of the window (should fit inside the sill)
-2 inch long wood screws (4 or 5 depending on width of window)
-3 screw in hook eyes
-Cord (Length should equal 4 times the height of the window plus 2 times the width of the window plus a couple of feet) This will be cut into two pieces, but you'll want to do a dry run like in step E) to figure out where to cut.
-Wooden closet rod cut to width of window with edges sanded (looks like a giant dowel with a diameter of an inch or two)
-Drill
-Stapler
-Awl
-Scissors
-Hot Glue Gun
-Pencil
-1 Cord Pull
-1 Cleat

Abbreviated Simple Version of Tutorial (which is probably good enough for most normal people)
A) Wrap top of fabric around the 1 x 2 and staple.
B) Hot glue bottom of fabric around closet rod.
C) Staple cord to top of 1 x 2.
D) Attach hook eyes on underside of 1 x 2.
E) Run cord down from staples (1), down front of fabric, around rod (2), through hook eyes (3) and out the hook eye on the side of the curtain (4). Repeat with other bit of cord.
F) Attach to inside of window.
G) Attach cord pull and cleat.


scan0002 copy

Version for those who prefer a more anal retentive explanation
-Basically, what I did is to first attach the 1 x 2 to the sill with the 1 inch front edge just flush with the wall. (I always drill pilot holes first before I attach screws) It's much easier to get this all lined up now, when there's nothing hanging from it.
-Now remove the screws and the wood. On the ends of the wood, mark which side is top and which is front and left and right so when you reattach it later, everything will still line up, which, you know, is a good thing.

A) Wrap top of fabric around the 1 x 2 and staple.
-Lay out the fabric right side down on a big flat surface (most likely the floor) and at the top of the fabric (double check to make sure the pattern is how you want it), lay down the 1 x 2 with the left and right on the correct sides (well, as you're looking at the back of it, the left will be on the right and vice versa, but imagine looking at it from the front and how the board should be).
-The board should be a couple inches from and parallel to the top edge of the fabric. The top part of the board should be facing up and the front part of the board should be closest to the edge of the fabric.
-Wrap the small bit of fabric up onto the 1 x 2, making sure it's parallel all along the length of the board.
-Staple it down.
-Now if you leave the board still and pull the length of unattached fabric up and over the board, pulling taut as you go, you'll see exactly how this will hang when it's mounted.
-Staple along the top again. (The board should now be completely covered except for the ends)
-Feel along the board to find the pilot holes under the fabric (for mounting). Poke into those with the awl and wiggle it around. Now use some sharp scissors to open this up just a bit. If you're worried about the fabric fraying, you can put some fray check (or even watered down white glue) around the hole first and cut it after it's dried.
-Do this all along both sides of the holes. You're doing this so that when you screw it to the sill, the fabric doesn't catch and tear.

B) Hot glue bottom of fabric around closet rod.
-This is the most fiddly part (especially if it's lined).
-I found it helpful to use watered down white glue as a temporary hold to get things started. I painted it on and smoothed the fabric against the wood, pulling it even as I went.
-When it's dry, roll the rod up the fabric just to the point where you want it to hang when the shade is completely lowered.
-Make a mark on the backside of the fabric just where the rod makes contact with the fabric. (point 5 on the diagram)
-Unroll the rod a half inch or so and draw a line from the mark all the way across the width. This is your hot glue line.
-Put hot glue on line and roll rod back up to make contact, keeping taut (I had to do this in sections).

C) Staple cord to top of 1 x 2. (This is spot 1 on the diagram)
-Decide where you want the two cords to be, measure so they're evenly spaced from the sides and mark the spots with a pencil on top of the fabric covered 1 x 2. Make sure that neither of these overlaps where you've already got the holes drilled.
-Lay one end of the cord on the spot and staple it to the wood about a half an inch from the back side.
P8220003
-Fold that piece over on itself and staple again (in the middle of the wood).
P8220005
-If you want, you can staple it down one more time right next to the front edge of the wood. (This ensures that it hangs at the right place when you attach it to the window frame.)

D) Attach hook eyes on underside of 1 x 2.
P8220007
-You'll want to put one each, exactly on the underside from where you just stapled the cord (spots 3 on the diagram). Plus, put another one just at the edge of the 1 x 2, on the side where you want the pull cord to be (spot 4 on the diagram).
-I started the holes with an awl and wiggled it around in there pretty good until it was the right size for the hook eyes to screw into without tearing the fabric.

E) Run cord from staples (1) down front of fabric, around rod (2), through hook eye (3) and out the hook eye on the side of the curtain (4). Repeat with other bit of cord.

F) Attach to inside of window.
-This is a lot easier with a friend (or two).
-I found it easiest to first partially screw all the screws into the 1 x 2, just so their tips are sticking out a smidge on the top side of the board. It makes it easier to line them up with the holes that you drilled earlier.
-Once it's all lined up, all you need to do is finish screwing them all in.

G) Attach cord pull and cleat.
-After everything is all hung up, run the ends of the cord through a cord pull.
-Tie a tight knot in the cord.
-Cut the cord off just under the knot; the pull will sit on this knot.
-Attach cleat to wall with 2 screws (either inside window frame or on wall next to window).

Now I would like to mention that this may or may not (probably not) be the best method of making a roll up shade for your windows. Curtains that pull to the side would be easier and might look nicer, depending on your fabric and the style you're after. But, these give nice clean lines when they're hanging down and add a feeling of softness when they're rolled up. Also, I didn't need as much fabric as I would otherwise (which honestly is why I figured this out the first time in Joey's room because the fabric I'd bought was the last they had in the store and it wasn't enough to do a regular slide to the side type curtain).

Wednesday, September 24, 2008

One of Life's Little Lessons

Jenny: Remember, the chapstick is in timeout because last time you had it, you ate it.

Kam: Me, yittle bite.

Jenny: Yes, you did take a little bite.

Tuesday, September 23, 2008

Three Columns From Two

You may have noticed that Wisdom of the Moon now has 3 columns instead of just 2.

It involved much more than changing a couple ones to zeros, but still, it wasn't that bad and I didn't cry once (mainly because I knew I had saved a backup copy of my code). I followed this tutorial at Tips for New Bloggers because it had instructions for changing the Minima template (which is what I use).

I changed the widths as follows...
Header-wrapper to 935
Outer-wrapper to 935
Main-wrapper to 510
each Sidebar-wrapper to 185
Footer to 935

Throughout the whole process I just kept repeating to myself the quote that I've got at the top of the blog,

For the things we have to learn before we can do them, we learn by doing them.
-Aristotle


So, how does it look? Can all of you see the whole width without having to scroll to the right?

Monday, September 22, 2008

Messy Party

To celebrate the Fall Equinox, I thought I'd put up a post showing how we said goodbye to summer.

DSC_1292.jpg

We did this at the end of August. I wanted to have one last bit of crazy messiness before public school started for the older girls. As usual, we were a bit late, but in my defense, school is starting earlier and earlier around here.

I'm thinking this needs to become a family tradition because even though the girls are in high school, they show no signs of being too old for it.

DSC_1324.jpg

The Ingredients…
big bags of flour, boxes of cornstarch, whipped cream, mud, water and washable paint.

The Tools…
cupcake tins, paint brushes and lots of bowls and old tupperware containers.

The Photographer…
Jenny (The rest of the pictures can be found here.)

DSC_1259.jpg

Cornstarch and water becomes oobleck, which is really fascinating stuff.

DSC_1007.jpg

Whipped cream is good for both eating and decorating.

DSC_1332.jpg

DSC_1161.jpg

I even got involved.

DSC_1193.jpg

I think the girls did a fantastic job.

DSC_1286.jpg

Tips (aka Things We Learned)...
-Hook up the hose to an indoor faucet so you can use warm water to wash off. (We learned this one the hard way last time. Those poor kids were shivering like little chihuahuas.)
-Do not put flour or cornstarch in the hair (just trust us on this one. It's almost as bad as combing out lice.)
-Using washable paint does not guarantee that it will come out of everything. Wear your grungy clothes.
-Whipped cream begins to smell like sour milk after about an hour or so.

------------------------

Sun Salutation Update- I'm holding off on these for a few days because I've pulled a muscle in my leg (not yoga related). I'm still keeping track, though, and will catch up when I'm feeling better.

Wednesday, September 17, 2008

Musical Education


Link

(just as the keyboard intro starts on the radio)

Joey: Is this Baba O'Riley?

Me: Um, yep. It is.

Joey: Damn I love this song.

(I guess I should mention- for those of you who don't know- that what makes this so funny is the fact that Joey is my 9 year old daughter.)

Added Note- After reading this, Joey informed me that she'd thought it was Bob O'Reily. Still though, she knew it wasn't named Teenage Wasteland.