Pages

Sunday, July 29, 2007

As Nature Does

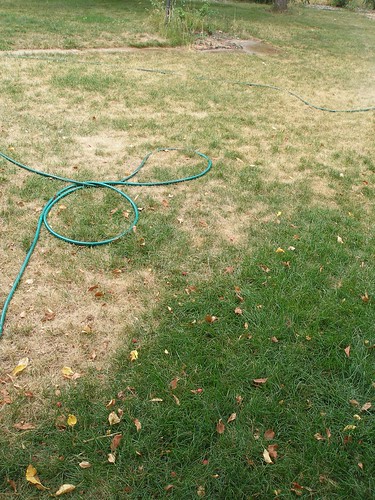
This very green part of our grass lies directly underneath our crabapple tree. Every fall, it is covered with decomposing crabapples. The rest of the yard does not get this special treatment.
P7270031
As you can see, that organic material really does the job.

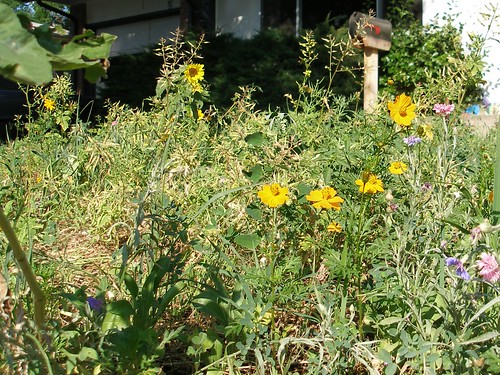
Our plan is to reduce the lawn in the back by creating vegetable & flower beds all around the perimeter. So far, though, we've focused most of our efforts on the front yard. (Click that link to see a photo how-to of sheet composting.) Here's what the flower patch looks like today.
P7290039 copy

We put wildflower seeds down so our neighbors didn't have to look at a yard full of hay all summer (hay is the top layer of the sheet composting). Also, some of the seeds we planted are cover crops with good strong root systems that should help to loosen up the soil.

And the pumpkin plants that have come up out of the compost are growing well. I'm sure lots of people wouldn't find this to be a good thing. But I'm thrilled.

As you can see, I enjoy a bit of chaos in the garden.

Friday, July 27, 2007

Hi-freaking-larious

I've been working on an army of fabric grocery bags, but don't have any pictures yet, so I'll tell you about this site instead, because it makes me laugh.

It's called Threadbared and if you haven't already seen it, you have got to go over and take a look. Basically, Mary and Kimberly post a bunch of vintage patterns and write snarky captions for them. I immediately liked them when they used the word 'snarky'. Here's an example...

You Go Guy!

I have to admit to being a tad ignorant and socially insensitive. I had no idea that Vogue made patterns for men who want to wear women's clothing. Now that I have been elightened, I think it's lovely. I can only imagine how difficult it must be to find a flouncy blazer that will both accomodate your broad shoulders and disguise your beer belly. Not to mention, dress gloves to fit your man hands. Kudos to Vogue for helping out the transvestites.
-By Kimberly

And another one...

“If You Don’t Come To Bed Right Now I’ll Be Ever So Cross With You, Mister.”

When a man gets through with a hard day there’s nothing better than going home to his sweet little wife.

She’s loving.

She’s cheerful.

She’s wearing a negligee that makes her look like a 36-year old Shirley Temple.

-By Mary

And my favorite...

Look At Me When I'm Talking To You.

HEY!

I SAID, if it looked "so gay" when I tried it on in the store why didn't you tell me that then? Hmm? HMM? Before I got it home and cut the f-ing tags off?

And wipe that stupid smirk off your face. Like you ALWAYS make the best fashion choices, right? Mr. Fuchsia Spandex Cycling Shorts. OH, I KNOW all about those!They're on the top shelf in your closet! Don't even ACT like I haven't seen them!

I am SO not talking to you anymore. Like your silly striped tunic is ALL THAT.

God, you can be such a bitch sometimes.
-By Mary

And the best part, I found a pattern that my mom actually owned and used to make aerobics leotards for me and my sister. Man, we were so cool.

Sunday, July 22, 2007

Green Week- Last Day

So, I don't have any pictures today, just some important thoughts.

Working to help the environment is not an all-or-nothing proposition. Even taking one small step is better than doing nothing at all. Sometimes, the problem seems so overwhelming, that it is easy to do nothing. But doing nothing only makes it worse.

If you make one change, though, it will encourage you to make another and another and then many more. Until this week, I didn't realize how many things that I regularly do to help the environment; they are changes I implemented purposely to help, but now they are routine and they are easy. There is still a lot to do, though.

"Never doubt that a small group of thoughtful, committed citizens can change the world. Indeed, it is the only thing that ever has." - Margaret Mead


With that in mind, you might want to consider taking the following important steps...

1-Contact your politicians. This is difficult at first, but becomes easier with time. You can type emails, handwrite letters or even call the offices personally. I, myself, have made several phone calls to various politicians (including the president's office). This is the hardest one to do, just making the call. Every time I do it, I get all excited and my voice shakes, but I don't hang up until I've said my peace. I enjoy doing this because I think it is good for me personally. It is good to speak your mind to power, even if only to remind yourself that they are only powerful because they are serving us.

Once, as we walked to the mailbox, my daughter (who was 4 at the time) noticed that the letter we were sending was to the president. She demanded to know why I was writing to him. I explained that he worked for all of us and that I didn't like the way he was doing things and that it was my job to let him know that. I felt so strongly that I had to do it. She literally tried to take the letter away from me. She wanted to know if I would be arrested if I sent it. How on earth does a 4 year old learn these things? How does she know that it *could* put my life in danger if I lived in any one of the many other, less free countries?

The following links have some good tips about writing letters (they're Canadian sites, so you may have to adjust for where you live. I didn't find so much info about doing this in America. Strange.)...
Canadian Parks And Wilderness Society
Sierra Club Canada

With the availability of information on the internet, it is not terribly difficult to find out what letters, emails or calls need to be made and when. Which brings me to the next option...

2- You can check various environmental websites to see what actions they are taking and join in. Here are my favorites (I've linked directly to their action pages, but check out their home pages if you're interested)...

Sierra Club
Environmental Defense
Working Assets - a liberal phone company "that fights global warming, supports organic farming and saves endangered species." We've got both our long distance and cell phone through them. In turn, they donate money to the following environmental organizations... Defenders of Wildlife, Global Greengrants Fund, Natural Resources Defense Council, Organic Consumers Association, Rainforest Action Network, Rocky Mountain Institute, Union of Concerned Scientists, Vote Solar Initiate as well as groups involved in Civil Rights, Economic & Social Justice, Education & Freedom of Expression, Voting Rights & Civic Participation and Peace & International Freedom. See the entire list here.

And here is a good Mother Jones article that advises how to evaluate Environmental non-profits. It also lists many groups that have misleading names suggesting they are working to help the environment, but in actuality are working against it.

3- Be proud of being an environmentalist. Make it look fun, easy and stylish. Honestly, setting this kind of example can change the opinions of many more people than you realize.

To that end, please send me links or pictures or just emails of whatever FUN, EASY or STYLISH environmentally responsible project you may be involved in. I'll post them on my site with links to your site. If you don't have a site, contact me anyway. I'll get your stuff up here. Maybe I'll call it Our Green Life. So keep my address and email me whenever you do it, even if it's months from now.

Let's be that group of "thoughtful, committed citizens."

Namaste

Saturday, July 21, 2007

Green Week- Day 5 (In the Kitchen)

Ooops, didn't get this up yesterday.

Here are 3 things that I do to help the environment when I'm in my kitchen.

P7210011

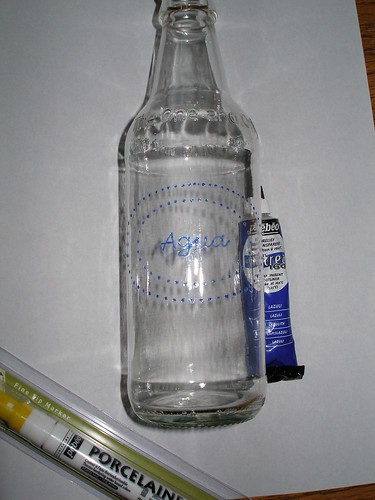
The first is that I'm currently in the middle of a project of re-purposing our empty beer bottles into water bottles for parties. I'm using these dishwasher safe paints and writing both Water and Tea is various languages. I can then fill them up before parties with either filtered water or iced tea. I'm going to recap them using home-brewing supplies.

We usually go through lots of water when we have people over and plastic bottles are bad, bad, bad for the environment. Peter Gleick (a water expert) claims that each bottle requires so much energy to produce, fill and transport that "It would be like filling up a quarter of every bottle with oil." We do put out pitchers of water and that is good, but these bottles are kind of fun and I think it would get some people thinking about how bad plastic bottles are for the environment.

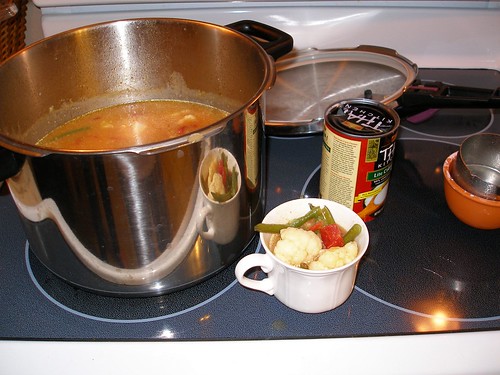
The next environmentally friendly thing we do is use our pressure cooker. Lots.

P7190001

I love this thing. Really and truly I do. It can cook anything (like this Indian vegetable soup) in almost half the time. I cook whole chickens and pot roasts that turn out really moist and tender. It works wonderfully for all dried beans and lentils and stuff like that. I even cook brown rice in there (because I cook it like pasta and drain off the water). It is the best money we've ever spent on anything.

We use it at least twice a week. Sometimes twice a day. I use it to cook Kitchari, which is made from brown rice, red lentils and Indian spices. You can find the recipe here, but I double the amount of dried spices; it's a bit bland otherwise. I just made this for craft day and everyone loved it.

Which leads to another thing we do... eat low on the food chain. The more of your diet that is grains, vegetables and legumes, the smaller your impact on the earth. It just takes more energy to grow a cow than a soybean. We aren't vegetarians, but we do try to make the majority of our meals plant based, not animals based. Speaking of, here is another one of my favorite recipes that's super easy to do with a pressure cooker (and not too bad without one, if you're interested)... Enfrijoladas by Rick Bayless. We do the version that doesn't use the avocado leaves, but uses the chipotles in ancho sauce instead. This uses chorizo sausage, which I absolutely love, and they carry at Whole Foods. It adds so much flavor, but doesn't make up the majority of the meal.

Because we cook this way, I have lots of mason jars filled with various grains, pastas and legumes. I'm currently writing the weights of these jars on the bottom of each, so I can use them to fill directly from the bulk bins. The cashier can tare them and ring me up. No bags wasted in transporting it from store to my kitchen.

Friday, July 20, 2007

Worm Composting (2)- Some other thoughts

I thought I would add another picture of my worms, just for the ewww factor. They rarely look like this; I had to dig them up to get them to the surface.

I would also like to point out that this is an excellent project for kids. For the past two years, I have brought them in to my daughter's class to do experiments. There was only one kid, the entire time, that wouldn't touch them. Everybody else got over their squeamishness quickly.


So in addition to the set up instructions found here, I'll include these following tips.

SOME OTHER THOUGHTS

  • Worms are comfortable at the same temperatures that we are. They will die if they freeze or get too hot.
  • Don’t add meat, bones, dairy, oily foods, pet wastes, diapers, anything that doesn’t biodegrade or anything that has been sprayed heavily with pesticides.
  • Each redworm should produce one tiny, lemon shaped egg capsule every 2 to 3 weeks. Each capsule contains a dozen or so baby worms.
  • Worms like the dark, so keep the lights off or the lid on.
  • If you run out of coconut fiber you can get more at garden centers. I buy mine at a local Hydroponics store.
  • If you would like, you can use shredded leaves, shredded white office paper, shredded newspaper or shredded cardboard as bedding. Don’t use anything with colored inks. I find these materials harder to get to the right moisture level, so I rarely use them alone, but they will work. I do sometimes add a layer of wetted, shredded office paper or leaves in the middle of the bin along with the regular coconut fiber under it and over it. It’s a good way to recycle these materials and mixing it with the coconut fiber gives a greater margin of error.
  • This particular type of worm, Eisenia fetida, needs huge amounts of organic matter to survive. They don’t do well in regular garden soil because there just isn’t enough organic matter for them.


--------------------

Related Posts-
Worm Composting (1)- Setting Up the Bed
Worm Composting (3)- Harvesting The Castings
Worm Composting (4)- Troubleshooting
Using Eggshells
Why You Need Worm Poo

Thursday, July 19, 2007

Green Week- Day 4 (Trying Something New)

After reading various suggestions from the Green Week group, I decided to try the following things...

P7180008

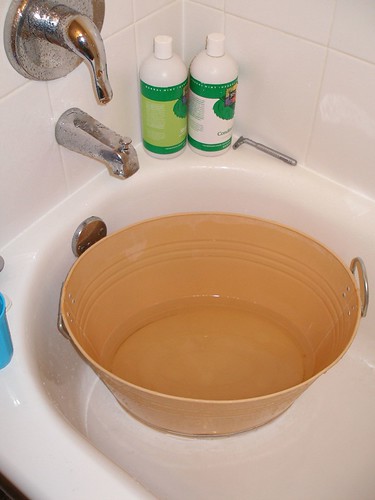
I tried showering with a bucket to collect water. It was really awkward (probably because the bucket is big- but I wanted to have as much surface area as possible) and didn't really collect all that much water. Our shower head *is* low flow and it comes with a little button so I can shut off the water when I don't need it. Maybe that's why I didn't get too much.

Also I almost tripped a couple of times. If you're going to try this, get a smaller bucket. Myself, I plan to look into how to install an automatic graywater system.

P7190016

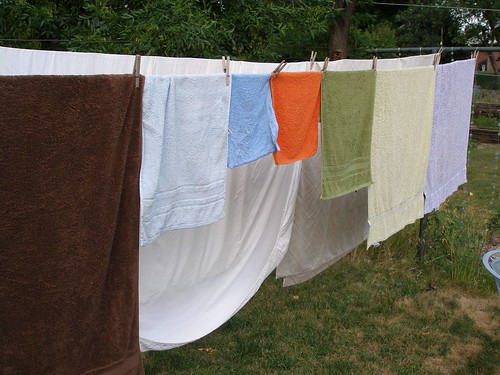
The second thing I did was to hang our laundry on the line to dry. I have to admit that I took it down when it was still slightly damp and ran it in the dryer for 5 minutes. I really hate how stiff line dried laundry is. There isn't enough fabric softener in the world to soften up those towels. If you want to save energy, but hate stiff fabric, this is definitely the way to go.

The final thing that I did was to work on fabric grocery bags. I don't have a picture of mine, because, well, um, yah... they aren't really finished yet.

I thought it would be fun to invite lots of people over today so we could all work on them together. Yah, too bad I've only got one sewing machine.


I spent a lot of time helping the other's sew theirs, so I've only gotten as far as ironing my thrifted sheet.


(Note 1- that's my energy star dryer in the background. Love it! I knew I'd get a picture of it in here. Note 2- By far, not the best picture I've ever had taken, but I thought it was funny, with my nephew on my hip and one of the 6 little girls in the foreground.)

So I guess instead of saying that the bags aren't really finished, I should say I haven't really started them. Well, I haven't started *mine* at least. I am glad that we did it, though, because not only am I changing my behavior, but helping others to live cleaner as well.

And it was really fun to hang out with my friends. That's always good.

Wednesday, July 18, 2007

Green Week- Day 3 (Energy)

So for those of you just tuning in, I've joined a Green Week group over on Flickr for the week.

At our house, we don't have air conditioning. Many people in the neighborhood cannot believe that we can survive without it. Here are the things we do to help with the heat. Even if you have A/C, these tips should help reduce the amount of time you run it.

P7180003

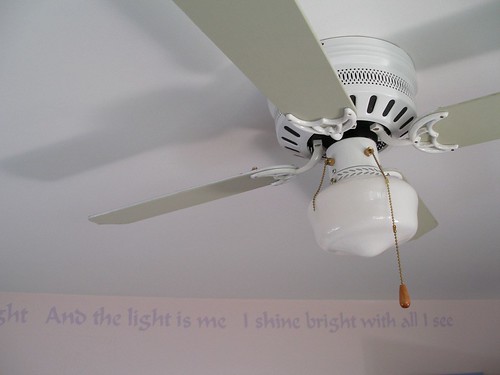
1- Use ceiling fans. We have 5 of them in the upstairs of our house and if we're in a room during the summer, there is a fan on. These only work to cool an individual person, by evaporation; they don't actually reduce the temperature of the room. So make sure to turn them off when you're not in the room.
2- We recently installed huge sun shades on our West facing cement porch. This keeps the afternoon sun from hitting it directly and creating a heat sink. And they only cost us $20 each. BTW, this is exactly the effect that works beneficially when a builder uses passive solar design. If we ever build our own house, this will definitely be something we do.
3- I open and close windows based on the heat inside versus outside. When I get up at 5 to exercise (it happens occasionally) I open everything up. We close it all back up when the temp outside equals that inside. Joey has learned when it is time to do this and will announce that it's time to shut the windows.
4- We spend lots of time in the basement in the summer. It is so nice and cool down there; you can feel it as you walk down the stairs. When we had cable installed the workmen commented that they'd like to spend the rest of the day in our basement.

I would also like to mention a few other things we do to save on energy.

We bought an energy-star front-loading washer and dryer. I love these things! I had to restrain myself from adding a picture of them. I've been known to show them to visitors.

Also we've set the computer so that it automatically goes on standby (very low power consumption) when it is unused for more than 5 minutes (for our computer there's a setting on the Control Panel called Power Options). This doesn't close down any of the programs, it just puts everything on hold till you want it again. When you turn the computer back on, it doesn't go through the entire start up again and you don't need to reopen any of the programs you already had going.

We have pretty much replaced all the lightbulbs in our house with fluorescents. But remember, when those need replacing, you can't just throw them in the trash because they contain mercury. This is something they don't really tell you when you buy them, but by law, you're required to dispose of them properly.

And now I'll quickly mention our environmental wishlist...
-More deciduous plants/trees on the south and west side of our house
-SunTubes
-Solar Panels
-Tankless Waterheater
-Hybrid Car

As long as I'm dreaming, I'll add the following...
-Wind Turbine
-Neighborhood that is within walking distance to shops, entertainment, etc.
-A butt that doesn't get really sore after riding a bike. (I had to sleep on my stomach for 3 days after riding in Moab- I know, I'm a wuss!)

Tuesday, July 17, 2007

Green Week- Day 2 (Shopping)

As you can see, today will be about some of my shopping habits, and how I've changed those to help the environment.

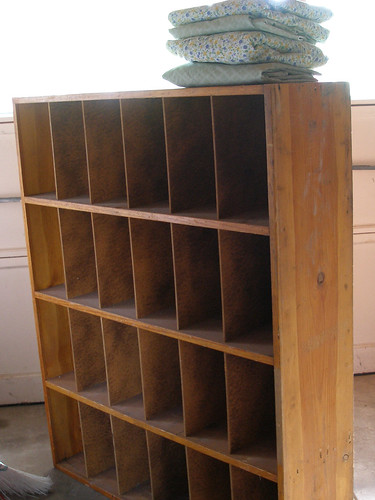
The main thing I do is use secondhand things. The picture below is of two of my recent finds.

Second Hand Items

We drug the cubby home from the neighbor's trash last week. Jeff hated every moment of it, but it was too heavy and bulky for me to carry by myself. And my sister wasn't here.

*Off subject comments

Jenny can always be counted on to shamelessly help drag trash/treasure from the curb. Once she and I hauled away 5 rolls of carpet from her in-law's neighborhood. Brad was mortified that we were doing it, but on the second load, the people called to thank us for taking it. (We had left them a note with our phone number) I think she and I learned this habit from our mom; I have a very clear memory of helping our mom load lots of river rocks into the back of our van. They had been unearthed during construction of a nearby road and she was in the process of building a walkway. It turned out pretty nice.

*Resume relevant comments

This cubby shelving cost us nothing, except Jeff's pride. It's pretty grubby now, but once I clean it and sand it and paint it, it's going into the kids' play area. Eventually, it'll probably end up in my craft area.

I bought the sheets on top from the thrift store for about 3 bucks each. I plan to make fabric grocery bags out of them, inspired by Jane Little on the Flickr group. Hopefully, there'll be more about those by the end of the week.

I've also acquired a huge tractor tire and one mini trampoline from CraigsList, both for free. These two things represent the best part about repurposed items... you gotta be creative. One of them I think I've come up with a creative solution for, the other, not so much.

I plan to dig down in the grass and put the trampoline flush with ground level. And hope to acquire more trampolines and do the same with them, all in a row, then the kids can bounce from one to the next in a line, like an obstacle course. A friend of ours that works in insurance told me that it is one of the worst ideas she's ever heard. How can that be worse than a regular trampoline? I guess people might not see it and step onto it accidentally. Anyway, I'll put up lots of signs when I do it, so nobody breaks their ankles. Also maybe some fencing and the signs can say, "Watch out for dangerous trampolines." He he, I'm just joshin, Beccy.

I don't know what to do with the tire. I originally planned to bury it upright in the ground and let the kids clammor on it, but I'd have to remove an awful lot of dirt to do that and Sean hasn't been in serious trouble for months, so no free labor. Then I thought of making it into a sandbox, but my kids are a bit old for that. Anybody have any suggestions?

And, finally, I would like to mention the concept of a "Buy Nothing Month" (or week). This is not something that we have done. Yet. I'm working on Jeff, but it's daunting. Basically, it involves buying nothing except for food and toiletries (and I assume gas, although maybe not) for the set amount of time. I think that doing this would drastically change how we view shopping. I know we'd realize how much of what we do is simply done out of habit, without much thought. I also read about a group in San Francisco (can't find the link, grrr) that are doing this for a year. They *can* buy all the secondhand stuff they want, so that's gotta make it easier. And more fun. I was thrilled to find the sheets pictured above, after all.

Added note- I just am listening to the song Coat of Many Colors (originally by Dolly Parton, this one's by Alison Krauss) and was struck by the appropriateness. It speaks to the embarrassment of reusing materials, something that many people still associate with the word secondhand, but more importantly it tells how much love someone can put into a handmade item, something I've encountered again and again on the blogs I read. So here are some of the lyrics...

I recall a box of rags that someone gave us
And how my momma put the rags to use
There were rags of many colors
Every piece was small
And I didn’t have a coat
And it was way down in the fall
Momma sewed the rags together
Sewin every piece with love
She made my coat of many colors
That I was so proud of
As she sewed, she told a story
From the bible, she had read
About a coat of many colors
Joseph wore and then she said
Perhaps this coat will bring you
Good luck and happiness
And I just couldn’t wait to wear it
And momma blessed it with a kiss

So with patches on my britches
Holes in both my shoes
In my coat of many colors
I hurried off to school
Just to find the others laughing
And making fun of me
In my coat of many colors
My momma made for me

And oh I couldn’t understand it
For I felt I was rich
And I told them of the love
My momma sewed in every stitch
And I told em all the story
Momma told me while she sewed
And how my coat of many colors
Was worth more than all their clothes

Worm Composting (1)- How to set up the bed

A complete set of materials and instructions to make your own vermicomposting kit. You'll never throw out those vegetable scraps again!

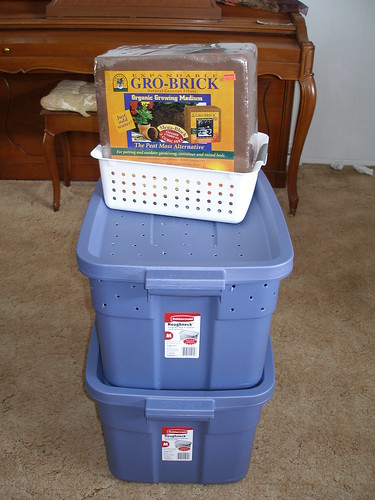
First, here is the kit that most of this information references.

P3010080

I donated this to a silent auction and wrote the following to go with it.

What This Worm Composting Kit Contains
  • One block of coconut fiber to function as bedding (from a local garden supply stores, hydroponics stores or online ordering)
  • Two large plastic bins (I got mine at Target)
    • One is without holes- this is for hydrating and storing coconut fiber
    • One has many holes drilled in the lid and on the top 4 inches of the sides- this is the bin for the worms
  • One small, white, plastic container to use for transferring worms when bedding has been turned completely to castings. (I got mine at Target)
  • Redworms- aka Eisenia fetida (from Flowerfield Enterprises or from a friend with a worm bin)

Brief Overview Of How To Use This Worm Composting Kit
  • Wet the bedding.
  • Sprinkle on dirt.
  • Bury the food scraps.
  • Add the worms.
  • Add food wastes as you collect it.

THAT’S IT!

Very (Some Might Say Overly) Detailed Instructions
  • Unwrap and place the coconut fiber into the blue tub that doesn’t have the holes.
  • Pour several gallons of water onto it. You can use cold water, but hot water soaks in more quickly. Let the coconut fiber sit for awhile (10 to 30 minutes). When it has absorbed most of the water, add more. Keep pouring water, letting it sit and so on until you are able to scoop out handfuls of fluffy coconut fiber. Only add enough water to loosen enough coconut fiber to fill the worm bin. You should still have extra still-compressed coconut fiber left in the original bin.
  • Transfer enough of the fluffy coconut fiber to the worm bin (the one with the holes) to fill it within 5 or 6 inches from the top.
  • Now, to the coconut fiber in the worm bin, add enough water until it has the consistency of a damp, mostly wrung out sponge. Stir it well as you add the water, so that it is the same dampness throughout. Right here is the hardest part about vermicomposting. If the bedding is too dry, the worms will die (or at the very least, not flourish), if it is too wet, it can get to smelling bad. Basically, if you pick up a handful it should be pretty damp, but not quite to the point where you can wring much water from it, only a drop or two.
  • Next is the step that enables the worms to break down the food. They have gizzards (like chickens) and so need some grit in order to eat. Grab a handful or two of dirt from your yard and sprinkle it over the bedding.
  • Now your worm bin is ready for the food.
  • Worm bins can take all kinds of kitchen scraps… fruit, egg shells, pasta, vegetables, coffee grounds as well as coffee filters, teabags, etc. Basically, you can add everything except meat, dairy or anything too oily or salty. Also, you should not add pet wastes of any kind. The bin functions best if you cut up all your scraps into small pieces. I let eggshells dry for a day or two and then crush them with a rolling pin or mallet before I add them to the bin. (Note- Adding lots of eggshells to your compost also helps to prevent blossom end rot when you apply the compost to your tomatoes.)
  • I save all kitchen scraps in a specially marked Tupperware in our fridge and then add them to the bin every 3 or 4 days. If you have any fruit that has attracted fruit flies, I suggest microwaving it till it’s hot (and letting it cool) before adding it to the worm bin. Once fruit flies get too entrenched in a bin, it’s usually better to just start over from scratch (I’ll give you more worms if that happens- but it’s unlikely to happen if you keep an eye out for them.).
  • Now comes the only other difficult part of worm composting, figuring out how much to feed them. When you first start out, it’s better to go with less food rather than more. As your worm population grows, they will be able to eat more and more of your scraps. One pound of worms can eat about half a pound of scraps a day. Trust me, your population will grow if given time.
  • Each time we add food to the bin, we bury it in a different spot. If you’re organized, this shouldn’t be too hard, just move in a grid-like pattern. You can work your way back and forth, from front to back. By the time you get back to the first place where you originally buried scraps (a week or two later), the scraps should be mostly gone. If you do happen to dig somewhere that still has lots of food, cover it back up with coconut fiber quickly. This is one of the only times you will smell something unpleasant. If you see lots of stinky food scraps, you’ve either dug in the wrong spot or you need to let your worm population grow a bit more before adding more scraps. Or it’s possible that you haven’t cut the scraps into small enough pieces. Myself, I sometimes put the food into the food processor with a little bit of water and pour that into a hole in the bedding. The worms will eat this slurry a lot quicker than if the food were in chunks. Just make sure not to add too much water, because your bin can get too soggy.
  • I’m not organized, so I find myself digging into areas that still have food scraps, so I just keep reburying them and looking elsewhere. If you’ve got more than one person adding scraps to the bin, I suggest you make a diagram and keep a log.
  • There are only two rules about burying food…
    • Make sure that the food scraps are completely covered with the bedding, at least an inch of bedding.
    • Don't add too much food at once. It is better to add too little than too much.
  • So now, the bedding is not too soggy and not too dry and you’ve got food buried in one or two places in it. It is time to add your worms. Spread them over the top of the bedding. They will all move down into the bedding, especially if you leave the light on.
  • That’s it. Put on the lid and let them go. Make sure to only use a lid if it has plenty of air holes. If not, you can just cover the whole thing with black plastic. This is necessary to keep out light and also to keep it moist.
I'll be posting more about troubleshooting and harvesting in a day or two.

--------------------

Related Posts-
Worm Composting (2)- Some Other Thoughts
Worm Composting (3)- Harvesting The Castings
Worm Composting (4)- Troubleshooting
Using Eggshells
Why You Need Worm Poo

Monday, July 16, 2007

Green Week- Day 1 (Gardening)

Well, technically the week started yesterday, but since I didn't post anything, I'll do as the French do and start with Lundi. That's really when my week starts anyway.

This week is Green Week because AfricanKelli says so. And that's good enough for me. So in addition to posting pictures over on Flickr in the Green Week pool, I'm also going into detail about my photos here. Basically, the pool includes pictures, information and encouragement about making many little choices that add up to help protect the earth. You should go and check it out.

Here's what we do to tread lightly.

We use a push mower. You know the reel type? Jeff had to convince me at first (three years ago), but I now don't mind using it because I love the noise it makes. Sort of crunchy swish swish sound that is really soothing. I also love the noise it doesn't make. So quiet I could mow at 5 am if I wanted, which I don't. Also, unless you're used to a self-propelled mower, it is actually easier to use, because it isn't as heavy as a gas mower.


But more importantly, by not using a gas powered mower, we drastically reducing the overall amount of pollution we produce. I found an article on Mindfully.org that references a Swedish study claiming that "The air pollution from cutting grass for an hour with a gasoline powered lawn mower is about the same as that from a 100 mile automobile ride."

What? That's insane! How come they're not making announcements of this over the emergency public broadcast system?

They suggest using catalytic converters on mowers, but I'm happy with our mower.

Another thing we do, or don't do, if you want to get technical about it, is use pesticides or non-organic fertilizers. What I can't understand is why someone, especially someone with pets or children, would allow somebody to spray poisons on their yard. Have you seen the signs they put up, about staying off the grass after they spray?

Have we all gone mad?

How is this sort of behavior acceptable? Seriously. It reminds me of that scene in The Birdcage when Gene Hackman finds out that Nathan Lane is a man and he says "I feel like I'm insane." He just can't wrap his mind around what he's seeing. I feel exactly like that when I see those warning markers in the grass!

Anyway, sorry for the rant. Back to me and my relationship with Mother Earth.

Because we don't use chemicals and poisons, we need to apply lots of organic matter to our landscape. In addition to Lasagna Gardening, which I've covered here and here, we do year round vermicomposting, otherwise known as worm composting.

This is a picture of our worm bin. It's in the basement, in an unused corner, under the stairs. We've had it for several years and have had almost no problems what-so-ever with it. Once I added fruit that had been sitting out on the counter and was full of fruit flies, and that did pretty much infest the entire bin, which we had to dump in the middle of winter, poor frozen wormies, but I've learned my lesson and microwave any produce that's been on the counter too long.


The worms get everything we eat except meat and dairy. Pretty much anything you could put in a regular compost bin, but this goes way faster than regular composting. I can bury something in here and a week later it'll be practically gone. And the best thing, no turning!

Here's a close up of some worms and egg shells. Calcium is good for tomatoes, so these always go in the bin. Although, usually I crush them up a bit finer than this. The bedding is dried, shredded coconut fiber (coir), which in itself is an environmentally responsible product. It's created as waste from the coconut processing industry and can be used to replace peat moss, which is very bad to use (from an environmental standpoint).


I'll also include a link to a picture of a worm composting kit that I donated to my daughter's school's silent auction. This is based on the setup that my sister has and basically looks a bit less, um, rustic.

I won't go into it right now, but I'd be happy to give detailed advice on setting up your own bin. It's one of those things that isn't terribly complicated once you get used to it, but has the potential to create a big stink if done incorrectly. I wrote up a word document to go with this kit and would be happy to send it to anyone who is interested. If enough people want to see it, I'll post it too. (I did, you can see the posts here.)

See ya tomorrow for day 2.

Ooops. I can't believe I forgot to mention the book Worms Eat My Garbage: How to Set Up and Maintain a Worm Composting System by Mary Appelhof.

--------------------

Related Posts-
Worm Composting (1)- Setting Up the Bed
Worm Composting (2)- Some Other Thoughts
Worm Composting (3)- Harvesting The Castings
Using Eggshells
Why You Need Worm Poo

Thursday, July 12, 2007

Doing Battle with Nature (not really)

Yesterday was given over entirely to working in the yard. I pulled up two trashcans full of weeds and cut away a small forest of crabapple suckers. We also spent a good amount of time defending our yard from wildlife.

Now, I try to be very accommodating of most animals that wander onto our property, but I'm really getting sick of the squirrels. They dig up my garden and they eat all our peaches. And I like peaches. A lot. Our peach tree is pretty much the only fruit we've grown so far, if you don't count the tiny little alpine strawberries and the tree full of sour cherries (which I don't).

Our peach tree is huge and ill-formed and produces only tiny little fruit. But, boy are they good. Really, though, I can't say that with 100% confidence. I have eaten exactly 2 small and hard peaches 3 years ago. I remember them to be very tasty. And I would like to eat more of them. Thus the next bit of yard work.


Jeff helped me to cover several of the branches of our peach tree with bird netting. I say 'several branches' and not 'the entire tree' because it really is a monstrously formed tree. And it would be impossible to cover the entire thing without the use of a cherrypicker, which unfortunately we don't have.

After about 10 minutes of wrestling with the netting, we decided to consult the internet for advice. The first bit about bird netting (from a site with links to buy it) was this... "It's efficient and easy to use. Controlling birds is a snap with bird netting. Just place it on the tree, bush or plant, and birds are no longer a problem." Humm. They must be talking about either a different type of netting or a different type of tree (maybe one shaped like a beach ball with no branches or twigs).

The second bit of advice we found had this to say about the netting... "An important tool in the critter kit is bird netting, a product that does not come with instructions on the bag, because if it did, you would know that putting this on a tree taller than eight feet is almost impossible. Working with this material is a real challenge; imagine trying to put a fishnet stocking over a porcupine." OK, so that's how it's supposed to work. We just need to muster up more patience and head back out there.

Another bit of advice we encountered on the web was about animals getting stuck in the netting. Basically, if we were to leave any place for critters to get in through the netting, not only would they get our fruit, but they'd also probably die in there. Either that or we'd have to pay some animal control person to come and remove the animal (because a trapped squirrel would be none too happy if we were to try to extricate him ourselves). Whether I would pay a professional to save the life of this hypothetical squirrel would honestly depend on how many unwanted holes had been dug in my garden that morning.

So Jeff and I continued to wrestle the fishnet stocking over our porcupine of a tree. Eventually we succeeded, sort of. And then we used about 800 twist ties to close the entire thing up. I took the picture above as I laid on the ground checking for possible entry routes.

At one point, Jeff and I noticed a couple birdies doing what looked like a courting dance on our porch. It was cute, but the problem was that they were doing said dance in the crease of the new roller shade that we recently put up (like three weeks ago) to keep the afternoon sun from baking our cement porch and creating a giant heat sink. We hoped that maybe they would just flirt there and then move on to find a more private space to build the nest.

So, we got to work on a project long overdue. Two of the birdhouses in our yard had come loose from the trees and several others needed to be cleaned out. When we were finished, the birds had 4 freshly cleaned houses to chose from.

Unsurprisingly, the birds were unappreciative of our efforts.

At about 6 this morning, I opened the door to see one of the birds flying away from their little perch in the shade. By 7, it has become a nest. This one, in fact.


So, after I took this picture I told the birdie that, really, she would be much happier somewhere else. Somewhere further away from where people are all the time. Somewhere, like perhaps, one of the many birdhouses just over there. See that one. Oh and that one. Oh, there's another one.

And then I unrolled the shade.

I know I'm doing them a favor, but I still feel guilty.

Monday, July 9, 2007

What a Girl Wants (compromising with what a mommy wants)

When we moved into our house 3 years ago, we offered to decorate each of the kids' rooms. Kenzie chose Spongebob and picked out a screaming yellow color for the walls. I cannot believe that Jeff and I actually painted her room this color.
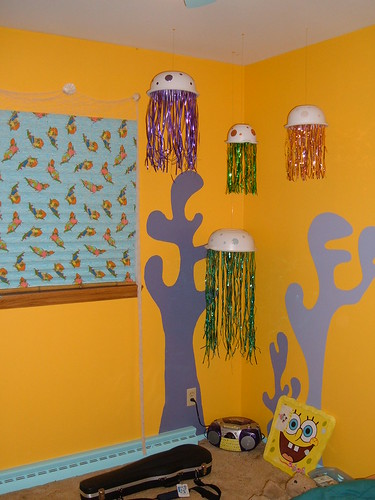
Jellyfish and Coral
You can see more pictures of it here. Let me just say this about Kenzie's room, it was really fun to do (painting coral, hanging jellyfish, attaching bamboo to curtains), but she outgrew it quickly. She already had been on the Spongebob kick for a year or two and was on the downhill side of it. Or maybe living in a Spongebob room helps you get over onto the downhill side. Either way, most of the yellow, as well as all of the decorations, have been covered over with music posters.

So, when it came time to do Joey's room, I was cautious. She wanted me to paint her entire room with various cartoon characters. I eventually convinced her to do characters from her picture books. I'll admit this wasn't because I was worried that she would tire of them, but that I would. This was compromise number one.

Then Joey picked pink for her room. But the pinks she picked were either the color of bubblegum or pepto bismol. I was happy with neither of them. So, I found a nice, soft, muted pink. This was both for me and for the growing up factor. Because I have learned something from the older girls. Little girls don't like pink forever. I figure that we can repaint the blue trim brown or something to make it more sophisticated (if she ever decides to grow up- which I'm OK if she doesn't). This was compromise number two.

By the way, the color of the walls really is a light pink. I've taken picture after picture of it, but it never seems to come out right.
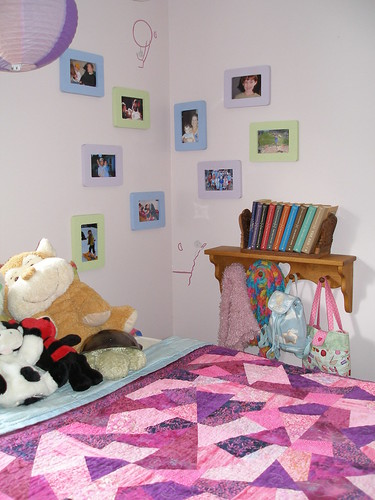
Joey's Room
So this is a picture of the corner of her room that she sees every night and every morning. I have a book called Feng Shui for Children's Spaces by Nancilee Wydra that describes the importance of this area. Basically, it should contain at least two pictures... one of the child surrounded by their loving family (which reminds them again and again and again how much they are loved) and the other of them doing something physically active (which helps to instill a positive body image, something that is especially important in today's culture). As you can see, we had some trouble narrowing it down. We painted the wooden frames (a buck each at Michaels) in the various colors we'd chosen for her room and I think it helps to coordinate the area.

Basically, Joey is really messy as well as a collector. She loves stuff. Really. Once I found a 9 month old collection of butterfinger wrappers, the snack size, in a pretty wooden box. She was saving them like they were jewels or something. I mention this because my overriding goal in her room is to provide places for her to keep and/or display her stuff. And to do this in a way that makes all her stuff not look as much like junk. Picking the four colors and sticking to them helps somewhat. That way when I tell her to pick out a few pictures and end up with 9, they can at least look like a collection.

Oh, and the pictures that I painted on the walls in this area are from one of my favorite books, Harold and the Purple Crayon. Since this area is in the prosperity corner (according to Feng Shui principles) I used images that show perseverance and achieving goals in a very creative and personal way (which, BTW, is what I think that book is really about).

Anyway, the funniest part of doing Joey's room was the fact that after I had bought all the paint, moved everything out of the room and taped it all off, Joey tells me that she doesn't want me to paint her room after all. Um, too bad.

Then she admitted that it was because there was a tiny little drawing that she had done on the wall that she didn't want me to paint over. I think she didn't want to fess up that she had drawn on the wall because, historically, I haven't been too pleased with that sort of thing. Anyway, we made a compromise (number 3, if you're keeping track) so we could save the picture and still finish the project.
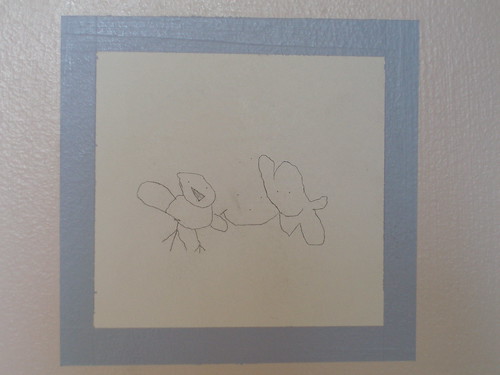
Joey's Saved Wall Art

I just taped off the area and painted a nice little frame around it. Let me tell you, you gotta roll with the punches.

Besides, I was creating art all over her room; it seemed silly not to allow hers.
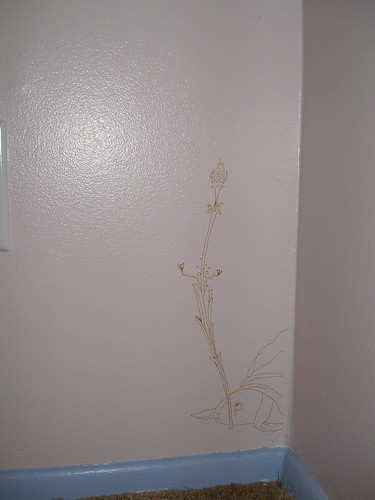
Joey's Room- The Velveteen Rabbit
This is my favorite picture so far. It is the point in the Velveteen Rabbit when he is about to be burned up and starts to cry. From his one little tear grows a flower, which contains a fairy, which makes him real. We've talked about this story quite a bit, how it's good to try even if things don't work out how you think they should. It's the trying that's important.

I also think it's about how love saves us. How you've got to open yourself up (for friendship, love, whatever) and just experience it. How when you give you heart (to something or someone), it expands, creates something magical (symbolized by the fairy) and transforms you into something more real than you were before.

I think I've gone on enough about her room for now. My purpose in this post is to start the clock ticking. Because, you see, Joey picked out like 50 pictures that she wants done in her room. I've done about 13 of them and haven't worked on them all summer. I really need to get back to work on them, so I'm officially announcing to the world (or the 30 people that read my blog) that I will do them. And if you would like to see more pictures of Joey's room and what I've already done in there, click here to see pictures on Flickr.

And one last thing, I would like to say Thank You to Courtney at Two Straight Lines for posting all the gorgeous pictures of her daughter's nursery. What I've done here is nowhere near as sophisticated and beautiful, but we all have our different styles and seeing what she's done really reminded me that I need to finish up what I've begun here.
Friday, July 6, 2007

This Little Piggie was a Ladybug

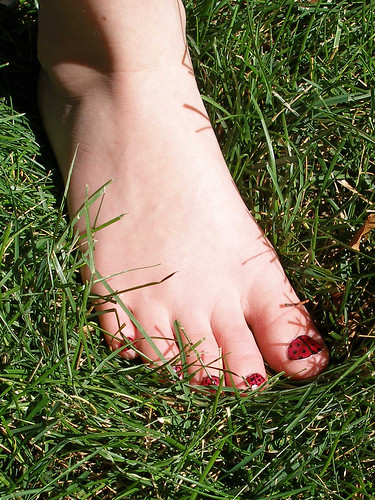
A fun idea to turn your toenails into ladybugs. It's great to try with your kids (or on your own nails, if you're a kid at heart- I've done it plenty, myself).

I got this idea from my step-kids' mom; it's clever, fun and relatively easy.

P7060004_edited-1

Supplies
-Regular nail polish
-3-D Scrapbooking Pens (I used Gelly Roll Glaze Pens. They create a raised line, sort of like embossing and they work well on non-porous surfaces (such as painted toenails).
-Clear top coat nail polish

How To
-Paint the nails with regular nail polish and let dry thoroughly.
-When they are absolutely, completely, solidly dry, draw designs on them with the 3-D pens.
-You may need to go back and forth over the line a little bit because even though they say they are for use on non-porous surfaces, they still tend to pool up if you're not careful.
-When the lines from the pens have completely dried, cover the entire nail with a coat or two (depending on the patience of the child in question) of clear top coat. Otherwise, everything comes off the first time they wash their hands and that would be so sad.
-Make sure they don't smear the nails after you apply the clear top coat because it makes all the previous layers soft again. This final layer takes even longer to dry than all the others, so be patient.

At one point in my life, I bought these pens for doing scrapbooking. Painting nails is pretty much the only use these guys see, though.

Here's another picture that shows her fingernails too.


For these, she wanted to alternate the polish color. And I just drew various designs on each nail using a contrasting color. After I finished each hand, she'd quickly look at it, excited to see what I had done... oooh, polka dots, and a bullseye like Target, and a checkerboard, and a spiral... and um Mom, do you know these lines aren't the same thickness?

She's such a perfectionist. I'm actually surprised she didn't ask me to figure out how to superglue antennae to the ends of her toes to make them more realistic.

But she seems happy with them. And I am happy with that.