Pages
▼
Wednesday, December 30, 2009
Monday, December 28, 2009
Potatos and Kale
My usual recipe for potato soup came from my mom and, frankly, is pretty much just thin mashed potatoes with garlic and Parmesan. It's very good, don't get me wrong. But dinner last night was a step up, and still very easy.
Because in case I haven't mentioned, I like easy.
I also love comfort food, which this definitely qualifies for. And with the addition of kale, I can almost pretend that it's healthy. Which it probably would be, if I'd cut back on the butter and cured pork.
Ingredients
-4 pounds of potatoes (I used red potatoes, but use whatever you have)
-4 cloves of garlic (peeled)
-1 pound of ham (can substitute 1/4 to 1/2 pound of bacon, or leave it out entirely)
-Olive Oil (you won't need this if you're using bacon)
-2 to 3 shallots, diced (you can substitute onion here if necessary)
-bunch of Kale (chard or cabbage would also work)
-1 and 1/2 cup of milk (you can use vegetable stock or even some of the reserved cooking water instead)
-1 and 1/2 stick of softened butter (yes, you can use less if you really want)
-1/2 cup finely shredded Parmesan (about half an ounce)
-salt and pepper
-a good loaf of bread
How to Put it All Together
-Scrub potatoes (I never peel my potatoes) and cut into 1/4 inch sized pieces. Add to pot of cold water along with 2 or 3 cloves of garlic. Bring to a boil, cover and reduce heat to maintain a low boil.
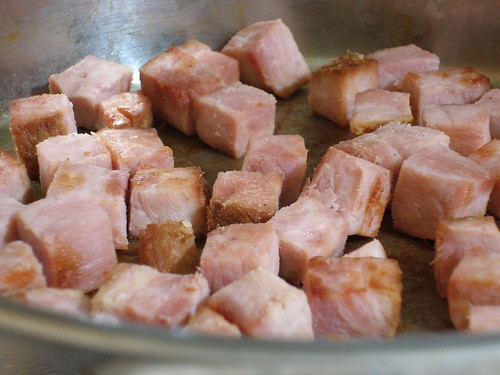
-Cut the ham (or bacon) into bite sized pieces and brown it in a skillet.
-Move the ham to the side of the skillet. Add a tablespoon or so of olive oil to the middle (if using ham), followed by the shallot. Cook, stirring regularly, until it's browned. It'll pick up all the nice browned bits on the skillet, which is a very good thing.
-Cut the stems of the kale into 1/4 inch pieces.
-Stir these in with the ham and shallot. Add 1/2 cup of water and cover.
-Mix together one stick of the softened butter, one clove of garlic that's been through a garlic press and half of the Parmesan.
-Slice the bread, butter one side of each piece with the mixture and place on a broiler pan, buttered side up.
-At this point, the kale stems should be somewhat softened. Chop the rest of the kale and add it to the skillet. If it looks dry, add a bit more water. Cover and let cook.
-In a microwave safe bowl (I usually use a big glass pyrex measuring cup), heat the milk until hot. Set aside.
-When the potatoes are cooked through, drain them, reserving some of the liquid.
-Return to the pot and mash. You can do this as smooth or as chunky as you like, just make sure to completely mash the few cloves of garlic that still are in there.
-Add the heated milk, any left-over butter and garlic mixture as well as the other half stick of butter. When everything is melted in, add the ham and kale from the skillet. If necessary, add some of the reserved cooking water until it's a consistency you like. (The pictures above were a very thick version because that's what I was in the mood for.)
-Season with salt and pepper and the remaining Parmesan.
-Put over low heat to keep warm while you put the bread under the broiler (about 4 inches from the element) until it's nicely browned. I never do this step while I'm trying to do other stuff in the kitchen because that always leads to disaster.
-Serve with extra Parmesan and the toasts on the side.
After I made it, I realized that the recipe is basically a version of Colcannon, Irish peasant food. So, just curious... do any of you out there have your own versions of this?
Sunday, December 27, 2009
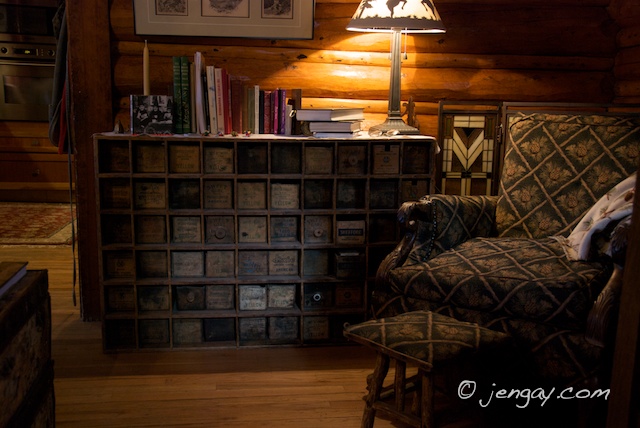
Joyce and Rich's Home
To enjoy good houses and good books in self-respect and decent comfort, seems to me to be the pleasurable end towards which all societies of human beings ought now to struggle.
-William Morris
-------------------------
Related Post-
A Perfect Start to the Year
Sunday, December 20, 2009
Joey
Wednesday, December 16, 2009
Joey's Sketch Notebook
It seems like every time that Michael's has their 40% off sale on drawing pads, I stock up.
Joey likes filling hers up with great sketches on the inside. But she's also done a stellar job on the outside.
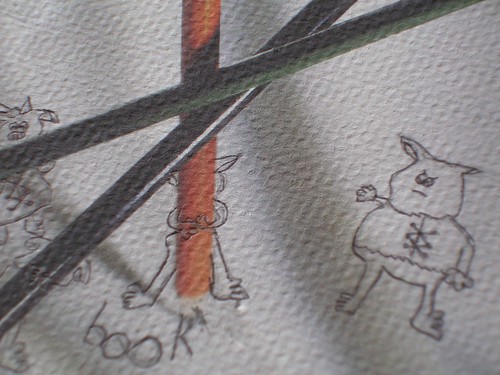
The notebook had the pencils on there originally, but she drew all the little trolls herself. I especially like how the H in the word 'Sketch' is in the process of being completed.
The perspective of this little guy struggling to work the giant pencil cracks me up as well.
And then there's the guy on the right who seems to be directing the entire operation. But I don't think he likes what he's seeing.
Monday, December 14, 2009
Cooked Sugar Christmas Trees
I'm not sure why it is that I adore these cooked sugar designs.
I guess it's their messiness. I like that no matter how hard you try to control them, they defy you. You really can't be held responsible for their shape because sometimes a big ol glob will fall down, other times you'll be drawing with nothing but thin little threads.
I just love how they look like little works of art.
Anyway, my original plan was to use these on cupcakes for a fundraiser for our older girls' music program. But I forgot to pour an extra half inch of trunk, so they couldn't stand up on a cupcake to save their little arboreal lives.
Joey and I instead decided to make a couple batches of giant brownies to display these on. Actually, she did most of the work; I was given oven detail.
For decorating I used white chocolate because the green trees didn't show up very well next to the brown chocolate. After melting and smearing it all over the brownies in a very rustic way (I was hoping it would look like snow on the eaves), it created a perfect visual base.
All they needed was a Christmas tree to top it off and a little sprinkle of green.
After finishing the giant brownies, I still had some trees left over. And as I picked one up, it caught the light from a window.
So, I made one more batch to use as suncatchers, this time trying to leave a little loop of a drizzle on the top so I could string it up with fishing line in our window. Some of them worked pretty well. Some not as much.
But I like them anyway.
If you plan to do this, make sure that you cook the sugar all the way to the hard crack stage. I suggest you actually do the cold water test instead of just relying on temperature. Otherwise, after a day of hanging, they'll stretch out to look like this.
(I assure you that when I first hung it up this tree was very pretty)
But if you like abstract art, by all means, don't fret about the temperature. Otherwise, consider this my most recent Don't Do What Donnie Don't Does. Don't stop cooking until you get a thin and brittle thread of cooked sugar when you drop it in water.
Also, just so you know, I went back and deleted like 3 separate instances of the word 'totally' from this post.
You're welcome.
--------------------------
Related Posts
Flower Cupcake Toppers
Fireworks Cake Toppers (this has instructions for working with and drizzling cooked sugar)
Sunday, December 13, 2009
Friday, December 11, 2009
Tuesday, December 8, 2009
Aurora Hendrix, Come On Down!
I hope that you're the next contestant on The Price is Right!!!
Aurora has asked that you all think happy thoughts for her today. And if she does get called down, I'll be sure to let you know the air date and post a link. I promise you, she will be crying.
It'll be fantastic. She's the type of person that The Price is Right was made for.
Update- Apparently, it's actually possible to be too excited for The Price is Right. Here's the story that she just posted on facebook.
ok well 12 hours later! Just got back from The Price....we had a blast. It is definitely an awesome experience. So I didn't get on, but funny story about that..... You all know I cry when I get excited....we waited 5 hours to get interviewed, and I was so excited that when it came time for our interviews I lost it!! I t...otally started balling.... Oh but wait, I then lost all feeling in my hands and face and... hyperventilated!!!! I had to sit down and the interviwer kept telling me not to pass out. I squealed out all my answers. Spencer was trying to pull me up, but I couldn't stand or I was gonna hit the concrete. We then saw the tapeing and left to go get lunch. At lunch w...e ran into the beauties, I asked for their autographs, while they were signing my shirt they... said they knew about me (the hyperventilater!!!!) so no prizes, but a great time and funny story!!! (air date 2/11/10)
Monday, December 7, 2009
Shipping with Popcorn
I thought I'd stop in today with a easy tip before everyone heads off to the post office to send out their Christmas packages. For several years now, I've used freshly-popped popcorn for cushioning and it works beautifully.
(Shipping out the custom stamp for the contest winner.)
The only thing to remember is that you have to make it in an Air Popper
because all other methods will add oil or butter, which obviously is not a great thing.
The first time I made popcorn this way as an adult was a revelation. It's even faster than in the microwave and you don't risk filling your house with that scorched popcorn smell.
What I love about using it as packaging is that it's cheap and environmentally friendly. And once they've opened their gift, the recipients can even use it to string up garlands for the birdies.
And you get to eat any leftovers.
Sunday, December 6, 2009
Davie and Kam
Wednesday, December 2, 2009
Nanaimo Bars
My first trip to Canada 8 years ago was to visit Jeff's family in British Columbia. One of the best parts of our 2 week stay, besides getting to listen to his Scottish Grandma's gorgeous accent, were the Nanaimo Bars. It seems to me that Nanaimo Bars are the Canadian version of Rice Krispie Treats. They're everywhere, at least in BC.
But the giant monstrosities you can buy while waiting for the ferries are nothing compared to a decent homemade batch.
The first few times that Jeff and I made these together, we lived in a 2 bedroom apartment, so maneuvering around each other in our tiny little kitchen turned into somewhat of a dance. Every time I have these, I think of that time and smile.
So here's the recipe we use, straight from Jeff's mum, complete with metric measurements.
Ingredients
Butter or cooking spray (for the pan)
Bottom Layer:
1/2 cup (1 stick) (113 grams) unsalted butter at room temperature
1/4 cup (50 grams) sugar
1/3 cup (30 grams) unsweetened cocoa (I use Dutch-processed)
1 egg, beaten
1 t. vanilla
2 cups (200 grams) graham cracker crumbs
1 cup (65 grams) shredded coconut (either sweetened or unsweetened is fine)
1/2 cup (50 grams) walnuts, pecans or almonds, coarsely chopped (for this batch Jeff used a combination of walnuts and almonds)
Second Layer:
1/4 cup (56 grams) unsalted butter at room temperature
2-3 T. milk
2 T. vanilla custard powder (Bird's) or vanilla pudding powder
1/2 t. vanilla
2 cups (230 grams) powdered sugar
Top Layer:
4 ounces (115 grams) semisweet chocolate, chopped (we use chocolate chips)
1 T. (14 grams) unsalted butter
Notes About Ingredients
-I know it seems like a lot of ingredients, but some of them are listed more than once. Butter, for instance, is in each and every layer, plus is used for greasing the pan.
-The picture above is everything you'll need (except for the graham cracker crumbs, because, well, I took this picture after the bars were made and we were out of them). And, in case you're curious, the jar of brown liquid is homemade vanilla with the beans still in it.
-We've made this with both custard powder and the vanilla pudding powder. Both work fine. And, no, they most likely won't have the custard powder at your local grocery store. We get ours (for about 4 bucks) from Cost Plus World Market in the English foods section. Cost Plus, by the way, has some screamin deals on Ghiradelli chocolate chips at this time of year. If you live within driving distance of one, I suggest you go stock up.
How To Put it all Together
-Butter a 9 x 9 inch (23 x 23 cm) pan (or use cooking spray)
Bottom Layer:
-Melt the butter in a saucepan over low heat.
-Stir in the sugar and cocoa powder and then gradually whisk in the beaten egg.
-Cook, stirring constantly, until the mixture thickens (1 or 2 minutes).
-Remove from heat and stir in the vanilla, graham crackers crumbs, coconut and the chopped nuts.
-Press evenly into the pan.
-Cover and refrigerate until firm (about an hour).
Second Layer:
-Cream the butter (using either stand mixer or hand mixer).
-Beat in the remaining ingredients.
-If the mixture is too thick to spread, add a little more milk.
-Spread over the bottom layer, cover and refrigerate until firm (about 30 minutes).
Top Layer:
-In a heatproof bowl over a saucepan of simmering water, melt the chocolate and butter.
-Spread over the filling and refrigerate.
To Serve:
-Use a sharp knife and bring to room temperature before cutting (if you don't want the chocolate to crack).
-Cut these suckers small because boy they are rich.
--------------------------------
Enjoy this recipe? Get more like it by subscribing to my RSS feed