"Anyone that doesn't agree with leggings as pants can physically fight me.
And I'm going to win because I have a full range of motion due to the fact that I am wearing leggings as pants."

Thursday, January 31, 2008

Things I Learned Last Week

-There are 9 Shoneys, 15 Cracker Barrels and 30 Waffle Houses along the highway between Atlanta and Nashville. (1)
-Sometimes all at once.
DSC_1433.JPG
(The view from our hotel window.)
-I would never want an onboard navigation system because part of the fun of driving someplace new is hysterically giggling about a missed exit/street as the driver speeds by it. (2)
-Flying out of Denver at 7 o'clock pm gets you to Chattanooga at about 3 o'clock am, local time. (3)
-When we order 4 taco supremes, 3 burritos, 1 taco salad and 2 large Dr. Peppers at midnight, I feel compelled to explain that, no, we aren't high, just traveling. (4)
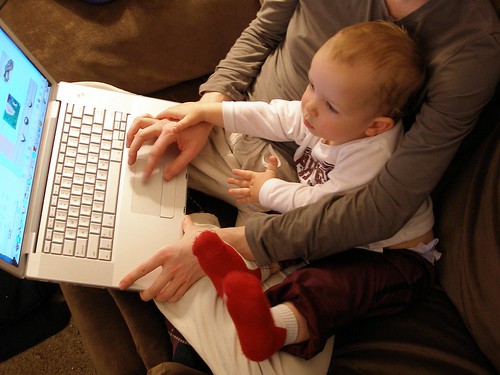
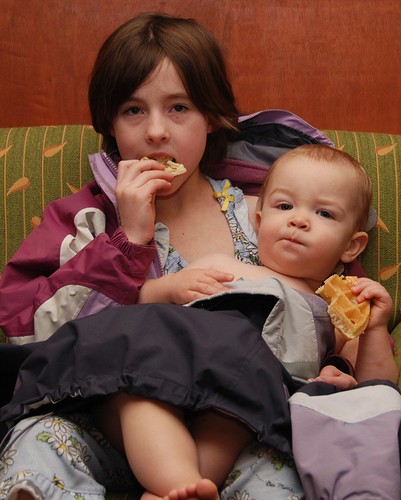
-Kam is a very easy kid to travel with.
-So is Joey (for the most part).
-That's a good thing.
-A fire alarm is not a fun way to wake up on your second day of vacation. (5)
DSC_1501.jpg
-I have forgotten proper fire alarm evacuation procedure. (6)
-Most people don't take fire alarms seriously. (7)
-It's hard to homeschool about the injustices faced by blacks when you're bawling at the Martin Luther King memorial.
-I seemed to be the only one bawling at the MLK memorial. (8)
-Going to the south does not guarantee warm weather.
-It is impossible to stay at a hotel with a swimming pool and hot tub and not go swimming at least once, especially when you're staying there with a kid. (9)
-Joey cries when Kam cries.
-There's a town in Tennessee named White. (10)
-Apparently, I was a rotten kid.
-I'm much nicer now. (11)
-I wish my whole family lived within (a reasonable) driving distance.
-A week of eating out leaves me craving nothing but salad and water.
-Jeff gets cold at night when I'm not in bed with him.
-It's good to be home. (12)


(1) Honestly, it seemed like more, but Joey kept a running tally and those are the numbers.
(2) And then, after you've circled round and taken the exit, finding out that it is, in fact, the wrong direction after all.
(3) Taking into account the odd missed exit or two.
(4) Though we were still giggling from the missed exit, so that probably didn't help prove my point.
(5) It was a false alarm.
(6) Joey reminded me that I should have checked if the door was hot before opening it.
(7) When we showed up in the lobby in pajamas, the front desk clerk asked if we were there to check out. Um, no. We were responding to the blaring horn and flashing lights. Silly us. Everyone else was already eating the complementary breakfast. Apparently, they made it there faster than us because we used the stairs, not the elevators.
(8) Which I found strange. I mean they had pictures of lynchings and of protest marches. And the idea of civil disobedience for a righteous cause and the cart that carried his casket through town. I mean, my God. I'm crying now.
(9) We went just before checking out on the last day.
(10) !?
(11) I think.
(12) Despite getting to deal with post-vacation colds and a broken furnace.

Wednesday, January 23, 2008

And We're Off

Just a quick note to let everyone know that Joey and I are heading to Chattanooga for a week with these two people...

2008 01 20 066 copy

We'll be visiting our cousin that moved away down south to Dixie when we were kids. We are so excited to see her and the rest of her family.

I may or may not be posting while we're gone. Depends if there's anything interesting to show; pictures of three grown women giggling (which is what usually happens when we get together) may not be as amusing to the general population as they are to me.

(And BTW, in that picture, Kam is helping his mommy work on a new web page for me. I love it, but Jenny says it needs much more work. So, you'll just have to wait to see its wonderfulness.)

Peace Out.

Tuesday, January 22, 2008

Sew Your Own Handles

This is super simple.

-Out of sturdy fabric, cut out 4" x 22" rectangles. You can use canvas or denim or any other fairly thick fabric.

P3110018

-Fold in half (hotdog) and iron a nice sturdy fold.

P3110021

-Open it up, bring each edge into the center line and iron the new folds you've made.

P3110024

-Close up along center fold...

P3110026

and sew along edges to secure

Yep, that's it.

Buffalo Scrunchies

Here is what I do with the extra elastic I cut off the fitted sheets when I'm making fabric grocery bags. When I decided to do this, it reminded me of the Plains Indians and how they found a use for every piece of the buffalo and wasted nothing.

Now that phrase goes through my head every time I make one. I suppose there are worse ideas to ponder. (And I am aware of the irony that the closest I've gotten to living off the land is to reuse elastic from someone else's sheet. It makes me laugh every time.)

Also, my apologies for the color on some of the pictures.

-When you cut off the elastic, leave a 2-inch wide strip of fabric along the entire length.

-Fold this over on itself, wrong side facing out, stretch it taut and pin fairly close together. This requires some dexterity (and I always poke myself at least once when doing this).
2007 10 24 022

This works much better if you can either pin it down to your table or have a third person to help stretch it as you pin.

-Keep the elastic taut as you sew. You can go over the elastic, or not, just make sure you catch the entire edge of the fabric.
2007 10 24 023

-Next pin a safety pin through one end and push back through the hole on that end, feeding it back on itself. Work the safety pin through to the opening on the other end and pull it right side out.
2007 10 24 029

This is what it looks like finished. (Though, it isn't usually so yellow.) You can cut it and sew it into a scrunchy or use to top the bag of bags.
2007 10 24 030

Here's what it looks like in action. You can read more about my bag, bag here.
2008 01 22 018

Cheap & Easy Fabric Grocery Bags

This tutorial gives an overview of how to make a bunch of reusable fabric grocery bags for less than 2 dollars each. (And most of that cost is in the webbing for the handles. They'd cost less than 50 cents if you use denim from old jeans.)

Note (March 09)- I've been using these same bags for just under 2 years. We use them almost every single time we go to the grocery store. And we have 3 kids at home with us, so we shop a lot. We also use them for almost ALL of our errands... clothes shopping, library, even the hardware store. I also wash the bags pretty often. The point it, they have been used hard. Very hard. And even though they're made of fairly thin fabric (which is kind of the point, as I need to be able to cram all of them into their bag, week after week), none of them have ever torn.

P8120008

To make these, you need access to a sewing machine, but don't even need to sew all that straight. Remember, you just need to make them prettier than the ugly plastic things you're using now. How hard can that be?

-For my bags, I repurposed an old sheet that was in fairly good condition (not threadbare at all).
-I buy the sheets at the thrift store for between $2 and $4 each. (The price has gone up since I originally posted. They're between $3 and $6 now. Still a good deal, though.)
-I wash them in hot water before cutting.
-I've been able to get between 6 and 10 bags per sheet.
-Flat sheets are easiest, but fitted ones will work too. You'll just need to cut off the elastic (click here to see how to reuse it).
-Cut as many 18" x 42" rectangles as you can from the sheet. (This results in a fairly big bag that's about 17 inches square. You can easily make it bigger or smaller, depending on your needs- and the size of your sheet. Regular plastic grocery bags are only about 11 by 13 inches. I'm thinking of making some more that are smaller and labeling the big ones with 'Light Items Only' because a big bag full of cans is way too heavy, but can be perfect for that jumbo sized toilet paper.)
-Basically, you're just sewing a very crude bag, with no lining. I kept it simple so I could make bunches of them. There's only one little trick that I figured out, shown in the next few pictures.
-Fold in half, wrong side together and pin like shown, about 3 inches from bottom.

2008 01 20 037

Now, pull top down...

2008 01 20 038

til it's even with the pins (creating a fold from pin to pin)...

2008 01 20 039

grasp all four layers of fabric at pins...

2008 01 20 040

and lift up. Then lay it back down flat.

Note- I just replied to a reader who had some confusion with this step. Here is the clarification I gave her "First of all, when you pull the top down, you’ll be pulling both corners of the front straight down till there is a fold right even with the pins. At this point, yes, you will have 3 layers, but when you pinch at the pins and lift up, the back of the bag will fall over your fingers and make four layers (you’ll have to reposition your fingers at this point). I actually fold the back layer down as I’m pinching, so that, in essence, I am grabbing four layers all at once."

-The wrong sides will now be facing out.

2008 01 20 041

(This is much less complicated than it sounds. Thus all the pictures.)
-Sew up the sides. The third option on this tutorial shows how to run both a straight stitch and a zig zag stitch in order to finish the edges nicely. Unfortunately, because of the folds in the seam, a French seam won't work here. The zig zag does the trick, though.
-If you want to check that you did this right, flip it right side out. It should look like this.

2008 01 20 057

-Turn the bag back inside out and iron each seam to one side.
-Fold down top edge of bag about 1/4 inch and iron. (Ya, in these pictures the top of the bag is actually at the bottom of the picture.)

2008 01 22 008

-Now fold the top down again about 2 inches. Iron.

2008 01 22 010

-I pin in squares of scrap fabric to reinforce where the handles go (about 5 inches from the edge). You can use denim or canvas. Just make sure they're right up against the top fold so they get sewn in with the next seam.

2008 01 22 014

-Now, sew two seams all the way around the top of the bag, one 1/4 inch seam parallel to the very top fold and one 1/4 inch up from the bottom fold.
-After that, you can turn it right side out and attach the handles.
-You can use webbing (like I did here) or sew your own handles out of sturdy fabric. I fold the cut edge underneath to keep it from fraying. This step is probably the most difficult; keep with it, it just takes practice.

2008 01 21 008

-Just make sure to keep the rest of the handle out from under the presser foot or you'll end up with this... I can't even tell you how often this happens to me.

2008 01 21 007

-You can attach the handles to the inside or outside of the bag, depending on the look you prefer.

2008 01 21 009

That's it. Please let me know if you have any questions. And I'd love to see any you make. There's even a Flickr group to post pictures on.

One Note- if any men will ever be using these for shopping, you may want to consider doing these from a more masculine print. Jeff originally refused to bring the pretty blue and yellow flowered ones to the store, but has since gotten over it.

Oh yah, here's one last picture... of my grocery bag, bag. It's got a front pocket for the Produce Bags and is closed using my Buffalo Scrunchy (cut off the fitted sheets).
2008 01 22 018

This is basically sewn up with a channel like the produce bags, but bigger and with a pocket.


--------------------------------

Enjoy this tutorial? Get more like it by subscribing to my RSS feed

--------------------------------

Related Posts
Cheap & Easy Fabric Produce Bags
How to Sew Your Own Handles
Buffalo Scrunchies

Cheap & Easy Fabric Produce Bags

I've been using my set of fabric grocery bags since I made them this summer, but I still kept using the plastic bags from the store for fruits and vegetables. Every time I pulled one off the roll, I thought, "I have got to make some of these." And then by the time I get home, I'd forget.

I finally made 9 of them this weekend. And they cost me exactly nothing because I reused a sheer curtain that we'd replaced.

2008 01 19 010

You can either use tulle or sheer fabric, but really I think the sheer is much easier to work with. The only requirement is that they be see through and lightweight. Sometimes they have sheer curtains at the thrift store, just take em home and wash well in hot water. If you can't find those, tulle is probably going to be cheaper. You can get 4 bags out of one yard, which costs 2 bucks.

Also, if you want them to be painfully cute, you can decorate them with some handmade stamps. I carved up some broccoli and onions special for this project.
P8130064

So, on to the directions.

-First, cut the fabric into rectangles that are 17" by 27", which makes a finished bag 15" tall by 13" wide (with double hemming). You can easily make them bigger or smaller, though. (If any of the edges are excessively frayed, cut that off first before cutting to size.)

-Then you need to hem any sides that are not on the selvedge (finished edge) to keep the whole thing from unraveling over time. You can do it one of two ways, both shown in the picture below. If you need a better explanation of the double hem, check here. If you use the tulle, don't bother with the hemming, just sew the whole thing with a fairly tight, straight stitch. (Note- I've changed this from the original recommendation of a zigzag because straight stitches work much better on tulle. Sorry, August!)
2008 01 19 002 copy

-Next fold in half hamburger-wise (as opposed to hotdog-wise... does anyone else remember this brilliant instruction from elementary school?) and pin. In the picture below, the right side is the bottom of the bag and the left is the top.
2008 01 19 011

-When you sew the side and bottom, start sewing about an inch down from the corner. Also, it's best to sew where the fabric is doubled up on itself, basically somewhere along the hem.
2008 01 19 003 copy

-Once you've sewn the bag, make the channel for the twine by folding down and pinning the top edge like shown.
2008 01 19 004

-Start sewing where shown in the picture, folding the fabric evenly down as you go.
2008 01 19 005

-By the time you've gone all around the top and returned to where you started, you'll have created a channel like this. The openings to the channel are underneath my right finger and thumb (please excuse the paint on my hands, we've been painting Randa's room this week.)
2008 01 19 006

-All you need to do to finish the bag is to tie a knot in some twine, push a safety pin through it and feed it through the channel. Leave about 2 or 3 inches hanging out on each side and tie it in a knot. When you want to close up the bag, just do a slip knot.

Oh, and one more thing. I weighed one bag on the kitchen scale and it's total weight was 0.4 ounces (as compared to the plastic bag which was 0.1 ounces).

That's it.

--------------------------------

Enjoy this tutorial? Get more like it by subscribing to my RSS feed

--------------------------------

Related Posts-
Cheap & Easy Fabric Grocery Bags
Produce Stamps for Produce Bags

Monday, January 21, 2008

Double Hemmed Corners

This is the technique I've worked out for doing flat double hems on corners. It's perfect for making napkins and placemats.

Just look how flat they are.
2008 01 21 004

Cut the piece square (90 degree corners) if you care about it being even at the corners. This really is pretty square, despite the camera angle making it look off.
2008 01 20 017

With the right side facing down, iron down a 1/4 inch seam.
2008 01 20 018

Fold seam down another 1/4 inch and iron. (Using fabric weights- these were my moms- to hold fabric til cool really helps the seams stay. If you don't have these type of weights, things like flattened glass marbles will work.)
2008 01 20 019

Do the opposite side.
(Note- I did not pin these. Sometimes, depending on the fabric and how well it holds a seam, I do.)
2008 01 20 020

Sew both seams very close to the inside edge.
2008 01 20 023

Two sides sewn.
2008 01 20 024

Fold all corners in like shown, creating 4 right triangles (only the 2 left ones have been done here so far).
2008 01 20 025

Close up of one triangle. The sides should each be 1/2 inch.
2008 01 20 026

Fold and iron one unsewn edge in like shown (1/4 inch) so that the edge is even with the top of the triangle.
2008 01 20 029

Now fold same edge in another 1/4 inch. The diagonal edge should line up like this.
2008 01 20 030

Fold the opposite side the same way.
2008 01 20 032

Sew these seams the same as the first set, starting at the edge of the diagonal fold.
2008 01 20 033

Finished backside
2008 01 20 034

Finished front
2008 01 20 035

Note- Obviously, using a matching thread will look better. I used white to make it more visible for the tutorial.

Mash Ups

I just received a nice email from the people at Bootie Mashups letting me know that everything is now A-OK. They just had too many hits on their site and it crashed.

These songs are some of the best things I've heard in a long time. I am easily amused, though. You'll have to decide for yourself.


My suggestion is that you go to
Best of Bootie 2006 and listen to
#3, DJ M.I.F's
Tricky Sandman (Run DMC and Metallica) and
#20, The Kleptones'
Careless or Dead 2006 (Bon Jovi and George Michael).

And I'm really impressed with
#20, Divide and Kreate's
Illiterate City on Best of Bootie 2007.

And they've got a blog. I've already added them to my Google reader. It looks like they release a top 10 list every month, in addition to yearly Best Of albums. And you can download all the tracks for free from their site. Go there and do it.

They've got dance clubs in Paris and New York and San Francisco. I WILL go to one at some point.

Jeff's been laughing at me because of how much I love these. They've taken old songs and made them new again. And that makes me smile.


-------------------------------

Related Posts-
More Mash Ups and Happy Birthday
Double Hems and Mash Ups